User Guide of iRocket VoxTalker
iRocket VoxTalker is a multimedia tool software with text-to-speech, voice clone, voice change, noise reduction, AI generate rap, speech-to-text, recording, audio format convert, and audio editing functions.
The text-to-speech function supports multiple languages, and users can convert text into their favorite voices by adjusting various parameters. Furthermore, it is also possible to recognize and read text in images and PDFs.
In addition, this software allows you to select high, medium, and low sound quality for recording and supports local microphone and virtual device recording. Once you import an audio file, you can transcribe it, convert it to MP3, AAC, or WAV, and even edit it by cutting it.
On this page, we will introduce how to register a VoxTalker product and how to use its various functions. You can also quickly jump to the part you are interested in using the table of contents on the left.
How to register your product
Step 1: Launch VoxTalker
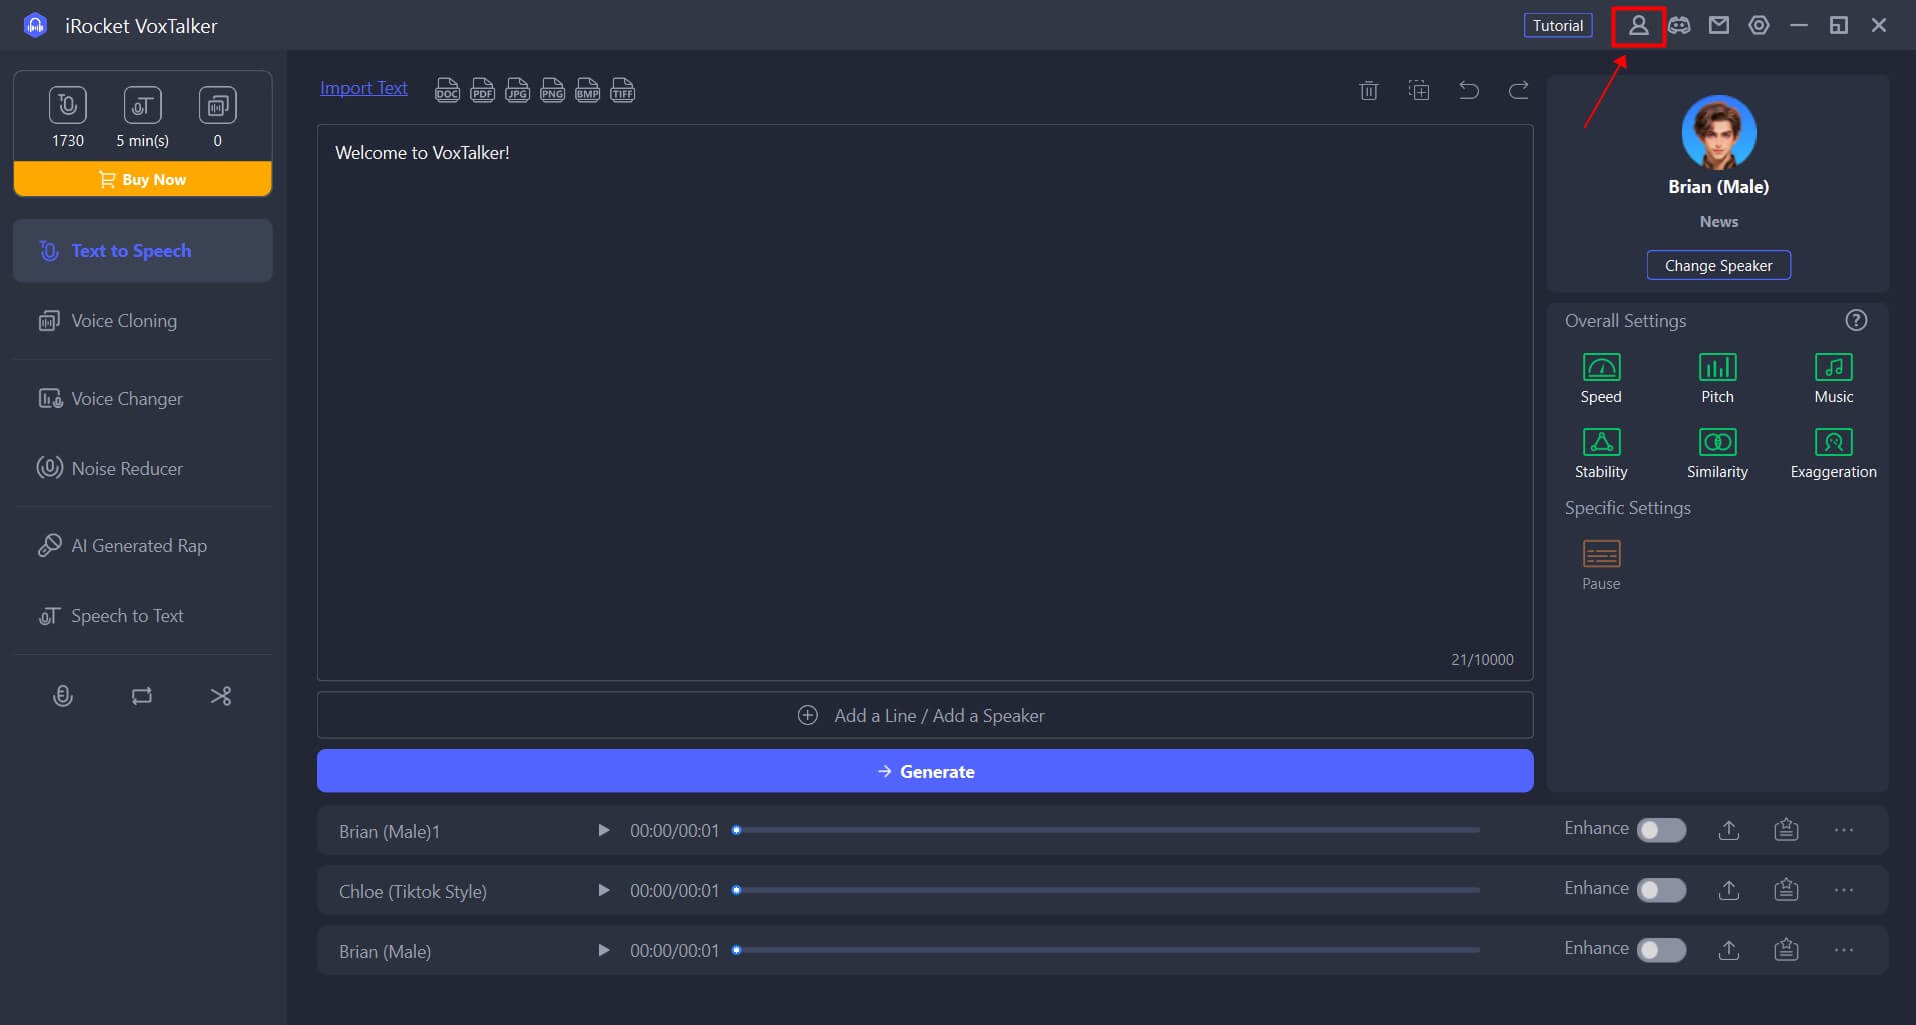
After downloading and launching VoxTalker, click the "Account" icon in the top right corner.
Step 2: “Log in” or “Sign up”
Then, the member registration screen will be displayed. Let's proceed according to the usage status below.
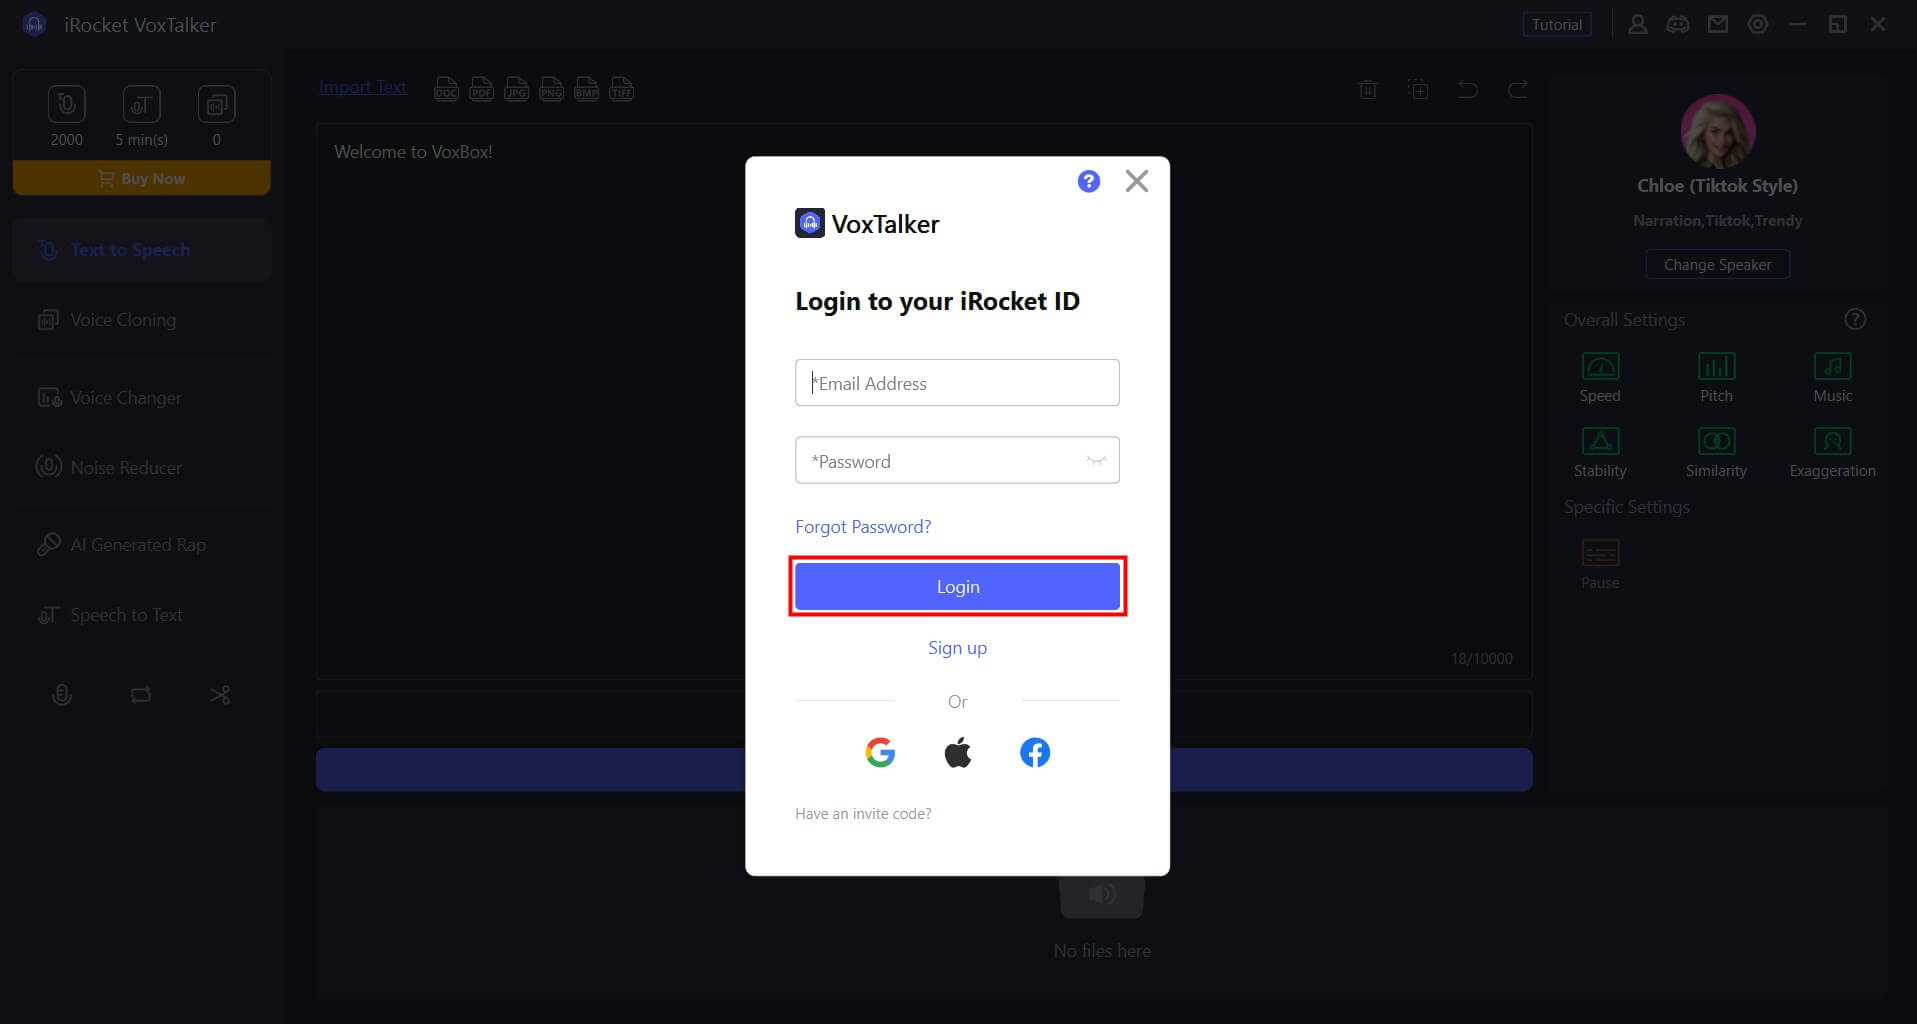
- If you purchase a license on the official website, an iRocket account will be automatically created. To register as a member with the product, select "Login", enter the email address you used when purchasing the license and the password you received, and click "Login" again. (You can change your password at any time)
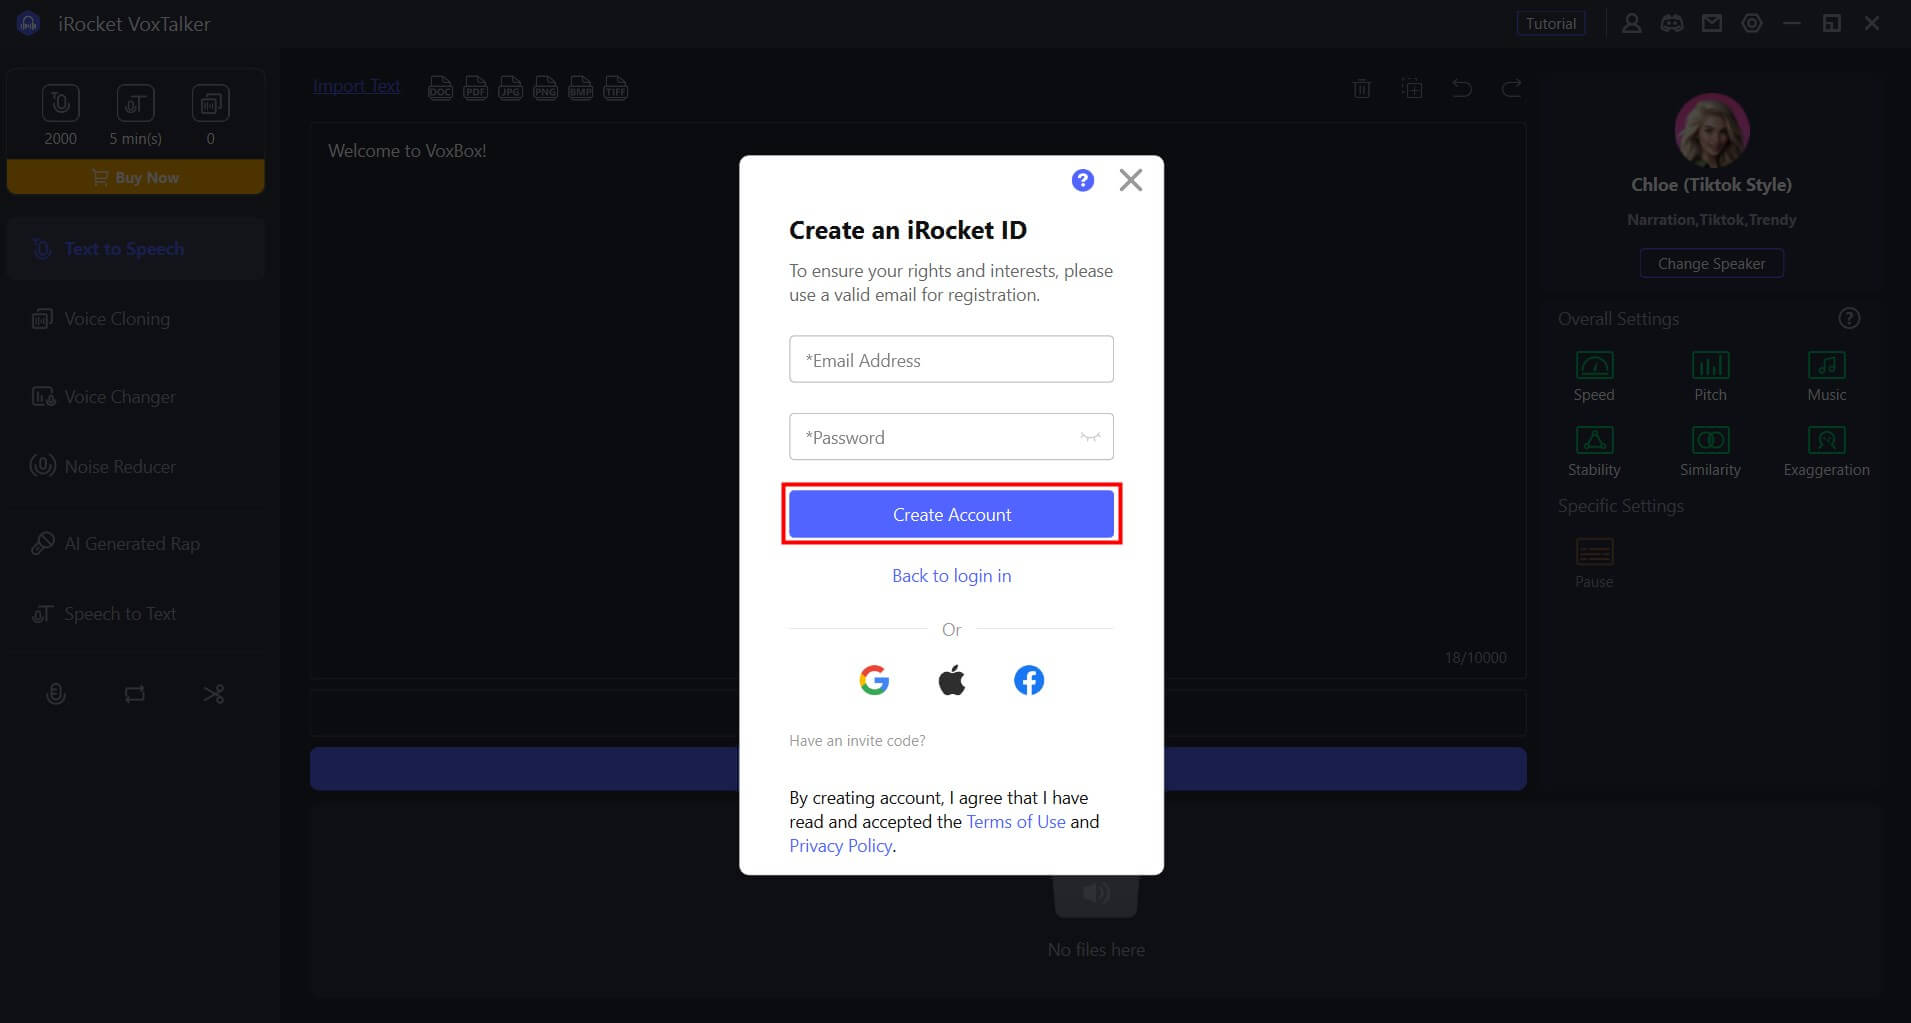
- If you do not have an iRocket account and purchased a license within the software, you will need to manually sign up for the product to become a member. Click "New Registration," enter your email address, password, and name, and click "Create Account."
Step 3: Verify your account information
Once you have created your account, your browser will automatically launch and point you to the Member Center. There you can check the licenses you have purchased. At the same time, the software will automatically log into your account.
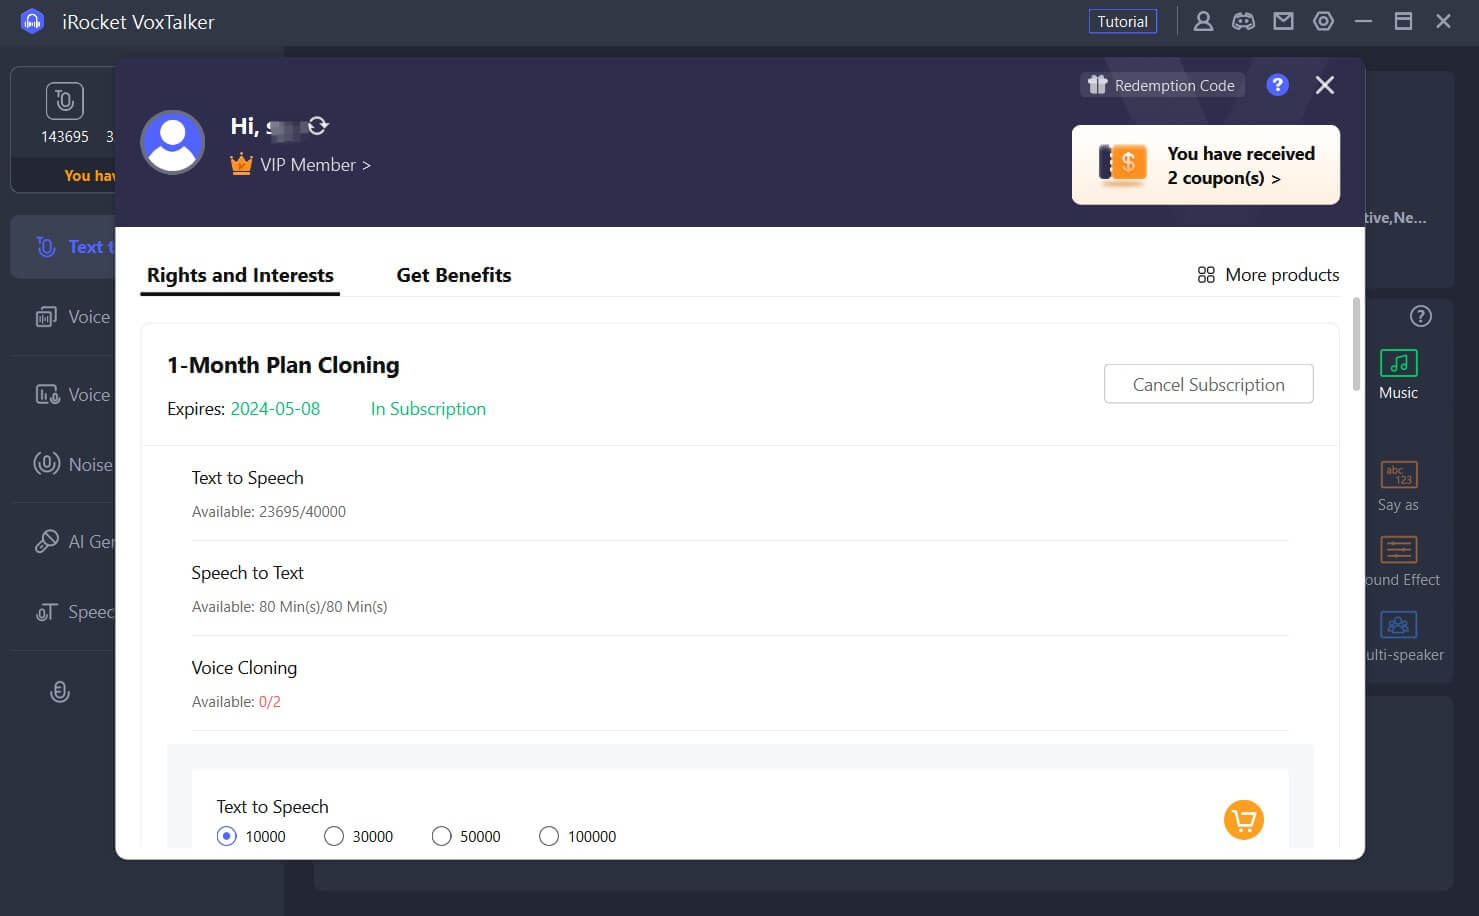
You can also check information about your license by clicking the "Account" icon in the upper right corner of the software while logged in. You can buy a license right here, or click to check the coupons and other products you received.
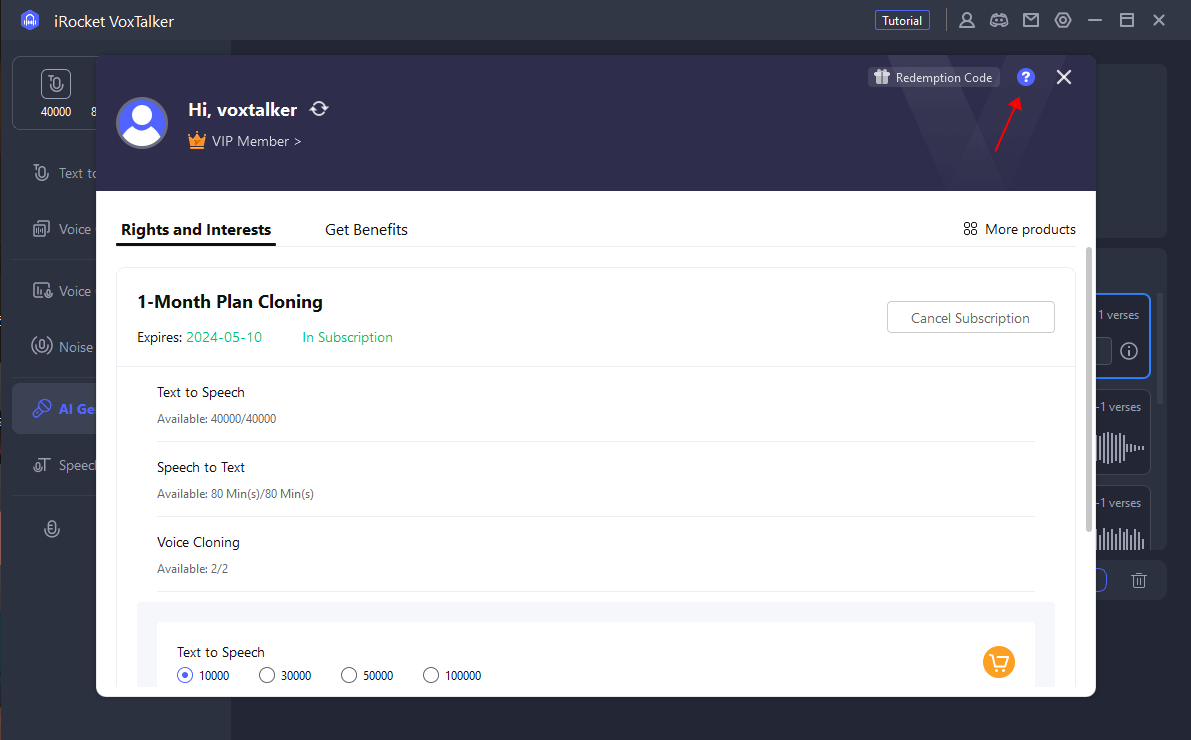
In addition, by clicking the "?" icon at the top right of the VoxTalker account screen, you can check the details of account login, registration, passcode change, etc. You can quickly check this by accessing this user manual.
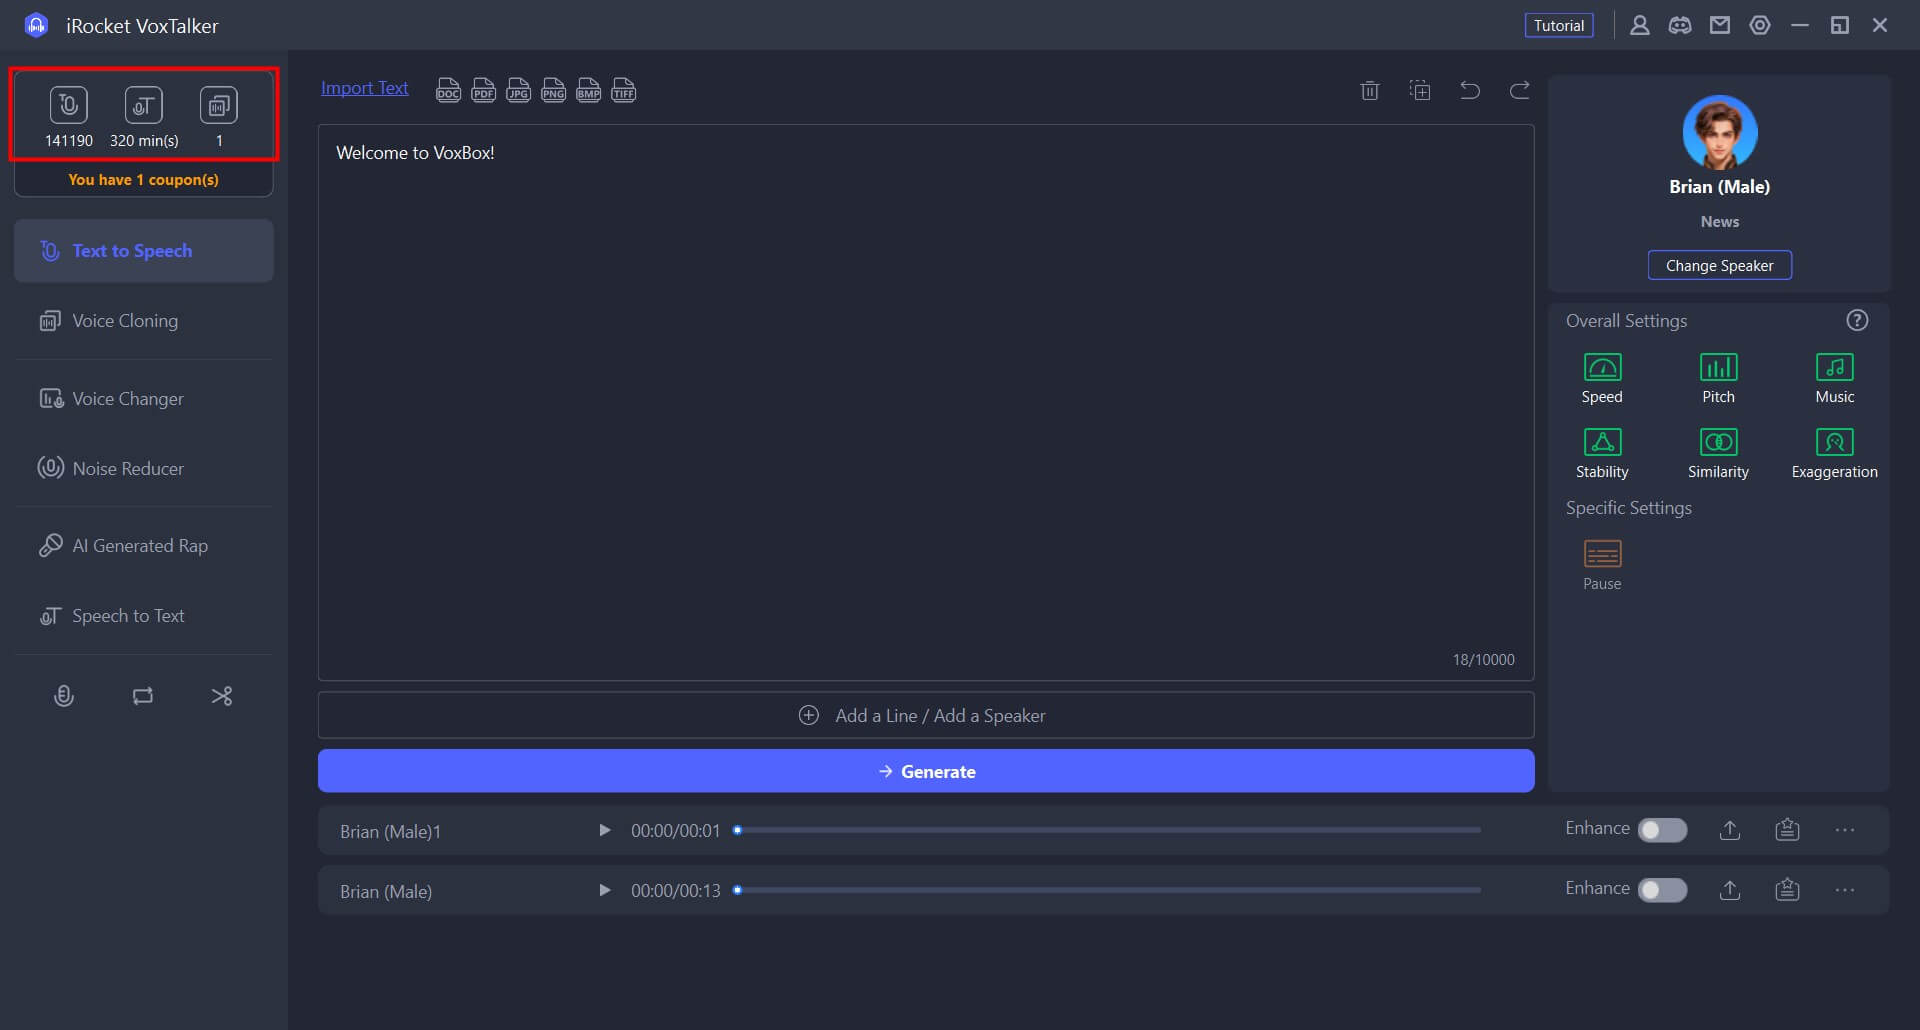
At the top left of the interface, you can see the number of characters available to read, the transcription time, and the number of voice clones. Click on it to purchase additional benefits for the corresponding item.
Text Reading
Video manual introducing VoxTalker functions and how to use them.
Step 1: Select language and voice
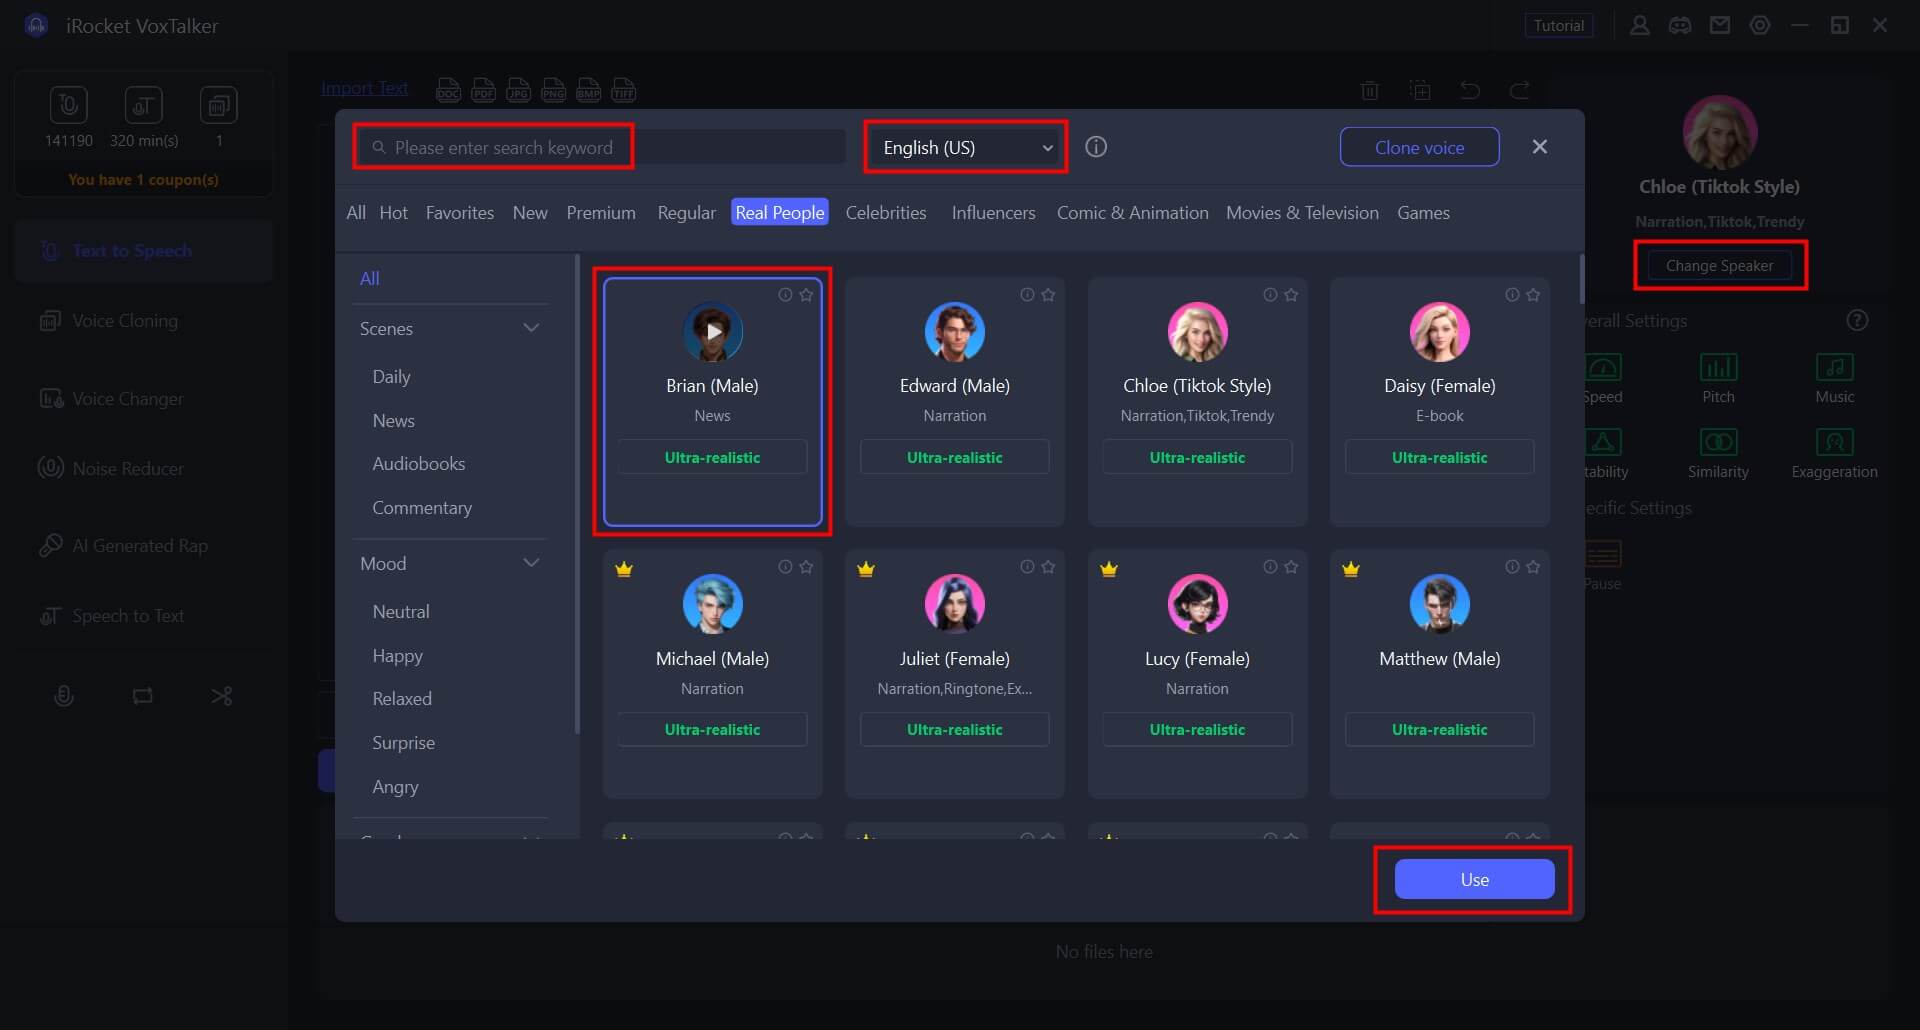
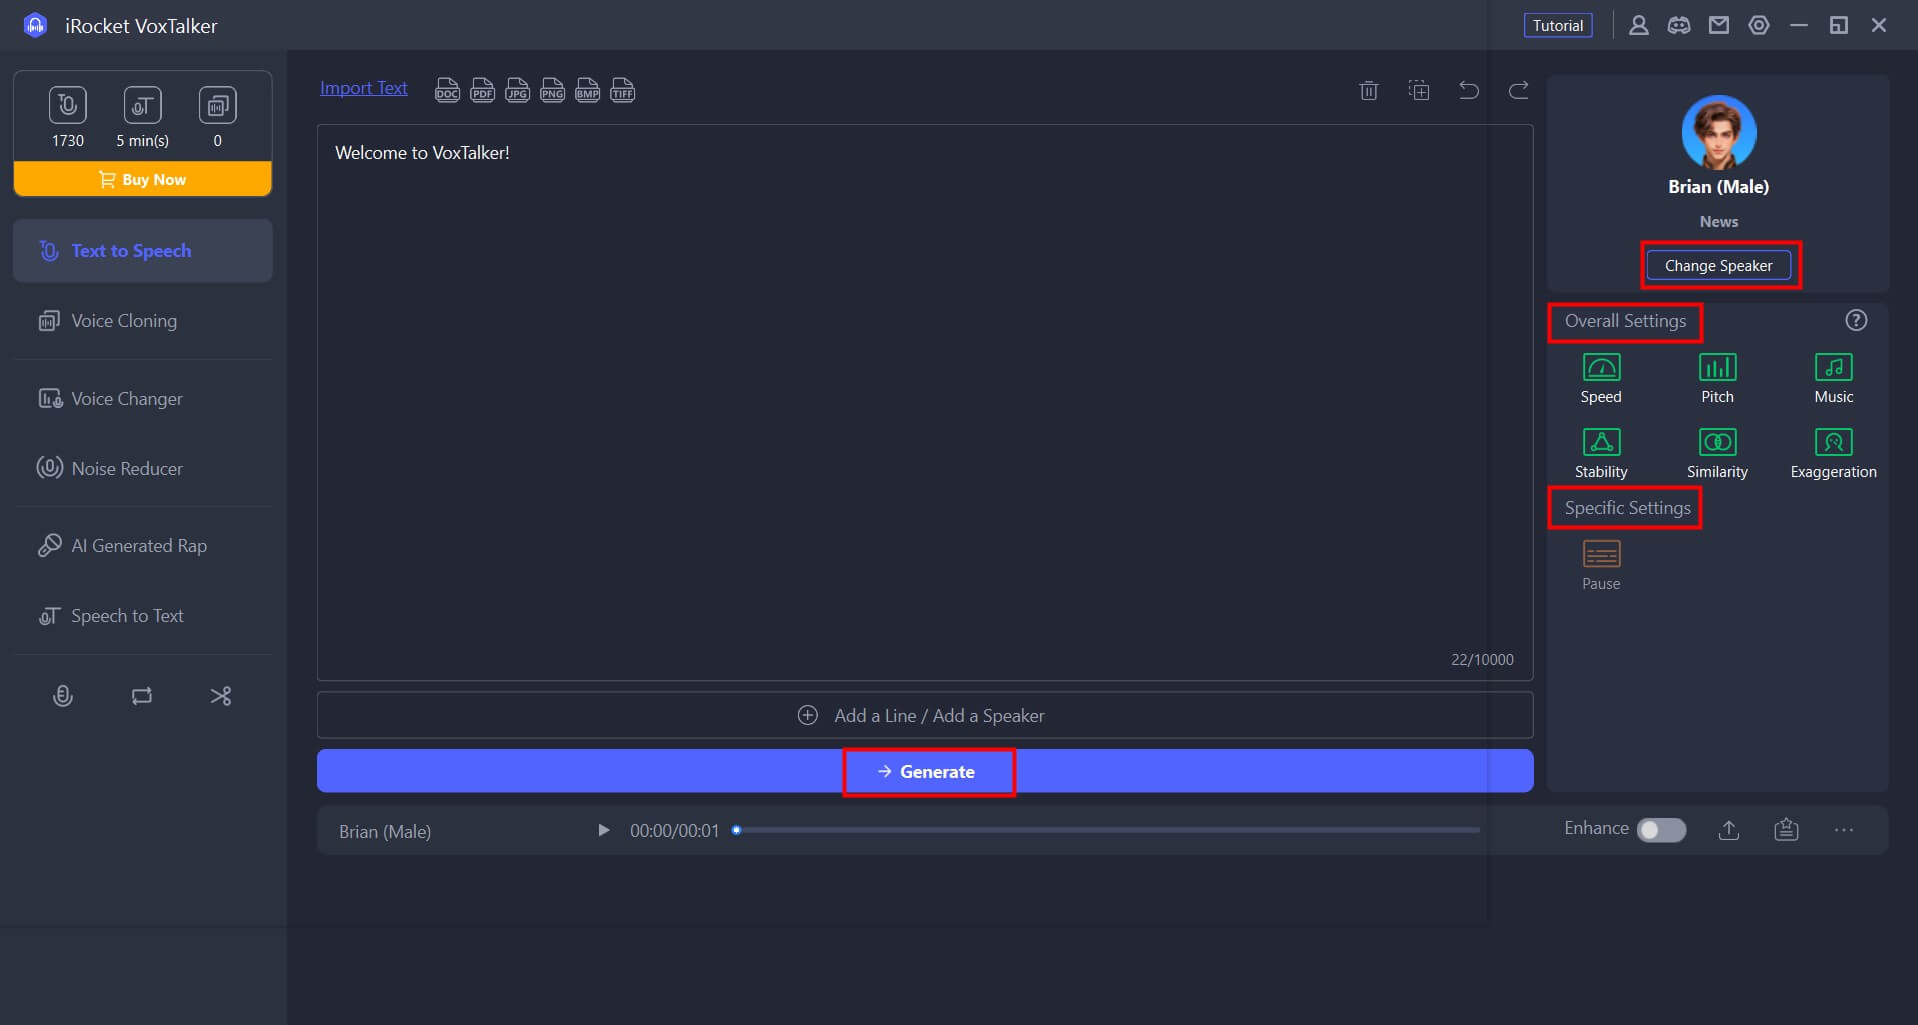
Go to the Text to Speech tab, click the avatar icon on the right, and select the language you want to read and the voice of your choice. You can also search for voices by entering keywords.
Step 2:Enter text
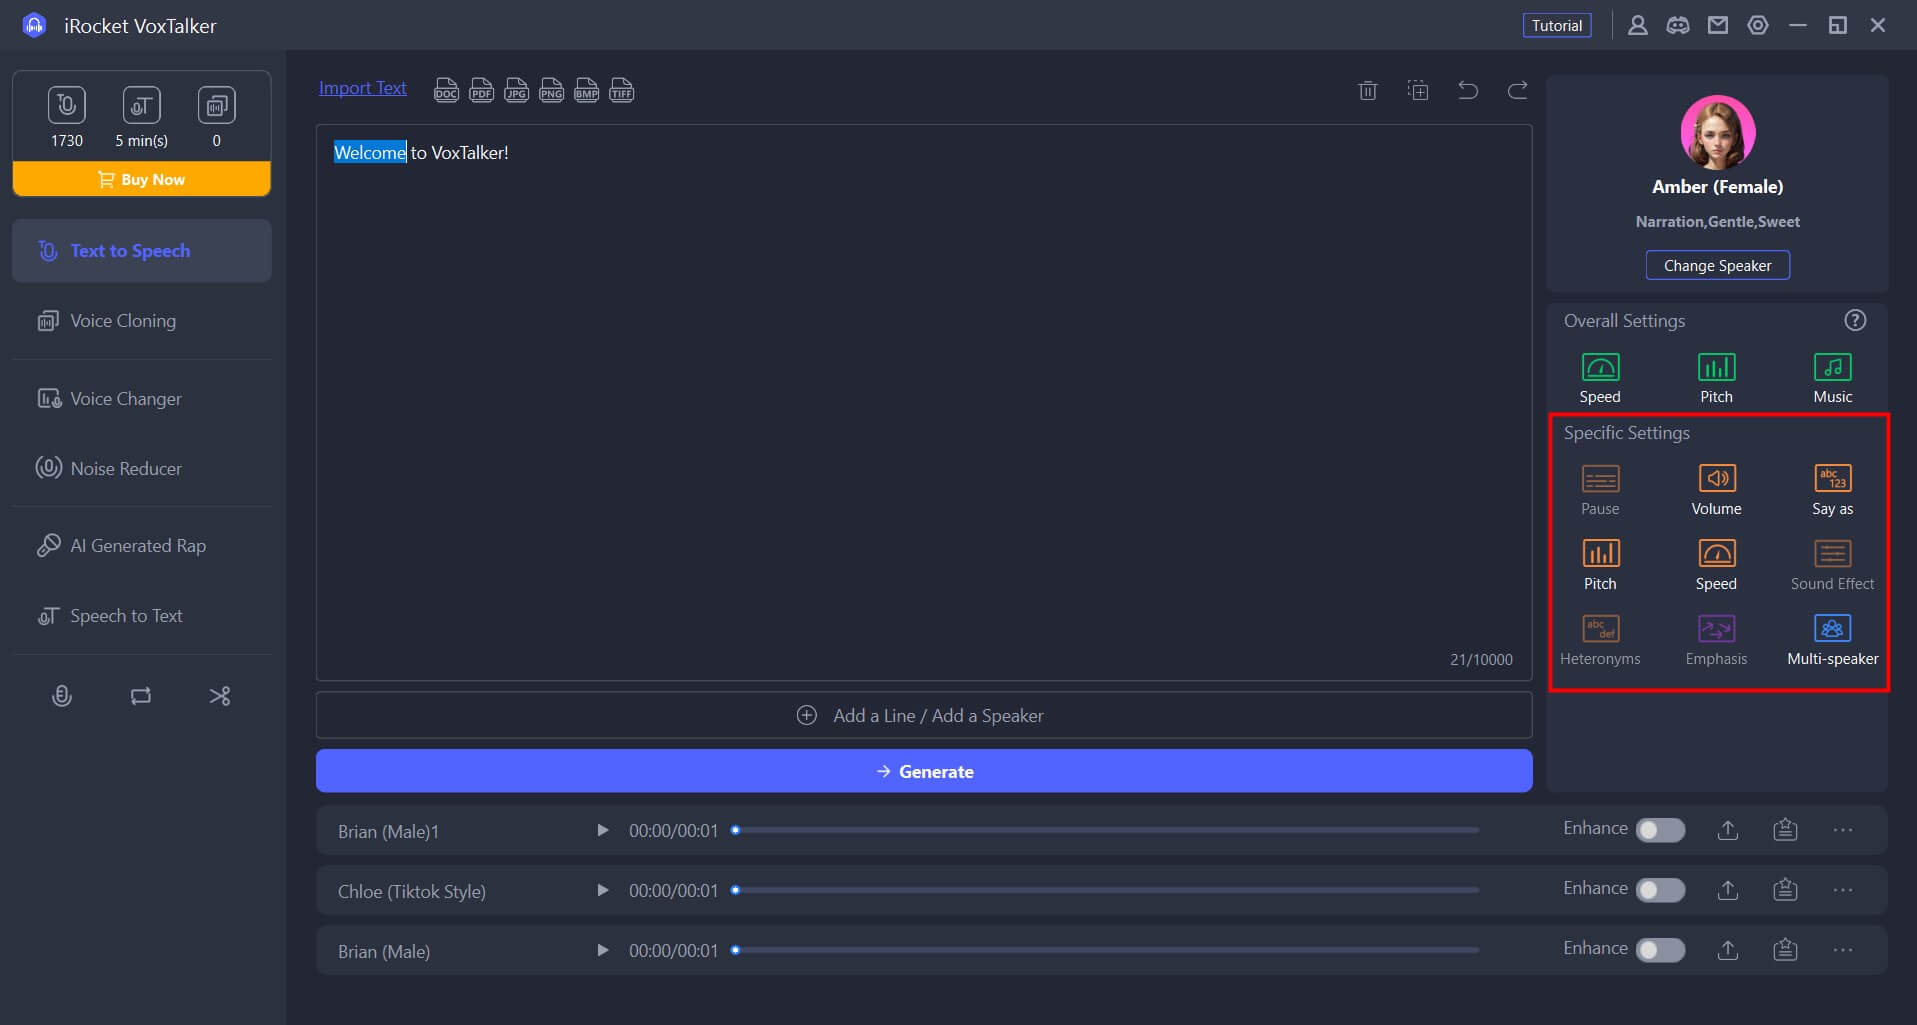
Enter the content you want to read aloud. You can also select a specific word and set parameters such as "Pause", "Speed", "Pitch", "Similarity", and "Exaggeration" on the right side.
Step 3: Convert and output to audio
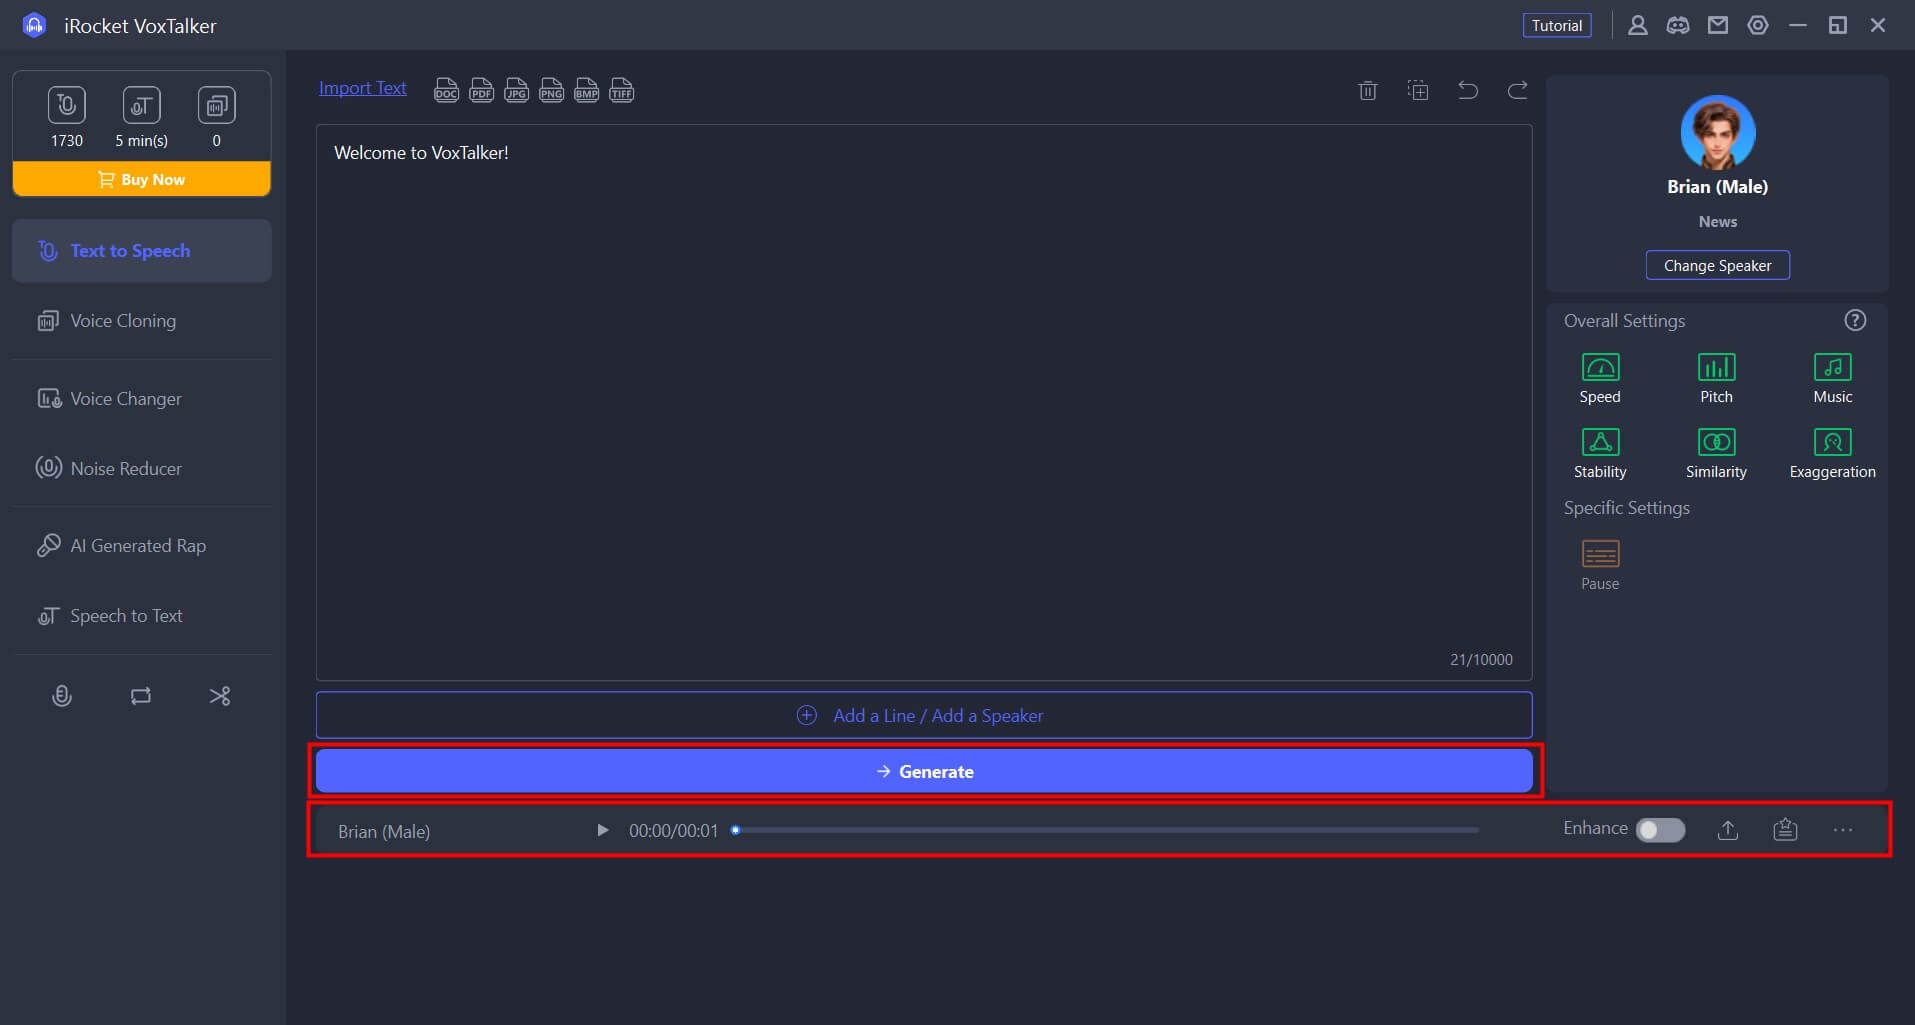
Click "Generate" and wait for a while, the generated audio will be displayed at the bottom. Play it and output it. You can also proceed to edit or delete your history.
Tips
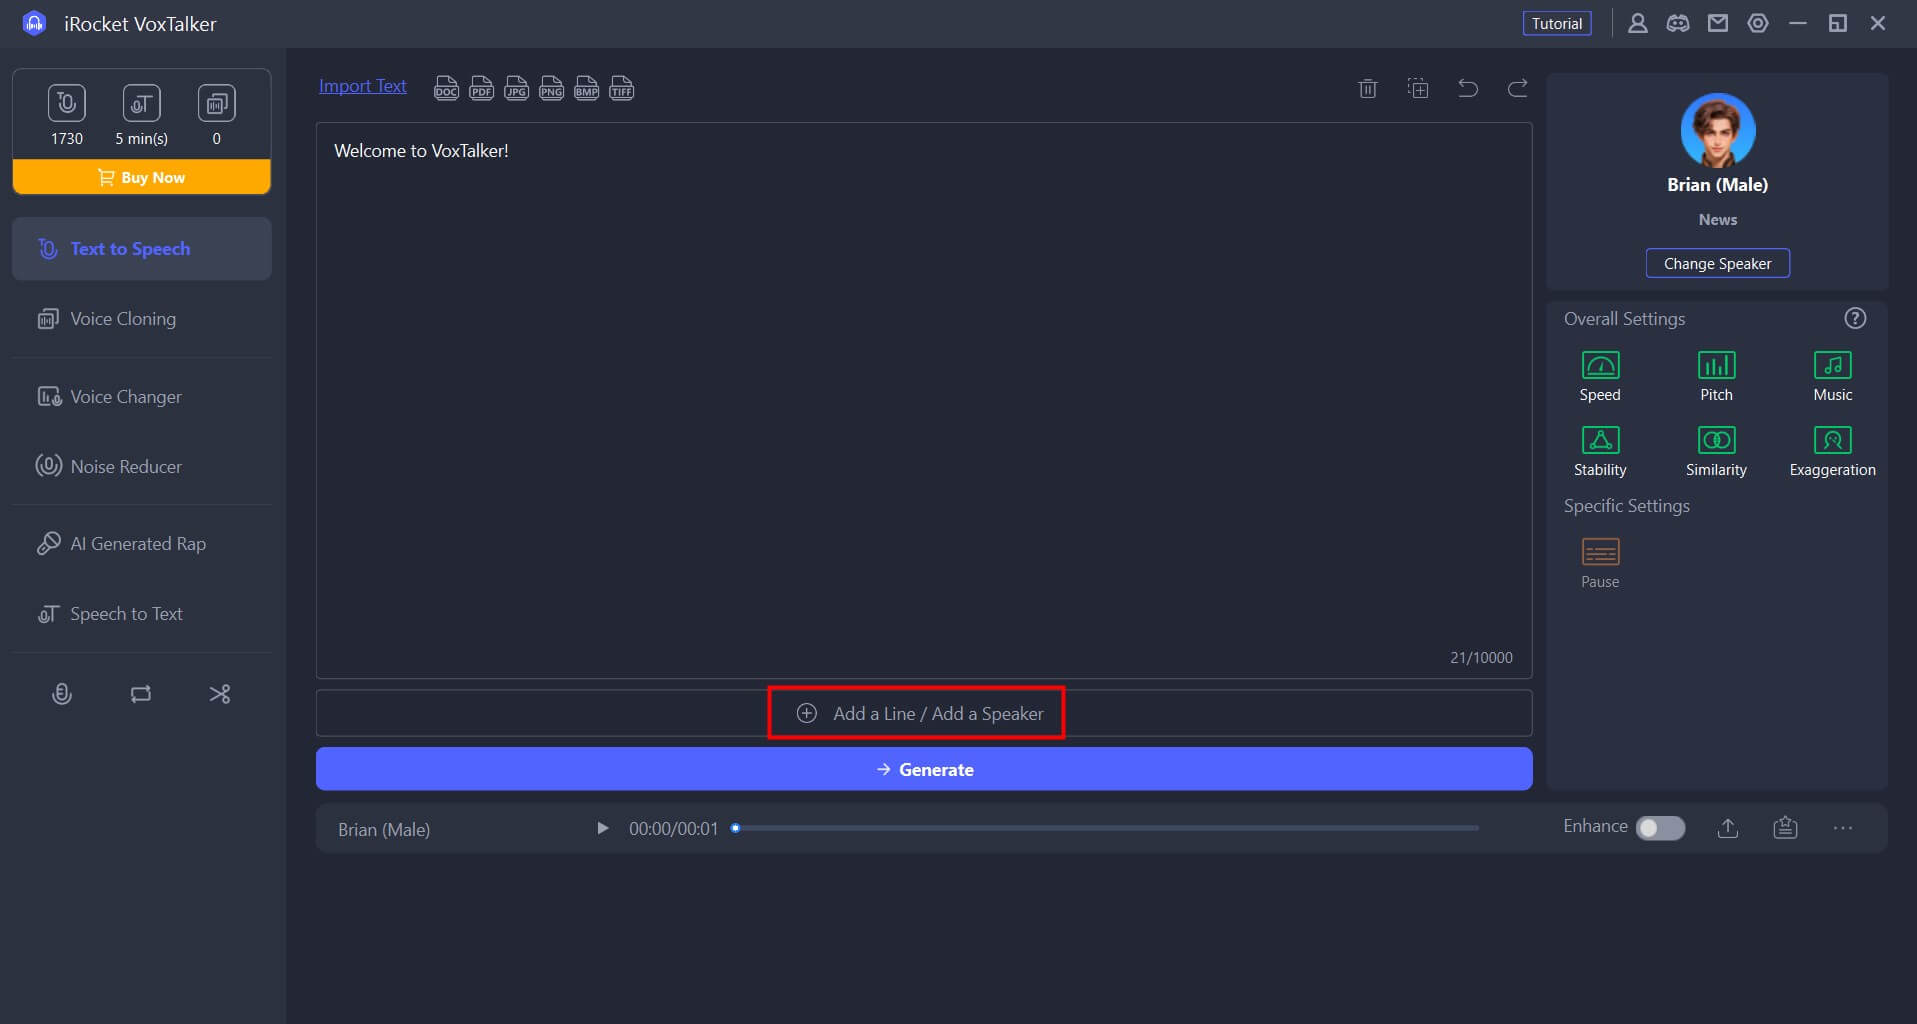
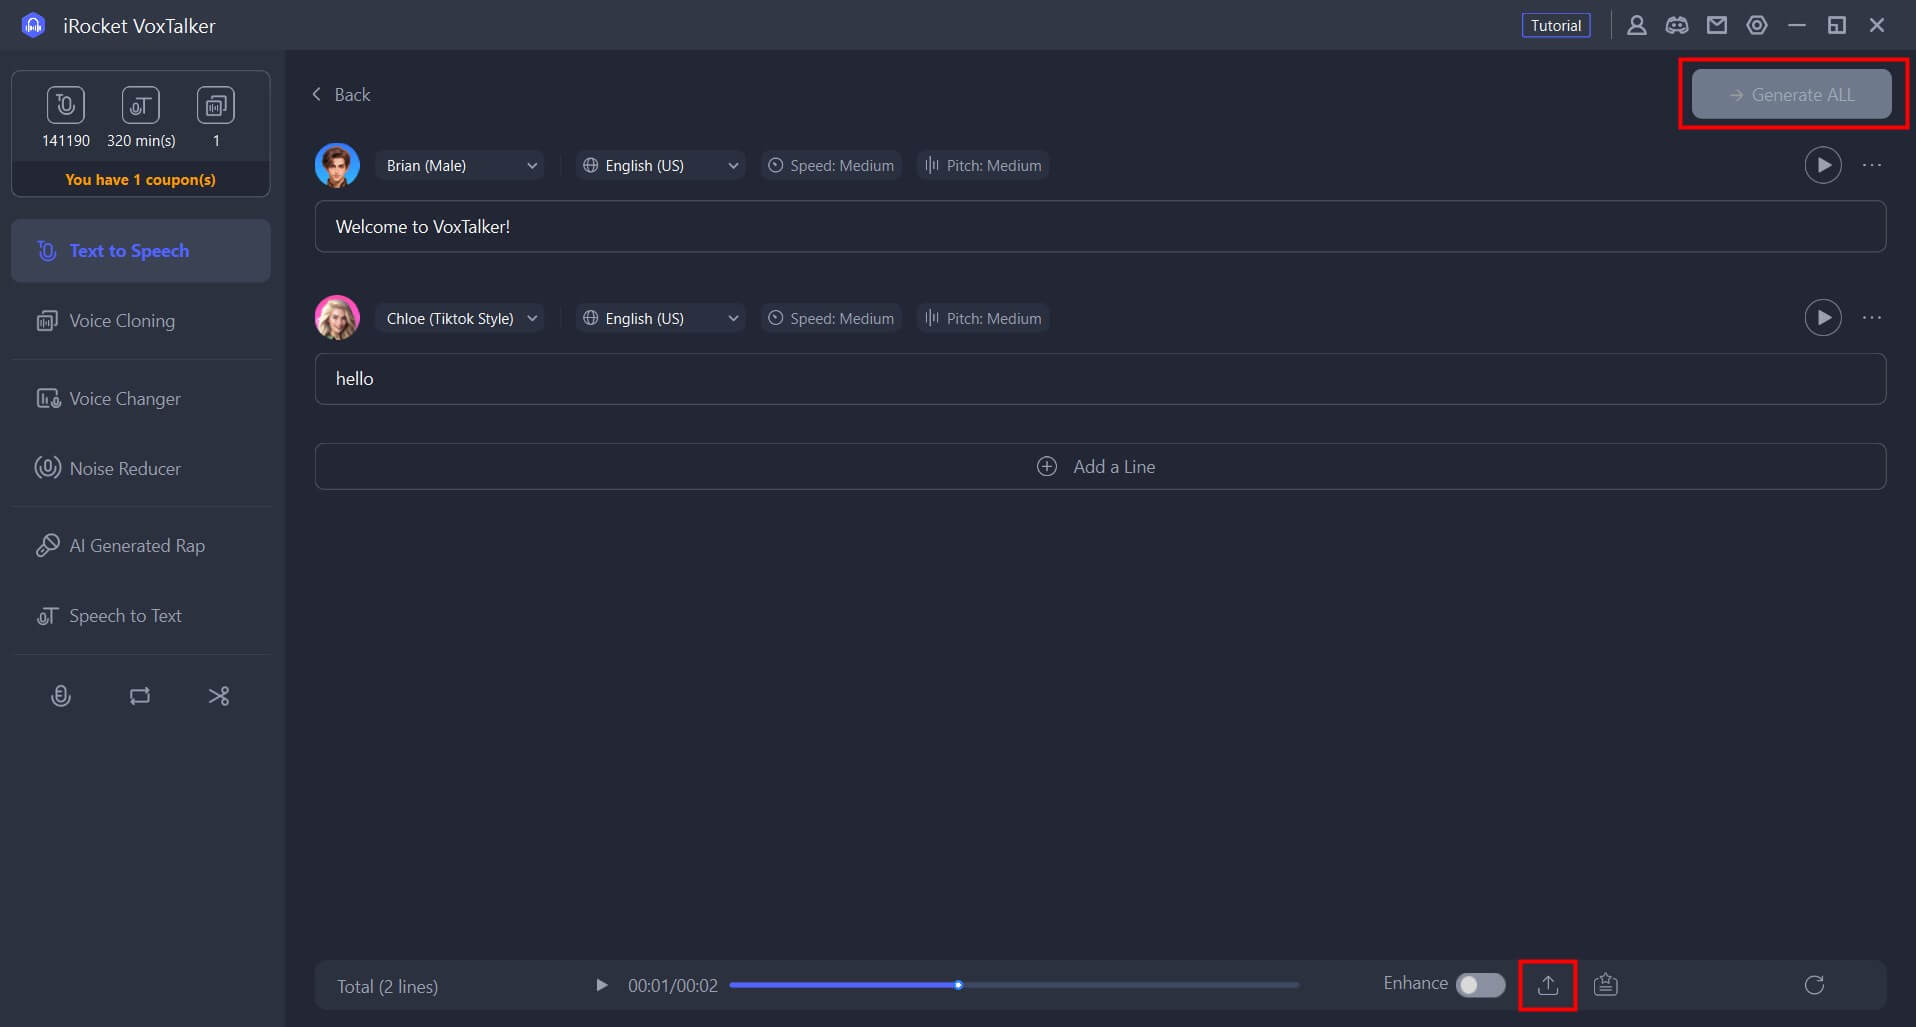
Step 1. Click "Add a line" at the bottom of the text input window.
Step 2. Enter each sentence as needed and set the speaker, language, speed, and pitch. You can also add more rows or adjust them up or down.
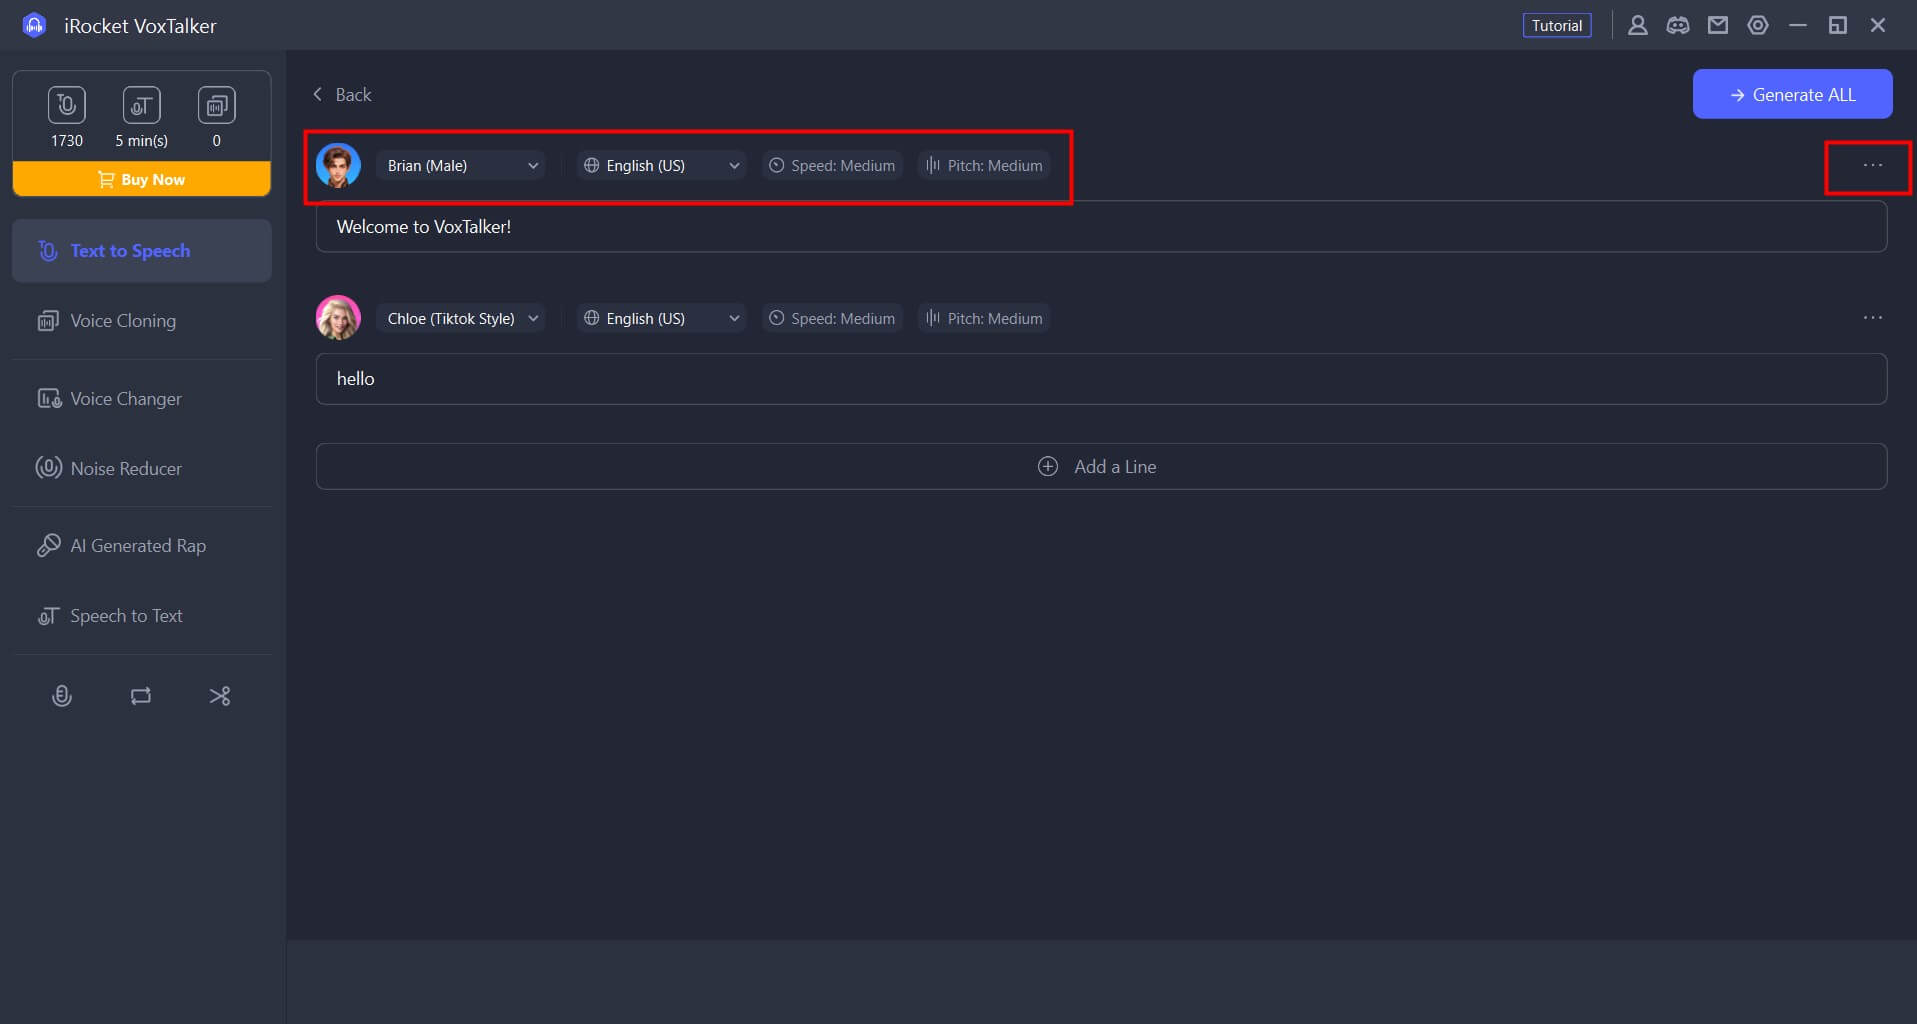
Step 3. Click "Generate All" and wait for a while, the generated audio will be displayed at the bottom. Let's play and save.
Document/image File Reading
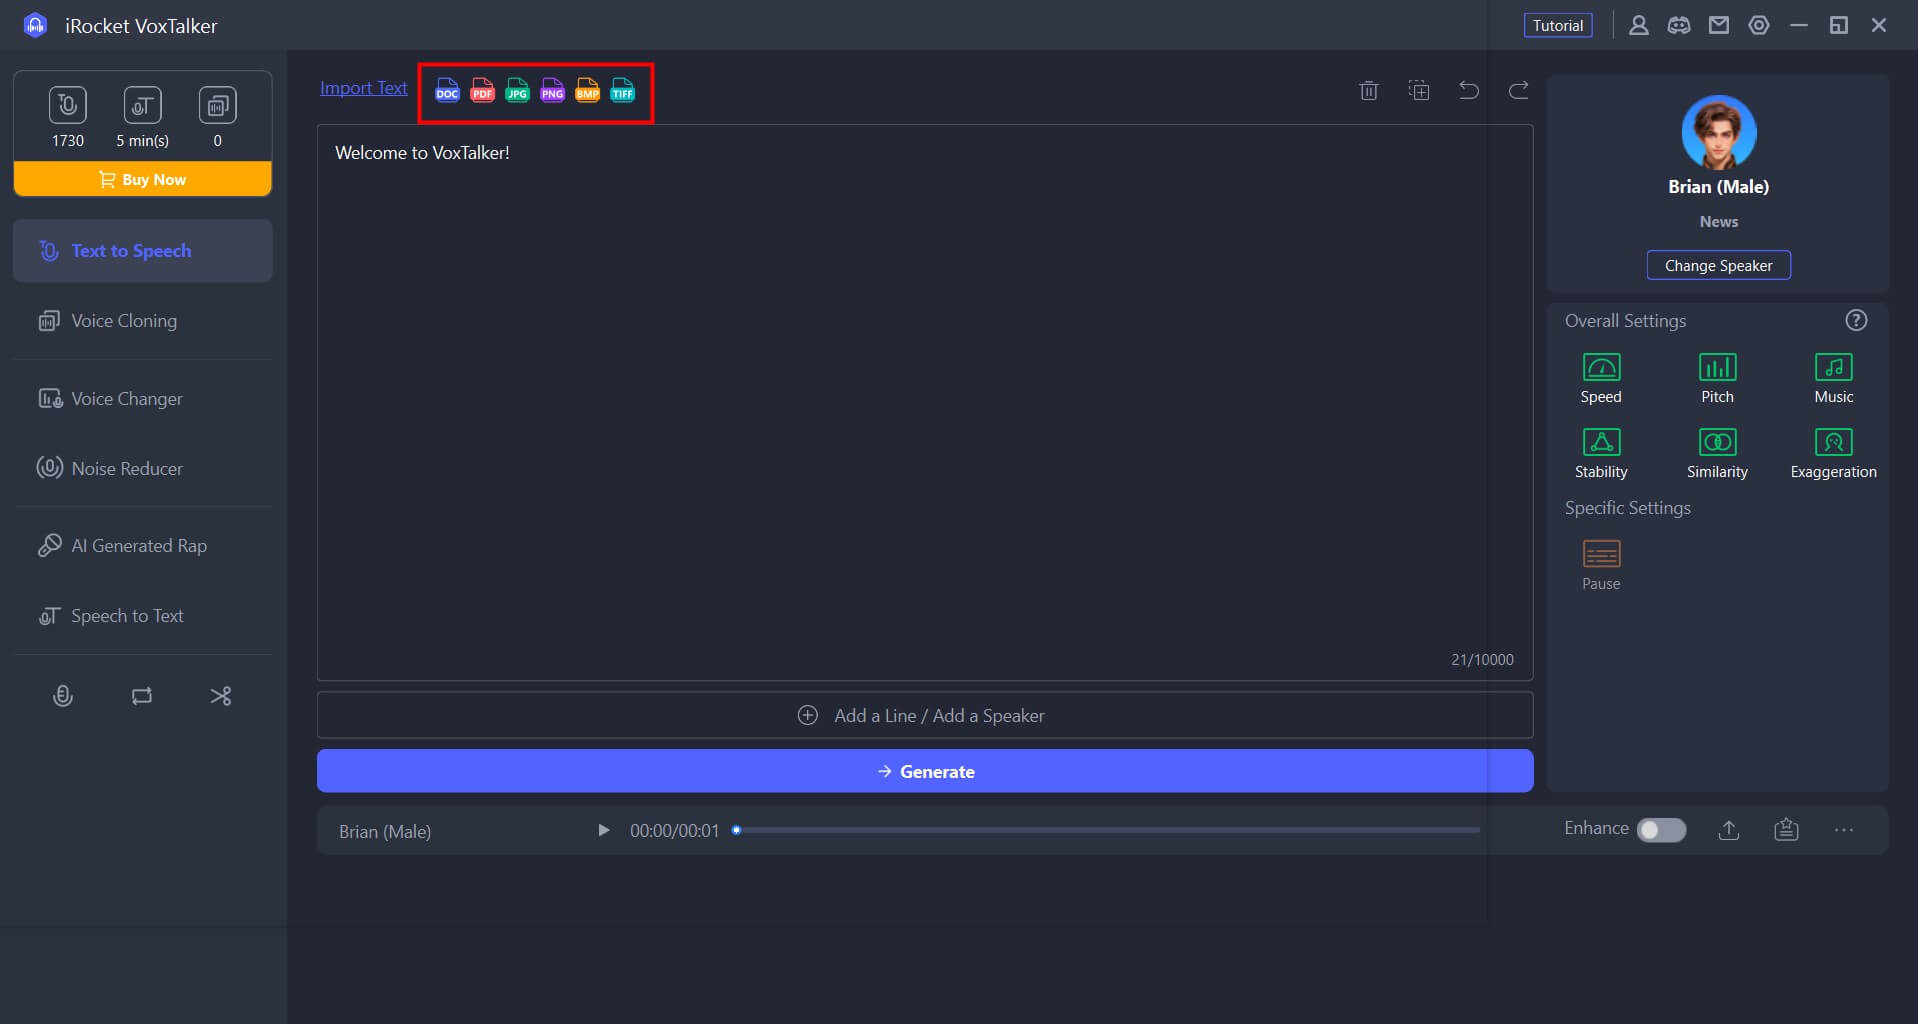
VoxTalker can recognize and read out characters in pdf/doc/docx document files and png/jpg/jpeg/bmp/tiff image files.
Step 1: Import the file
Go to the "Text to Speech" tab, click "Import Text", and import the image or document file you want to read aloud.
Step 2:Language selection and character extraction
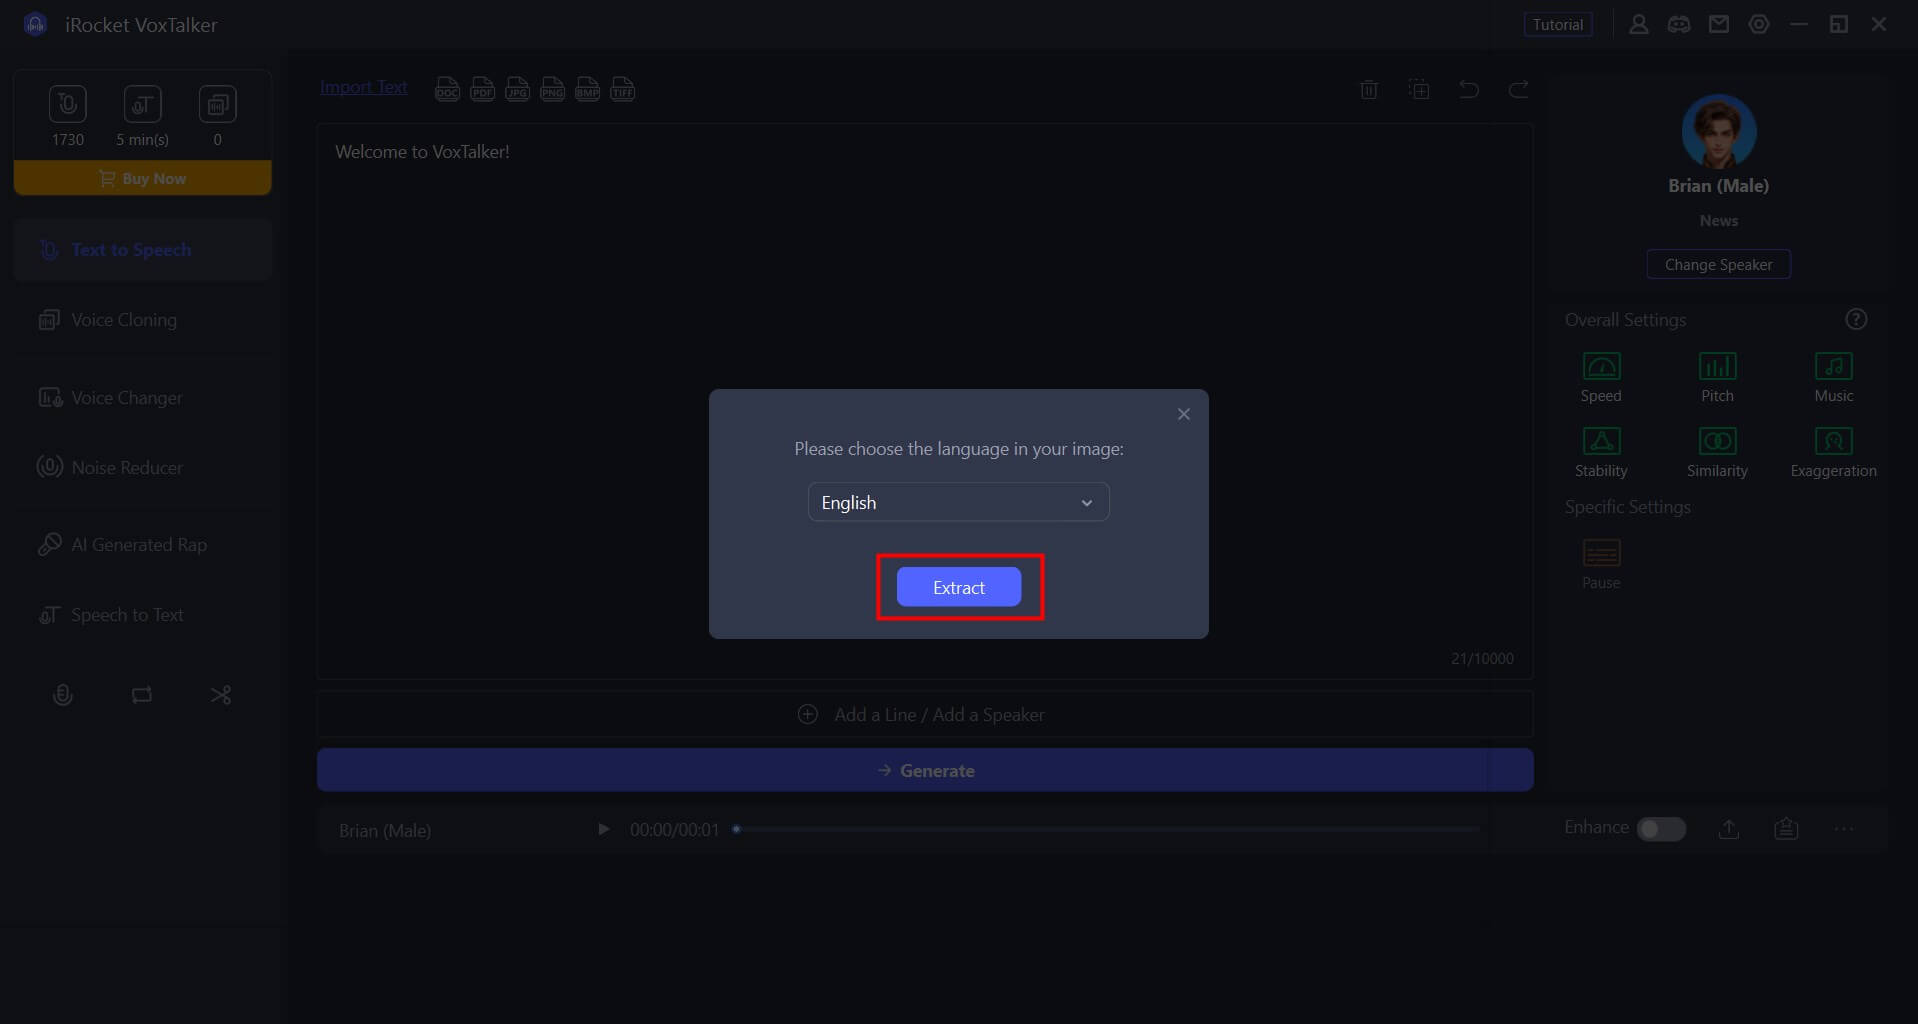
If you are importing an image file, select the language of the text and click "Extract" to identify the text.
If you are importing a document file, you do not need to do anything special; characters are automatically identified.
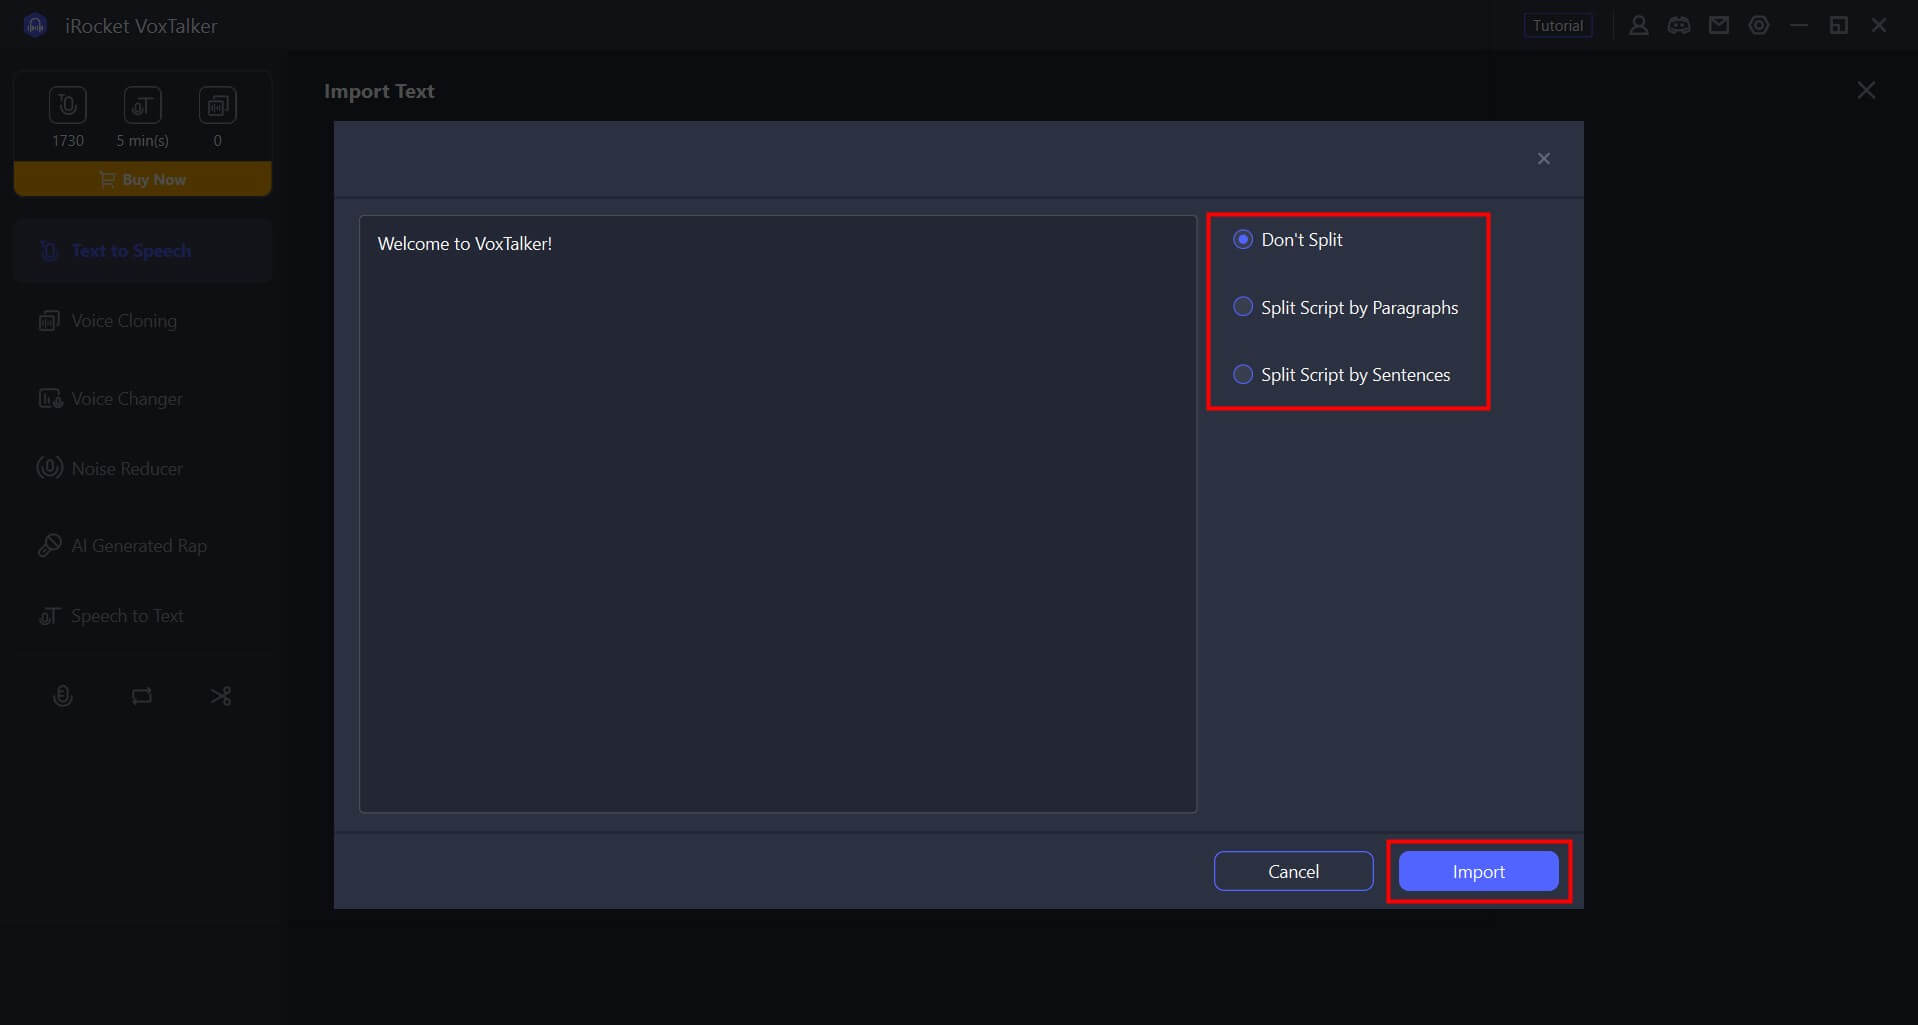
If necessary, make corrections in the text window. After that, set the text division method, and click "Import" to proceed to the reading settings.
Step 3: Convert and output to audio
Set the parameters on the right side, then click "Generate", and wait for a while, and the generated audio will be displayed at the bottom. Play it and output it. You can also proceed to edit or delete your history.
Voice Clone
If you purchase VoxTalker's SVIP plan, you can use the "Voice Clone" feature to synthesize your voice. Once synthesized, you can use it to read out any text.
To create a voice clone, you need to provide a voice sample.
Step 1: Provide an audio sample
Go to the "Voice Clone" tab and click "Create a new clone".
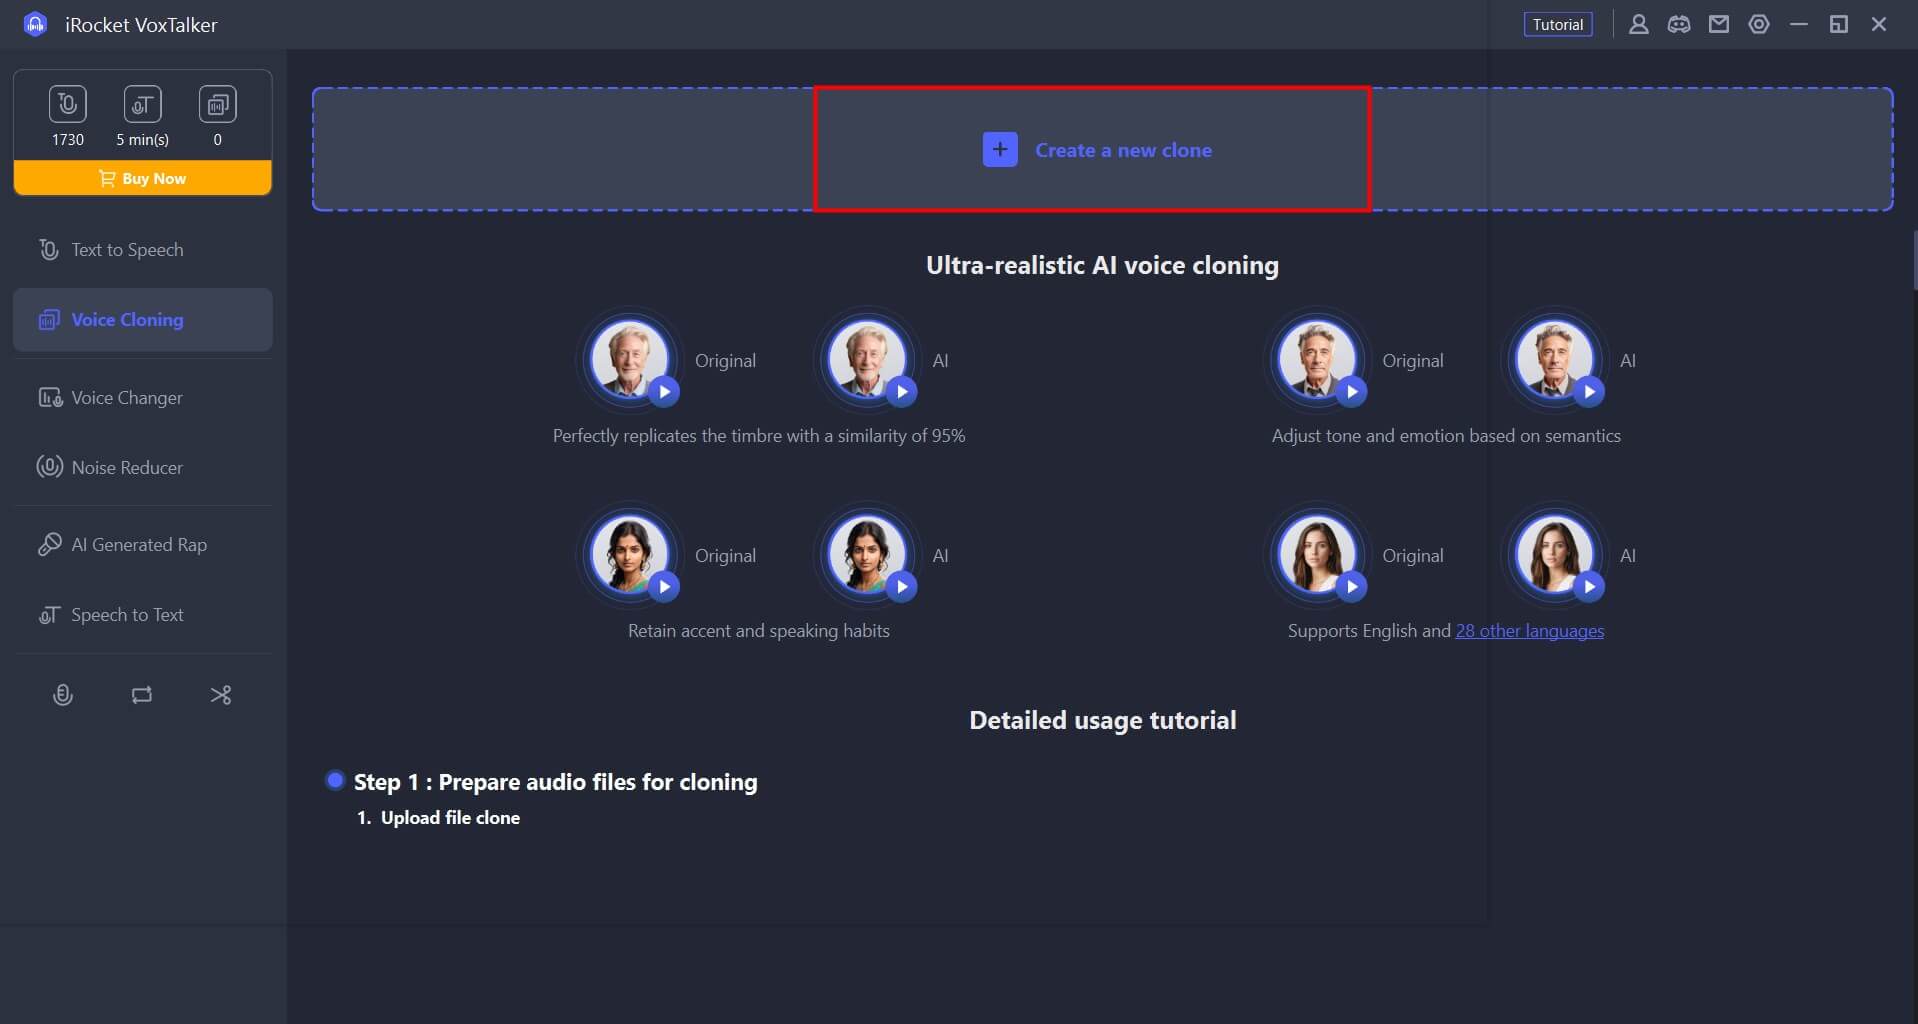
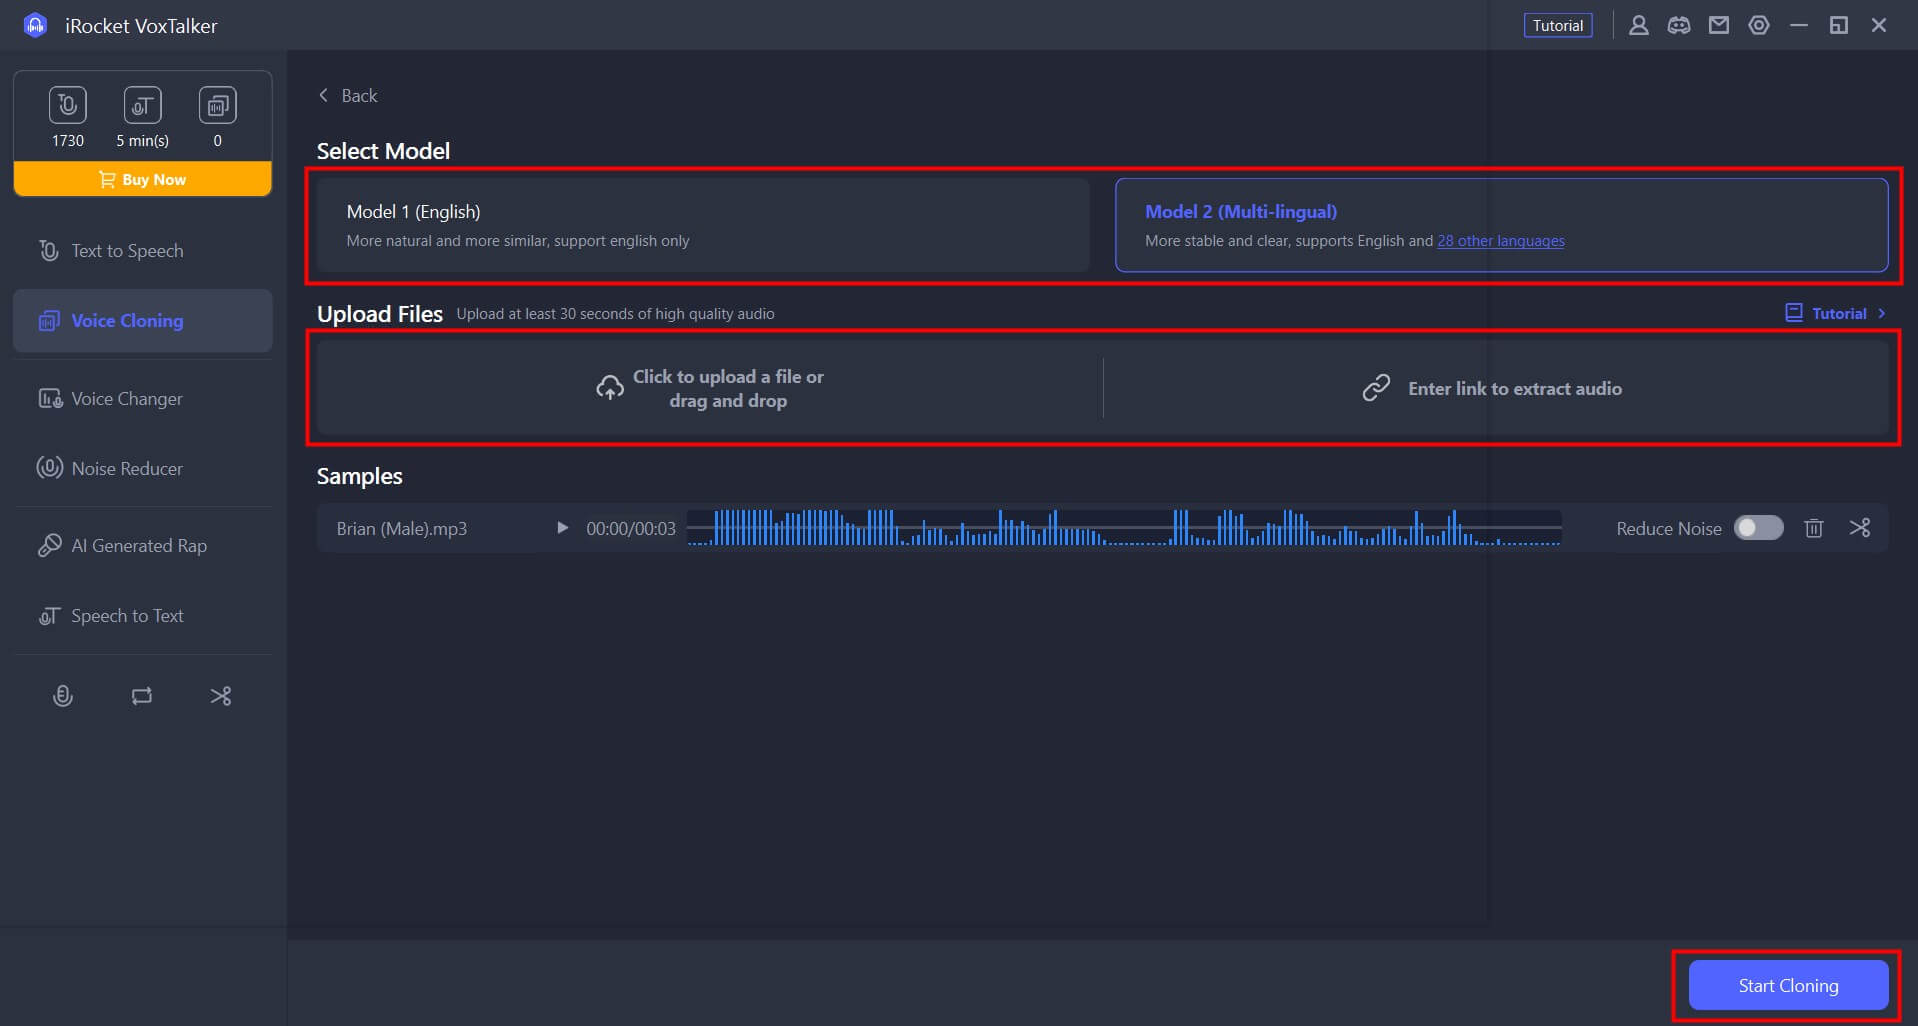
Choose how you want to upload or record your video or audio file.
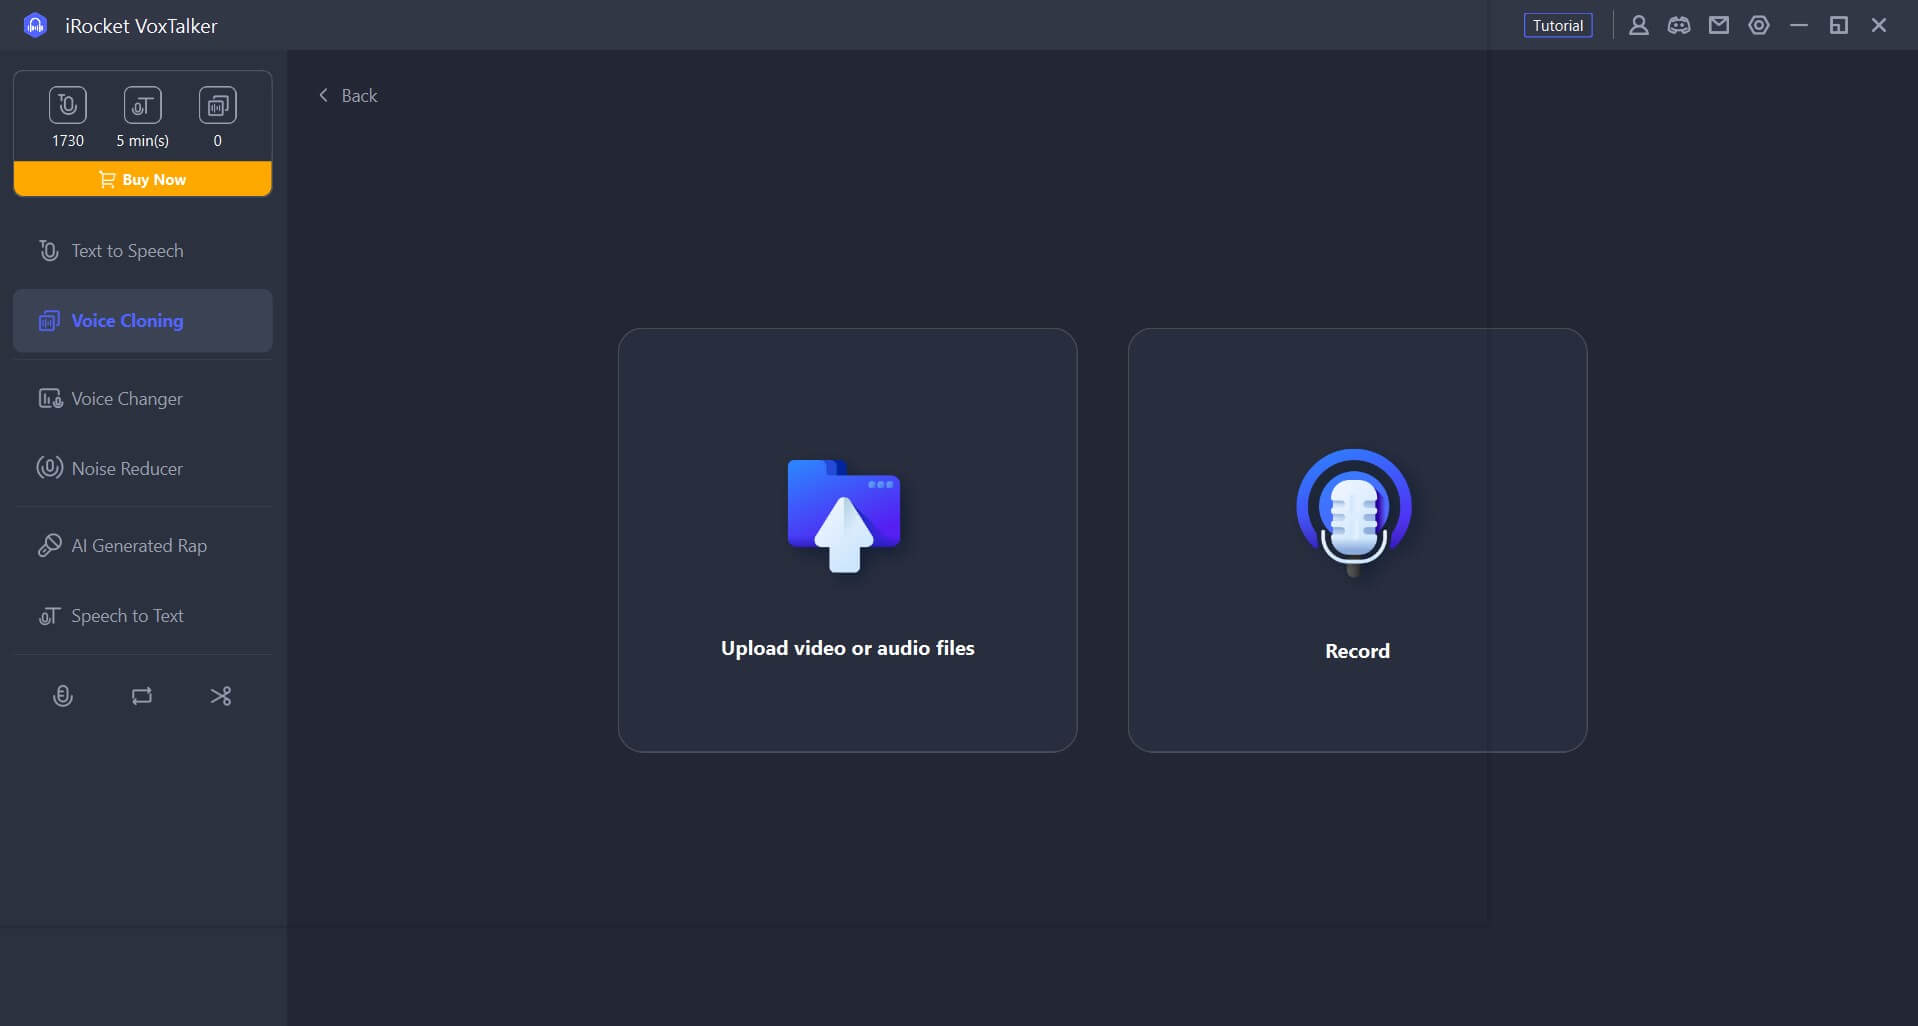
If you choose to upload a file, select the model and click or drag to import the audio file. Then click "Start cloning".
If you choose text reading, complete the recording by reading the text that appears on the screen. Then select the model and click "Start cloning".
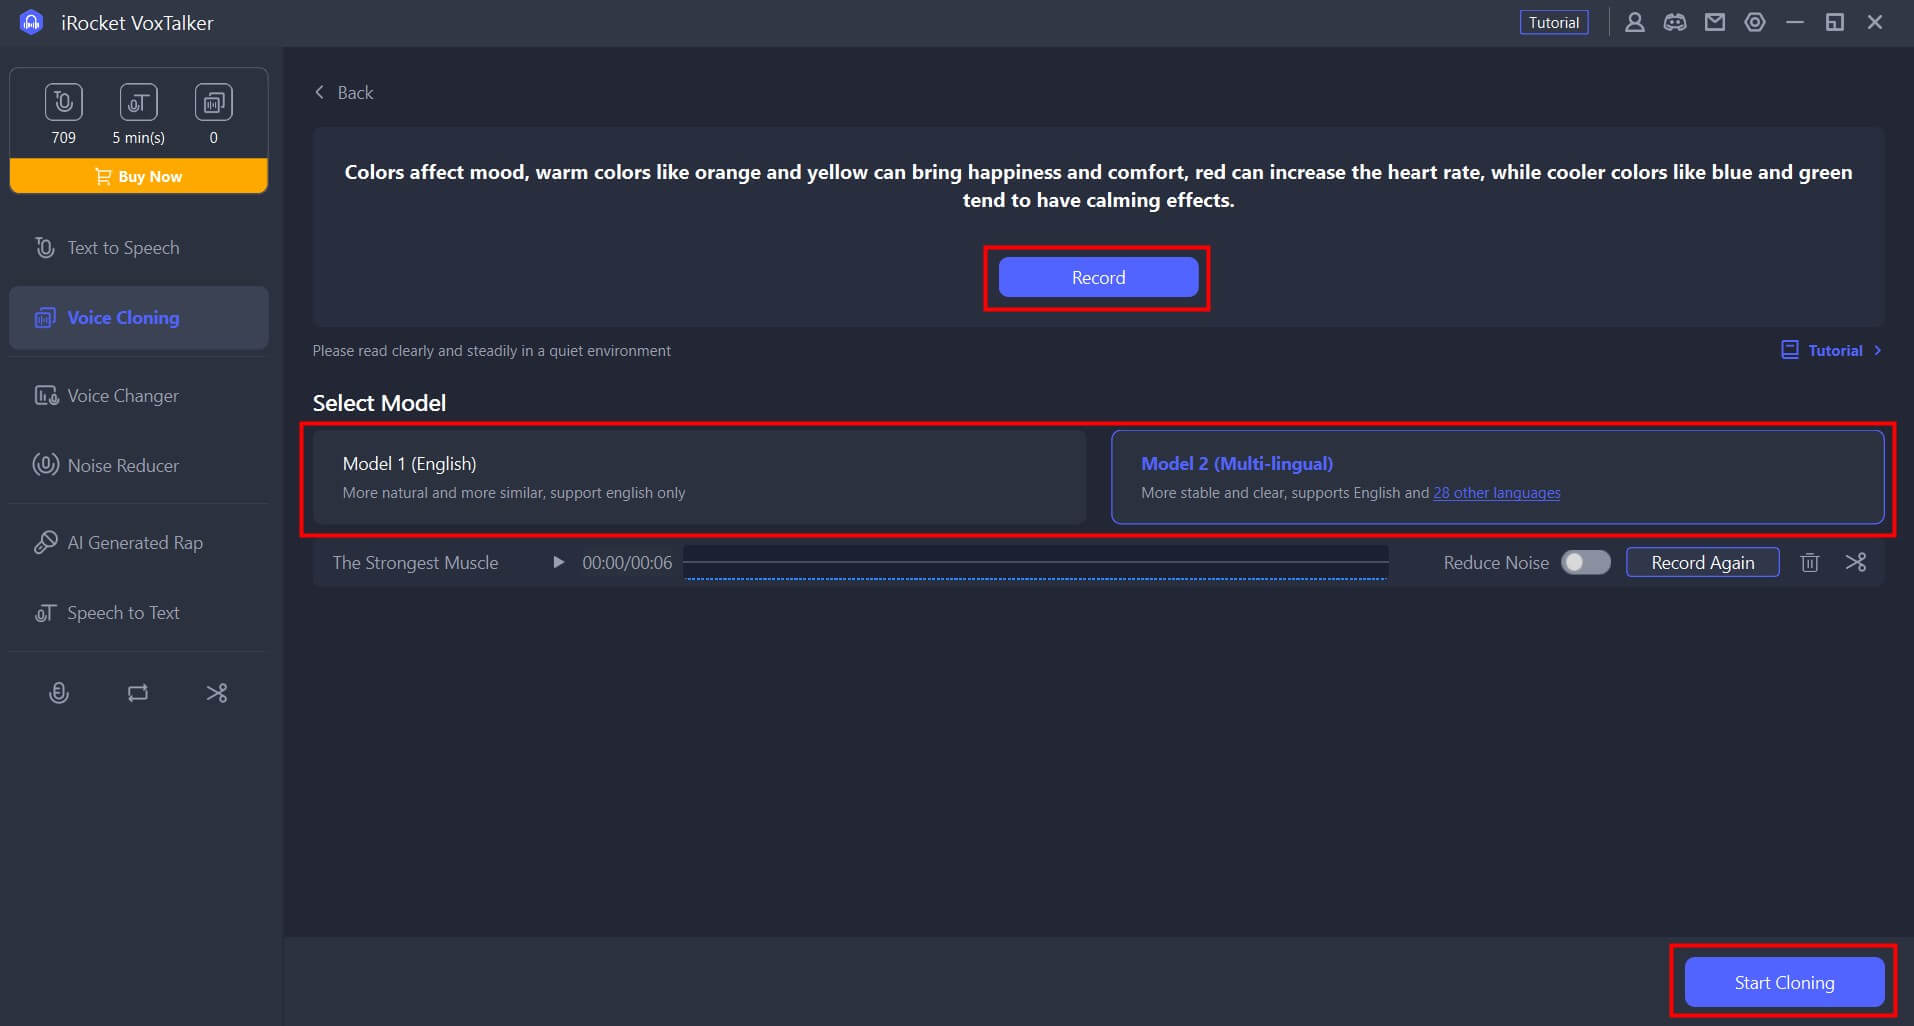
Step 2:Check and use the synthesized audio
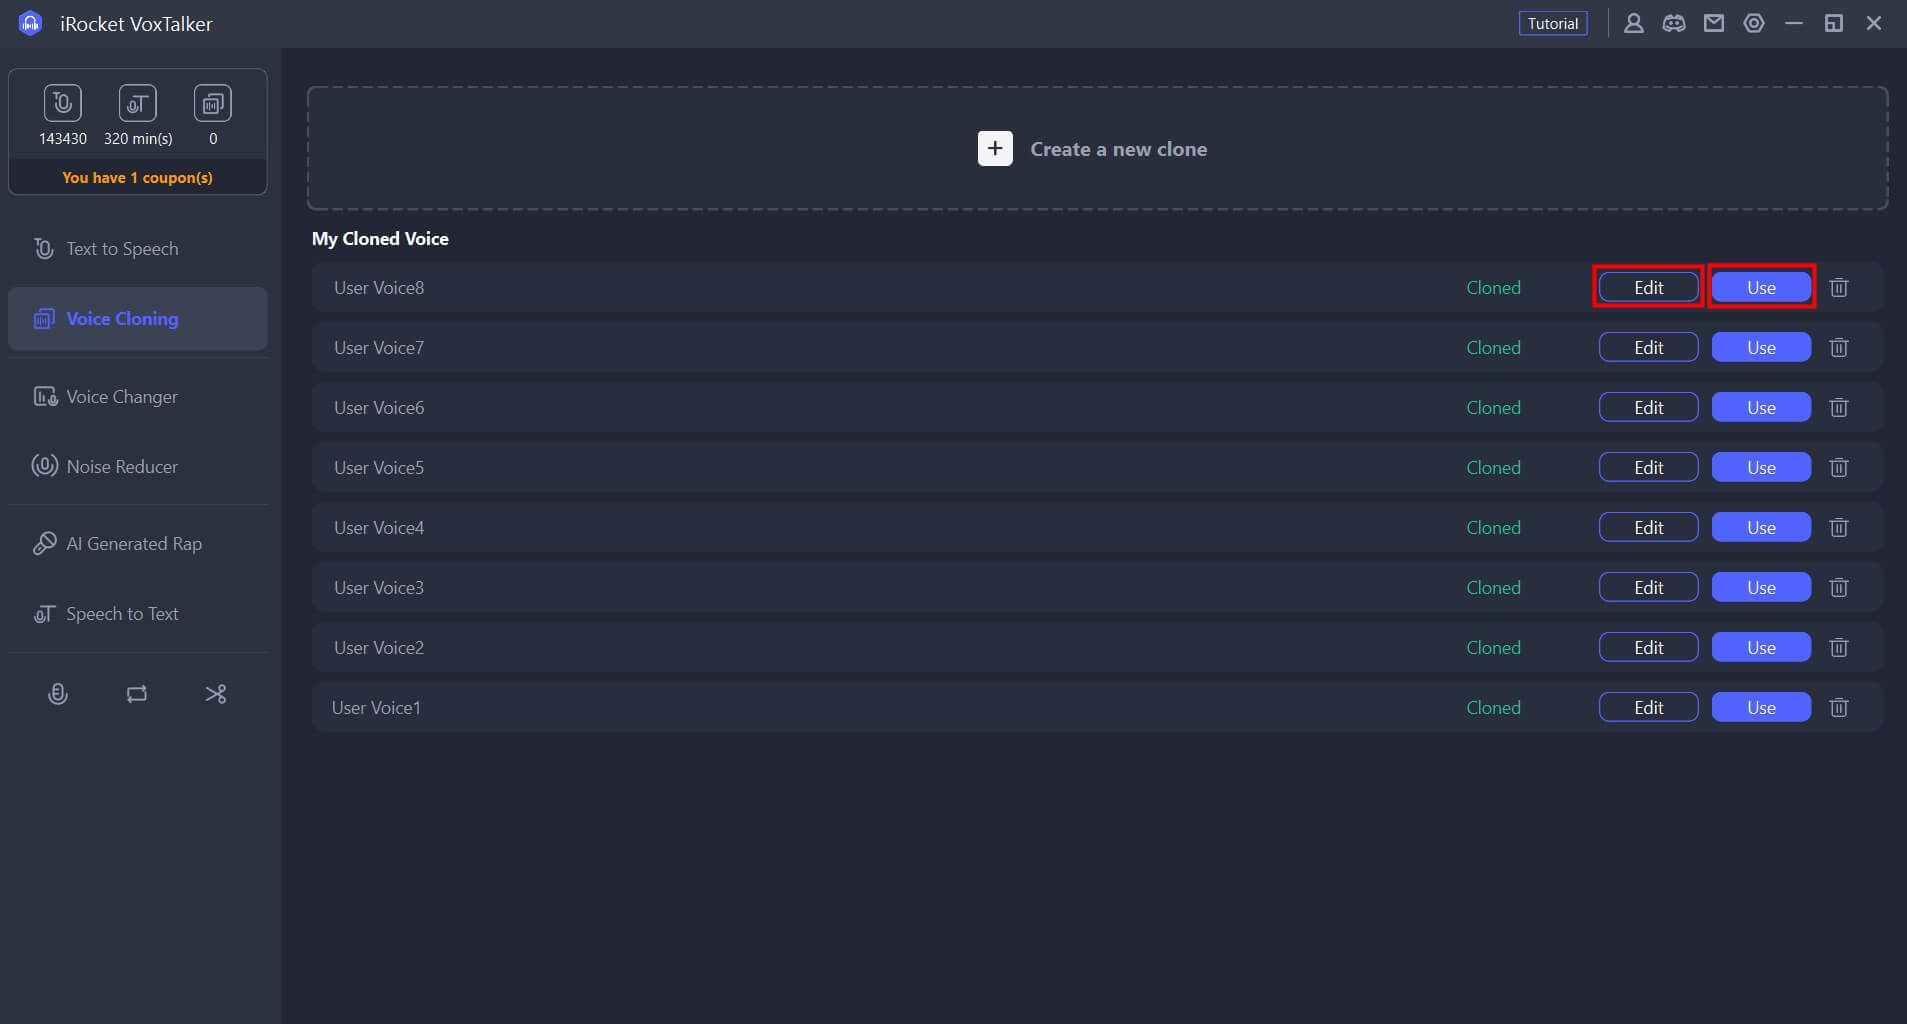
After a while, your cloned voice will be created and displayed in your history. You can also change the name. Click Use to use it to read the text you type.
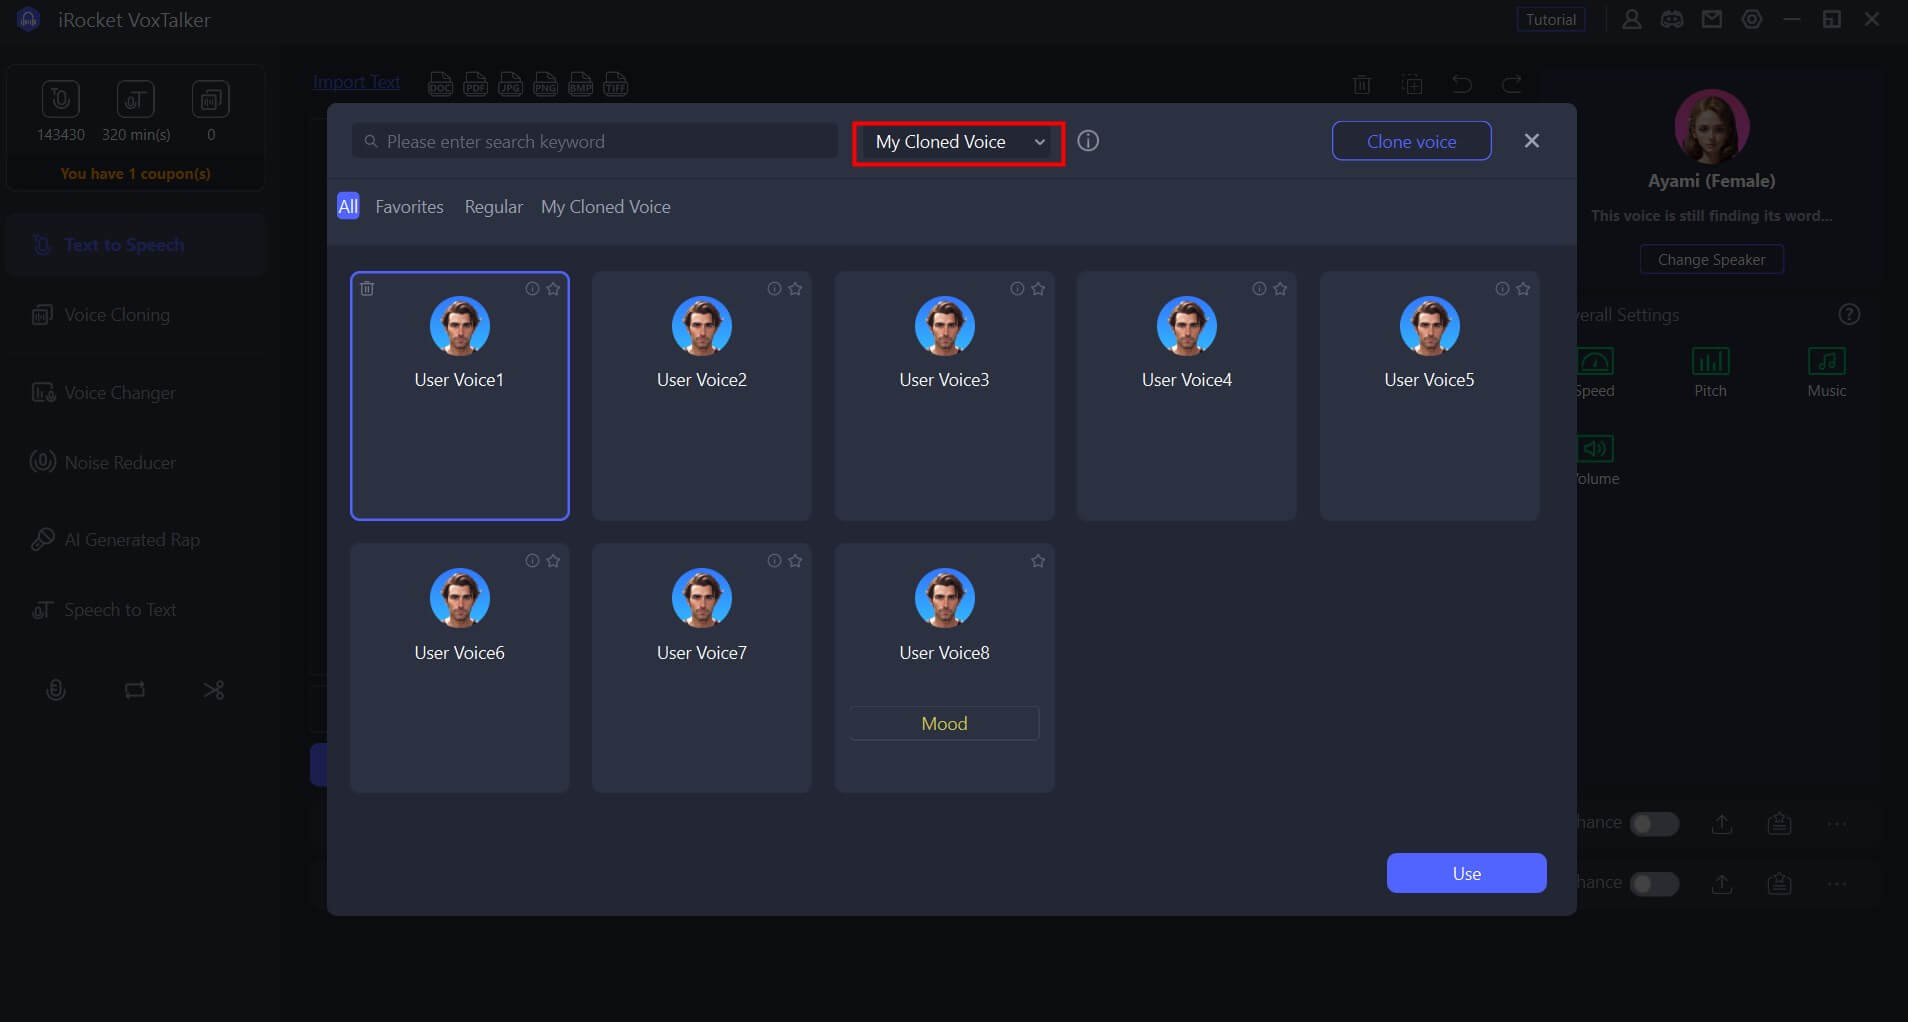
You can also open the speaker selection screen in the text-to-speech tab and narrow down to "My Cloned Voice."
Sound Quality Enhancement
We recommend using this feature if your recordings have problems such as background noise, poor quality, or uneven volume.
Step 1: Select sound enhancement mode
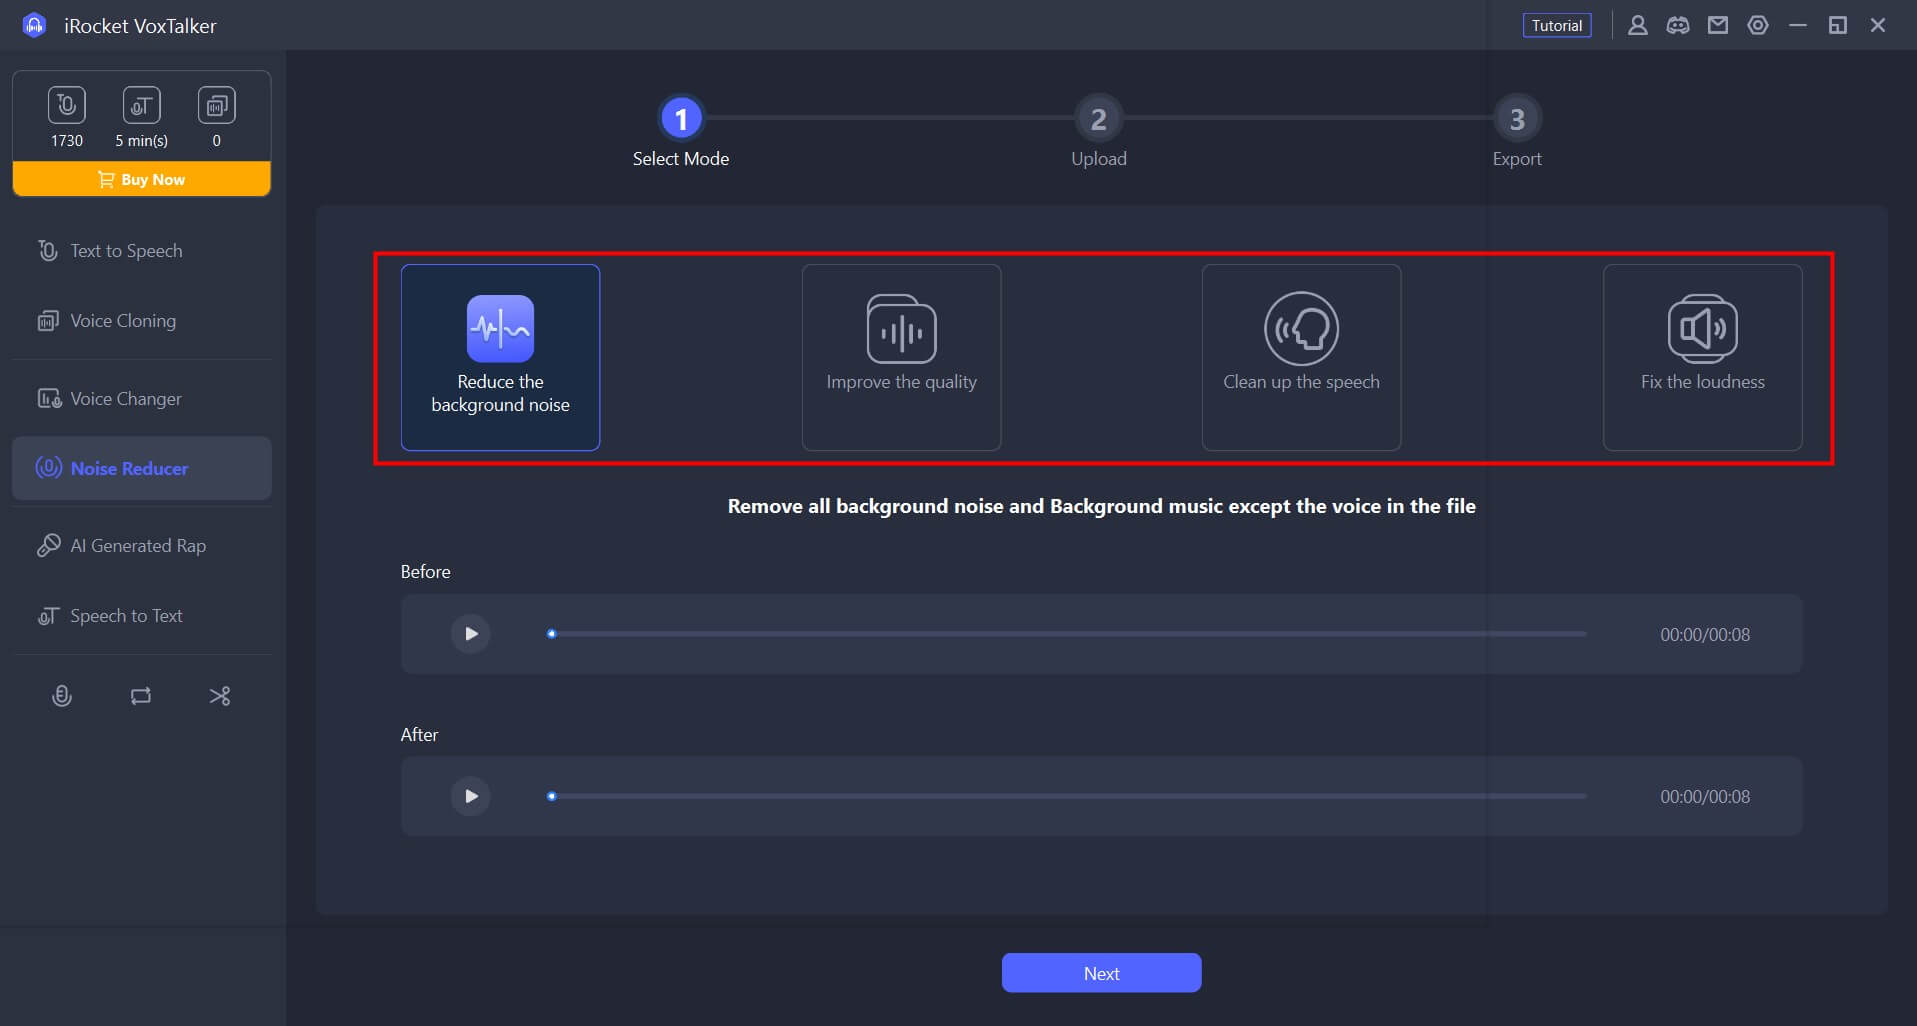
Go to the "Noise Reducer" tab and select one modification mode according to your needs.
Step 2: Import the file
Select the recording type and click or drag to import the audio file. Then click "Next".
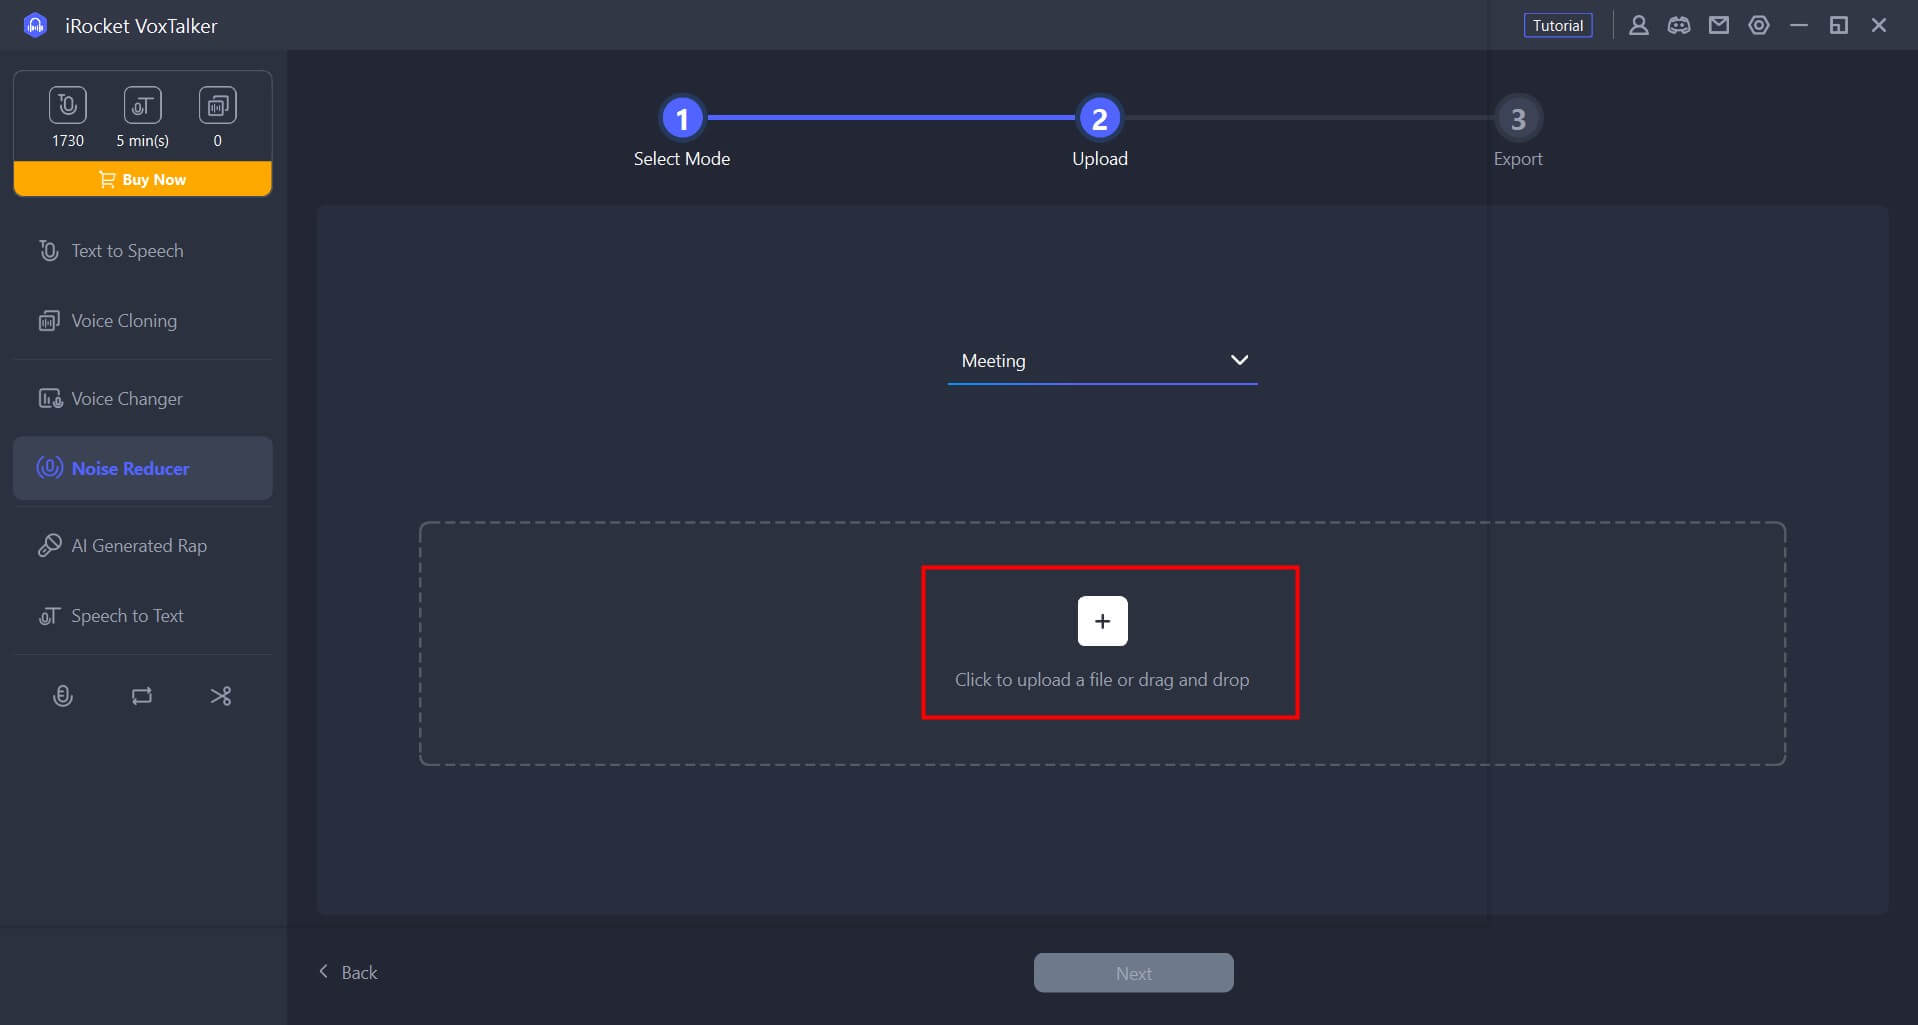
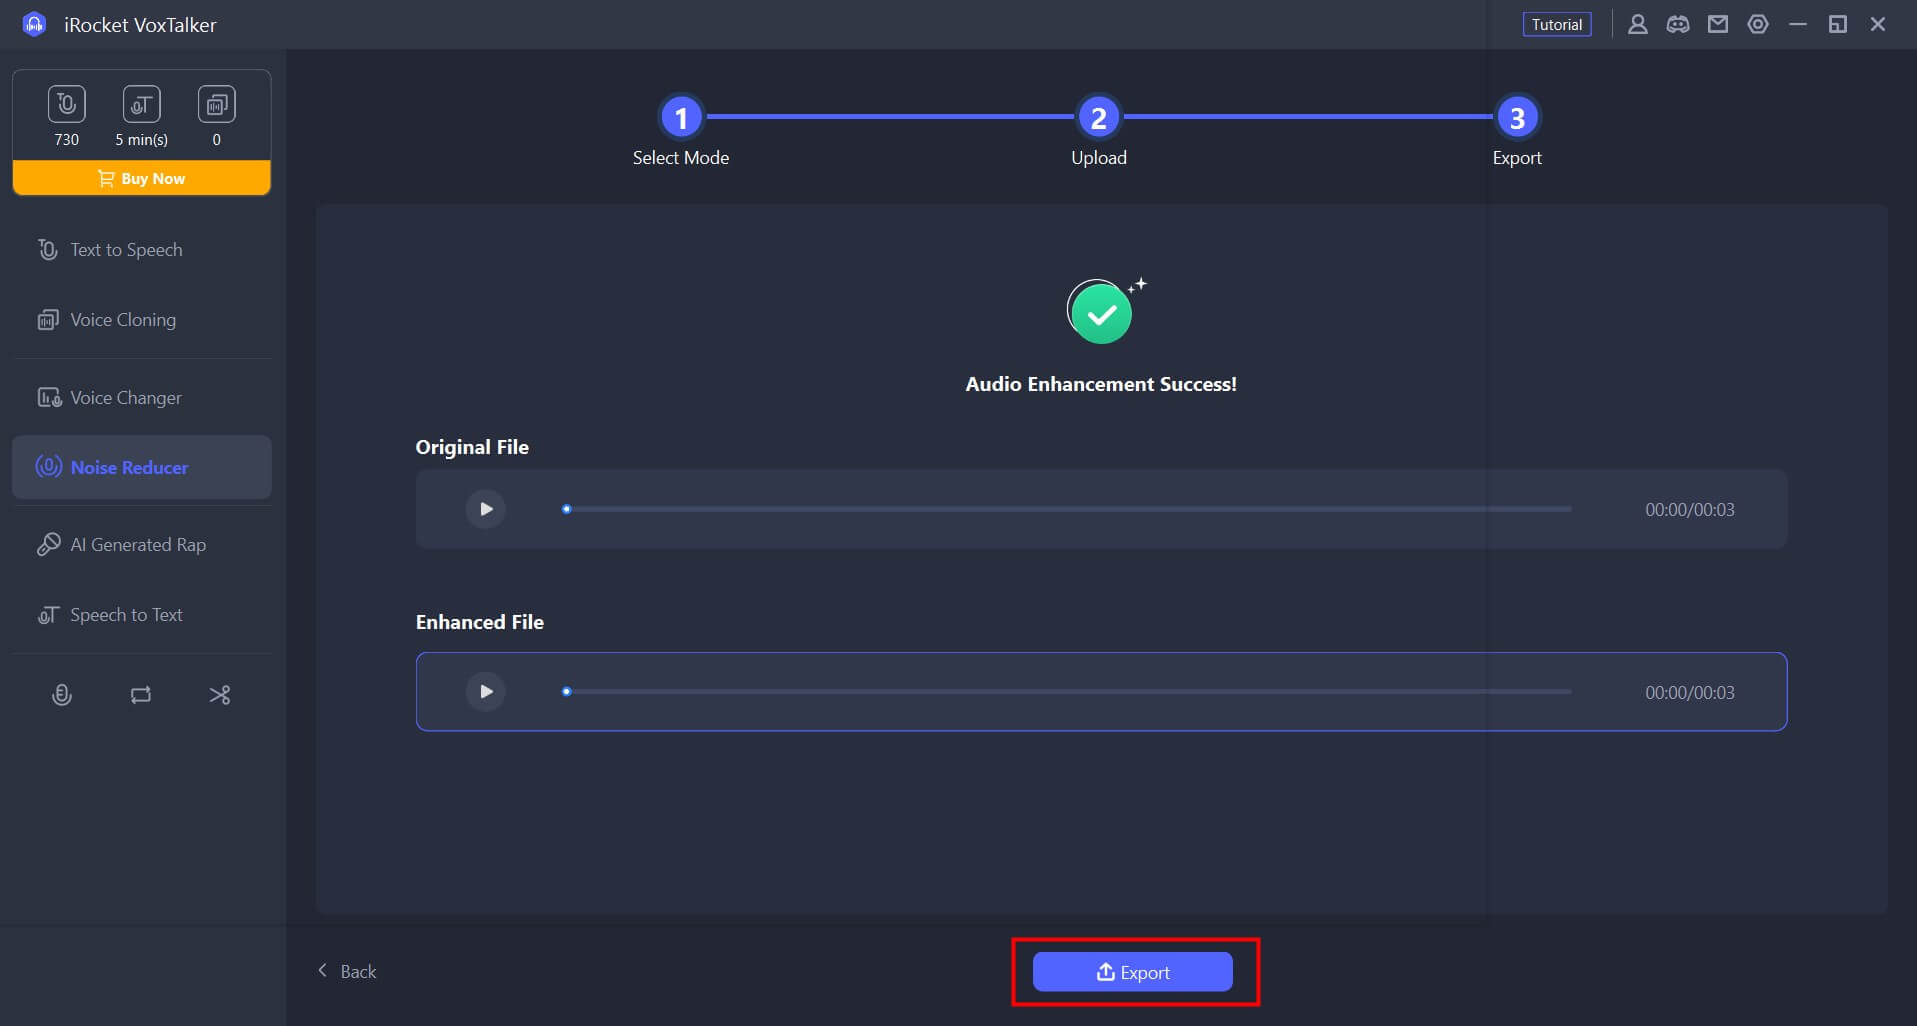
Step 3: Check and save the adjusted audio file
You can also open the speaker selection screen in the text-to-speech tab and narrow down to "My Cloned Voice."
Transcription
VoxTalker can extract and save characters from video and audio files such as mp3/wav/m4a/mp4/mov. This is a very useful feature when working with video subtitles.
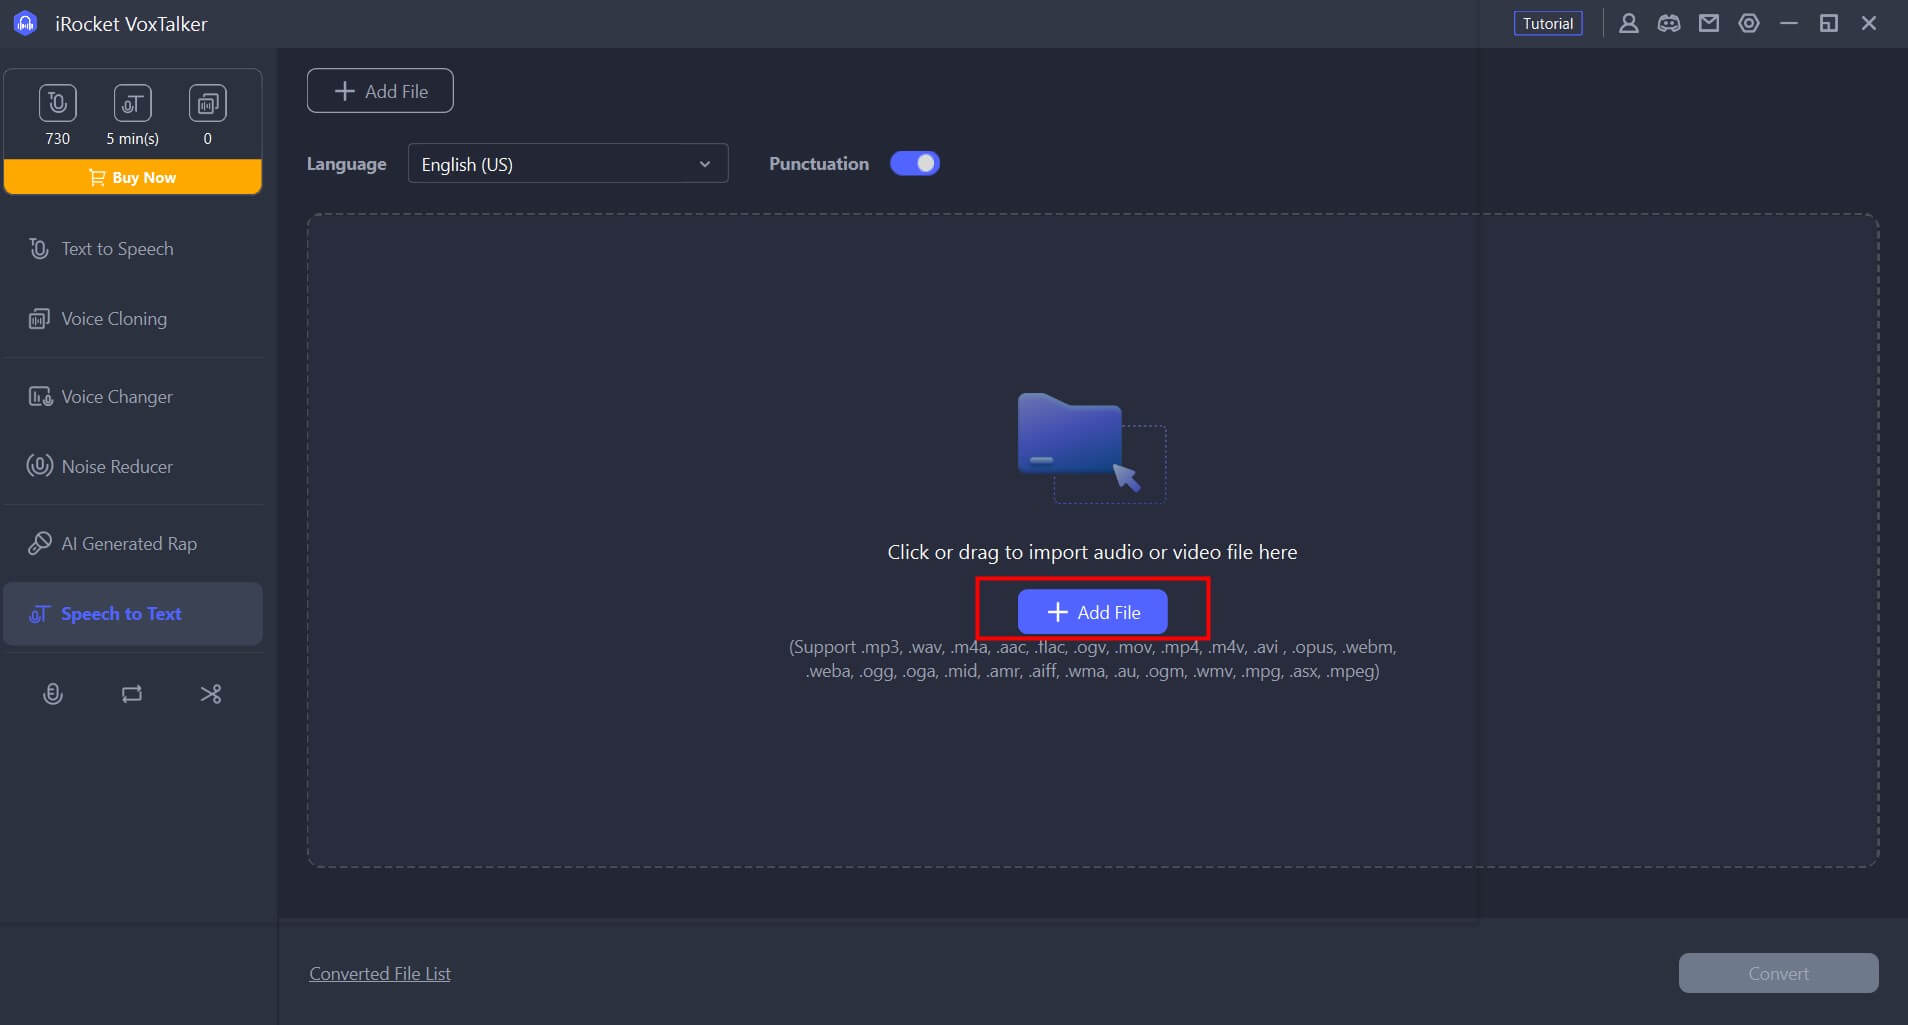
Step 1: Import the file
Go to the Transcription tab and click or drag Add File to import the video or audio that contains the text you want to read.
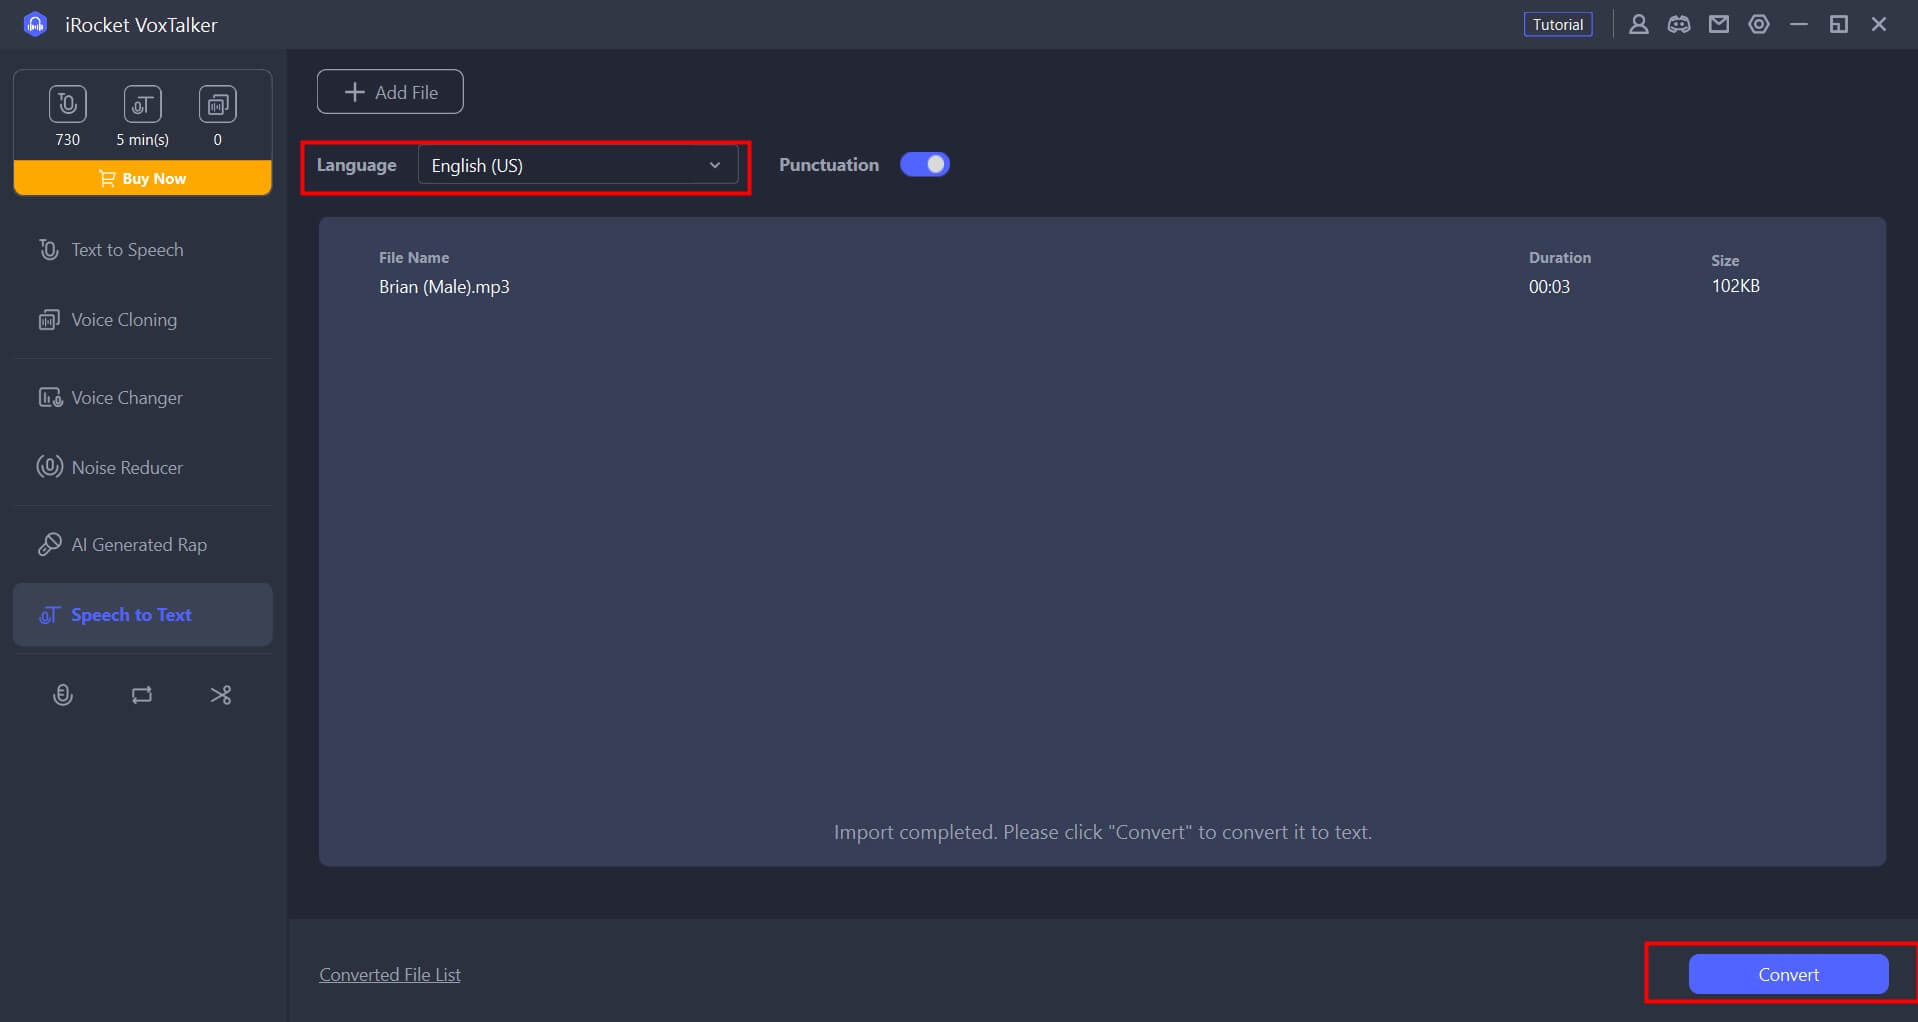
Step 2: Language selection and character extraction
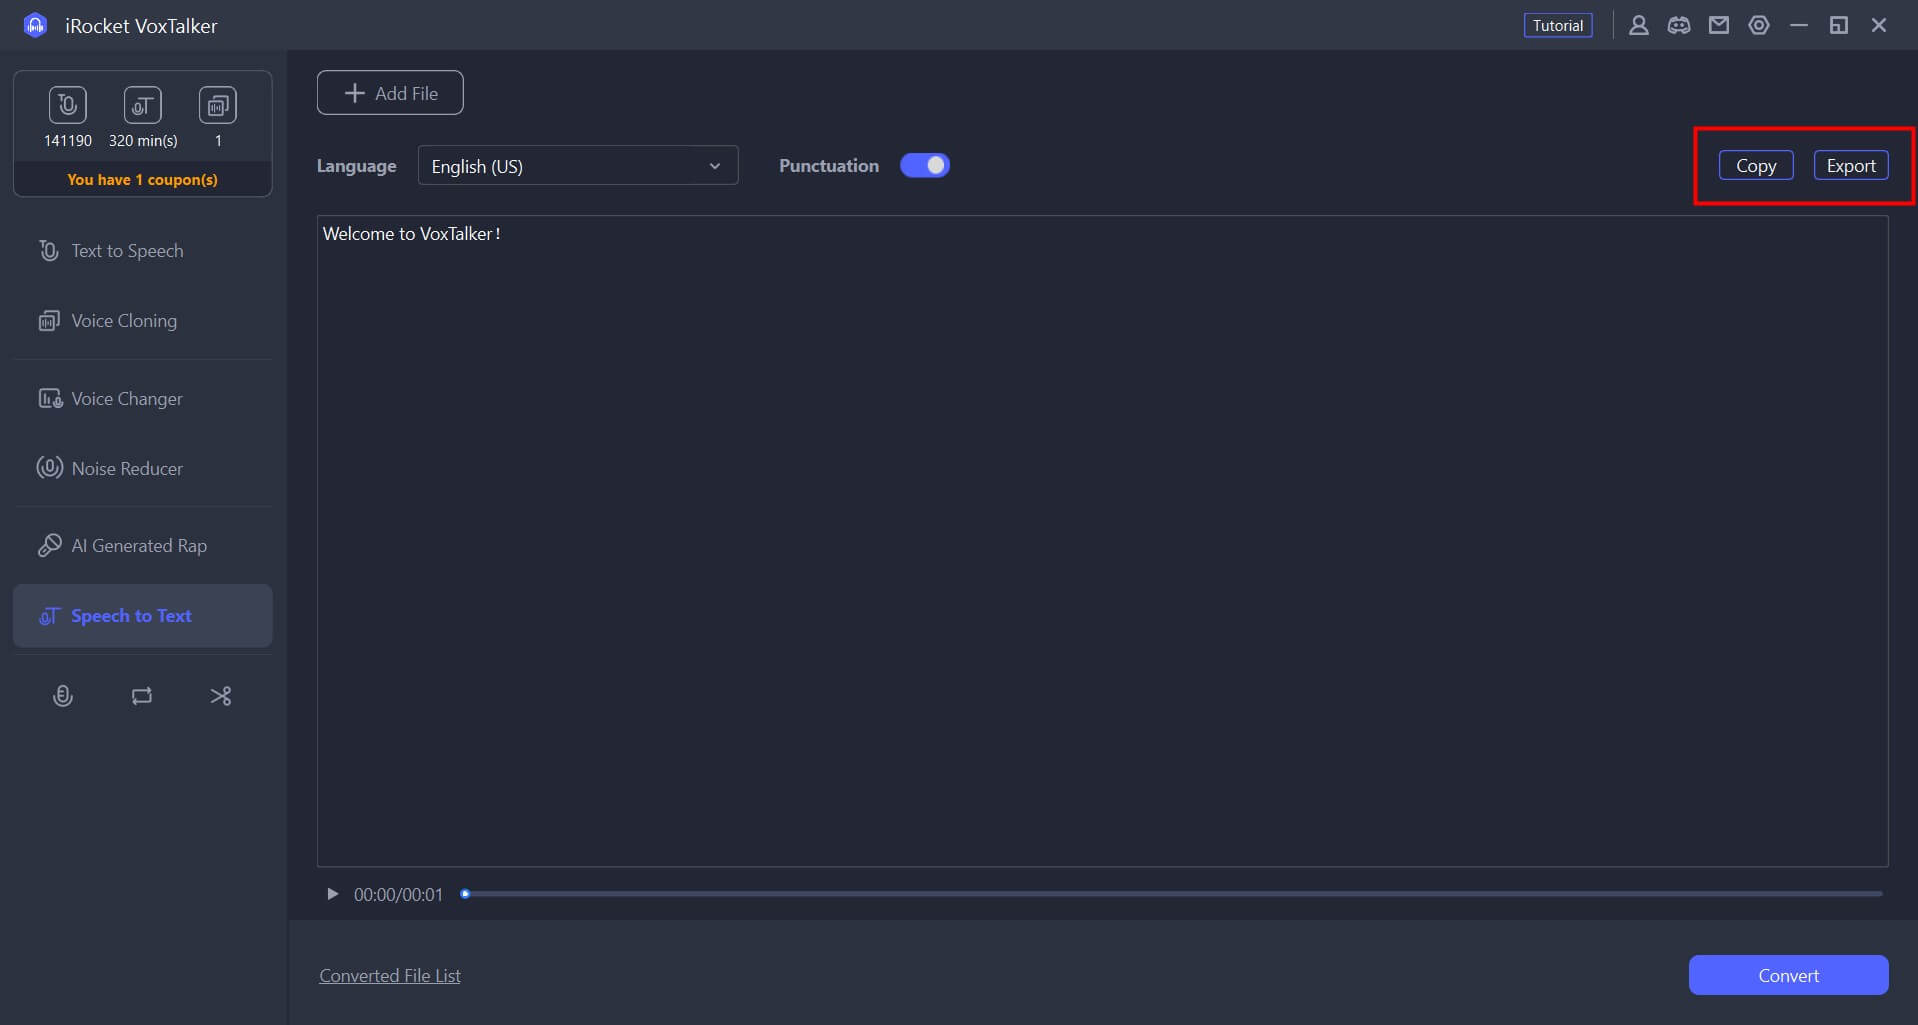
Select the language at the top and click "Convert" at the bottom right to convert the video or audio to text.
Step 3: Save converted characters
Check the converted characters. At the top right, you can copy it or output it as a txt file.
Voice Conversion
VoxTalker has also added a feature called AI voice conversion. This is a feature that allows you to convert the voices of your audio files into celebrity voices.
Supported audio formats are mp3/wav/ogg/opus/flac/aiff/aac/m4a.
Step 1: Import the file
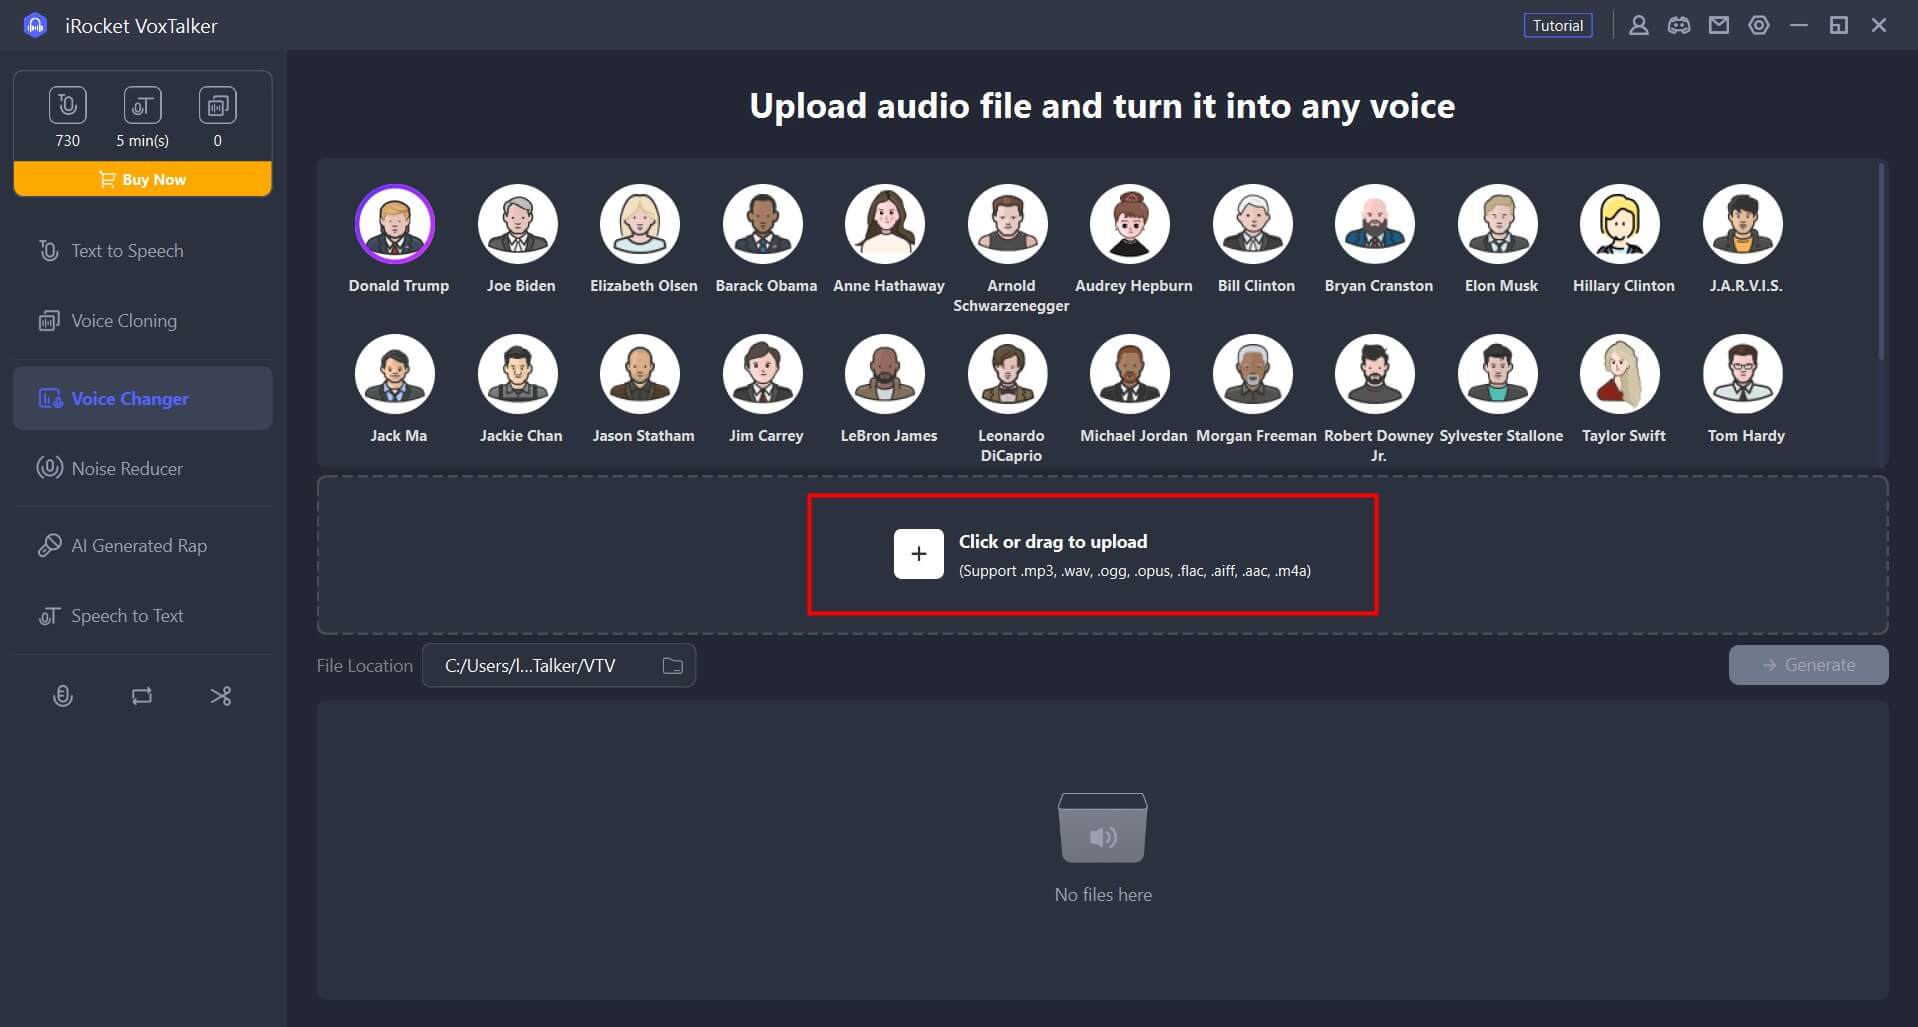
Go to the "Voice Changer" tab and click or drag the middle part to import the audio file whose voice you want to convert.
Step 2: Select AI voice
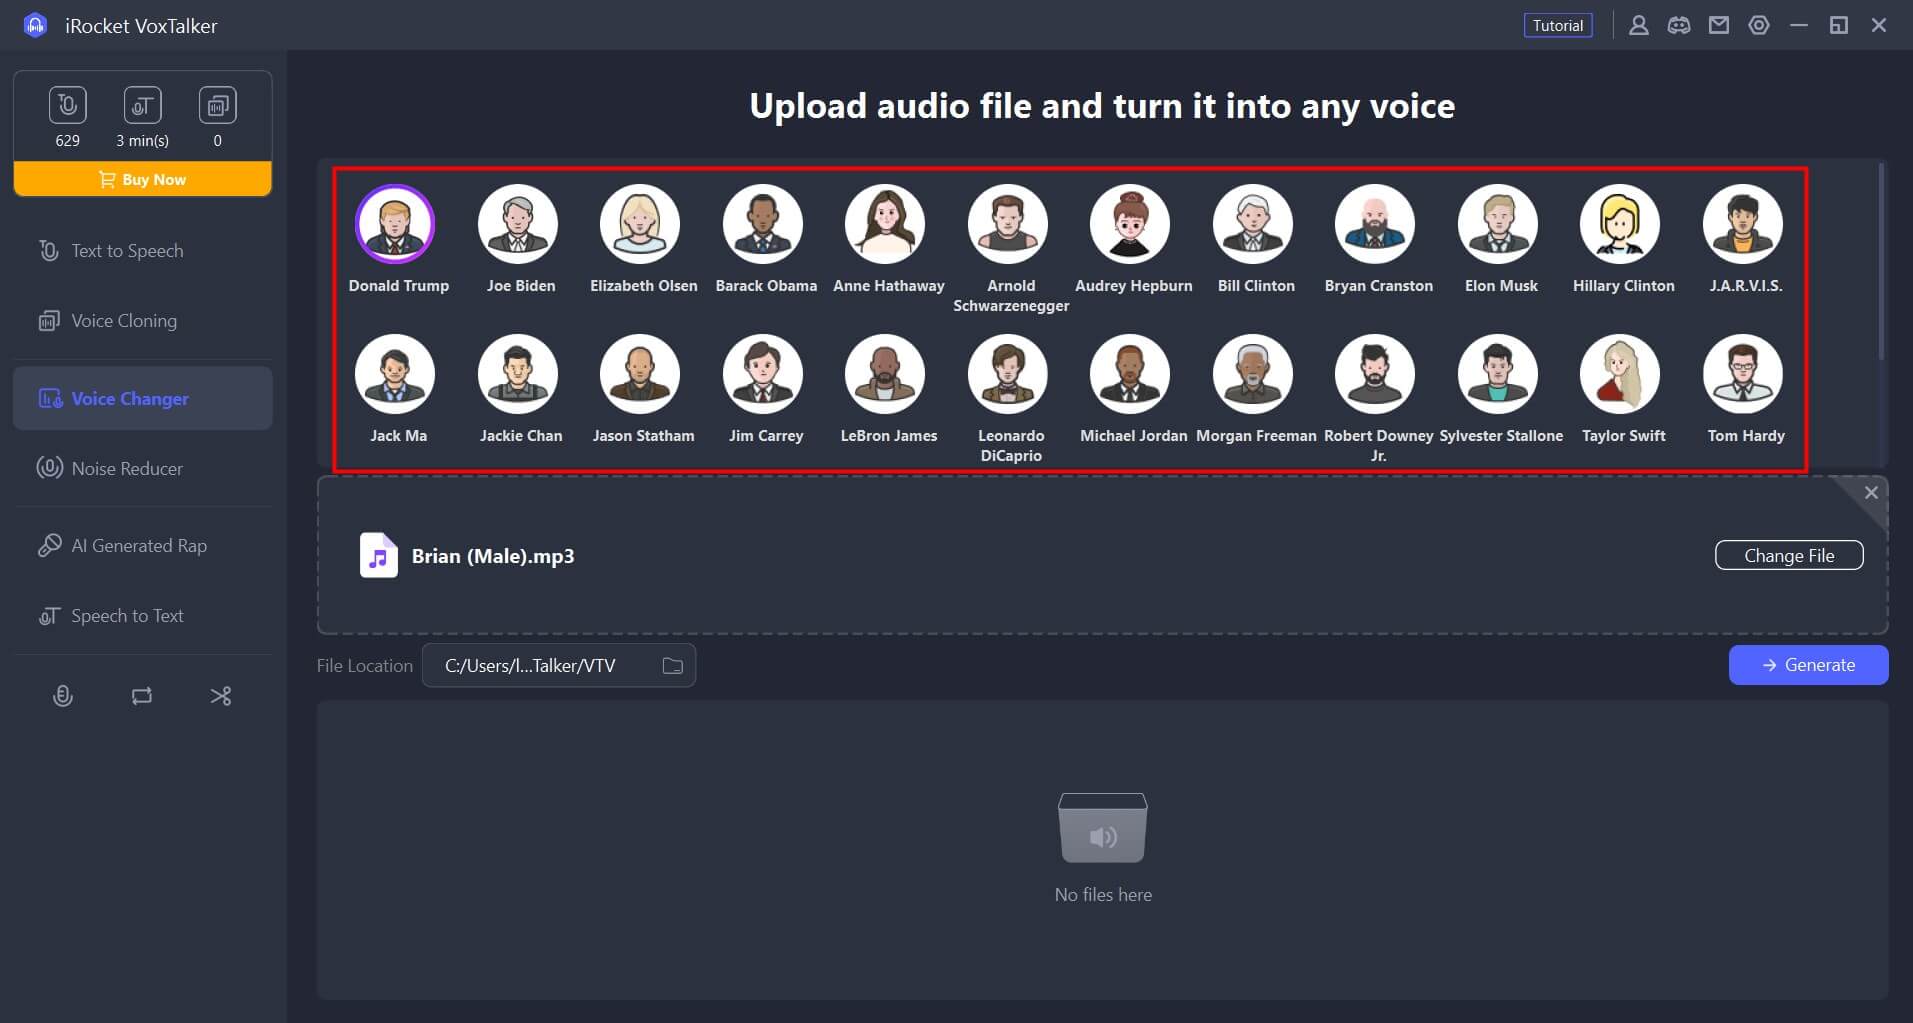
Click on the desired AI voice to listen to it and select the one you want to use.
Step 3: Convert and save
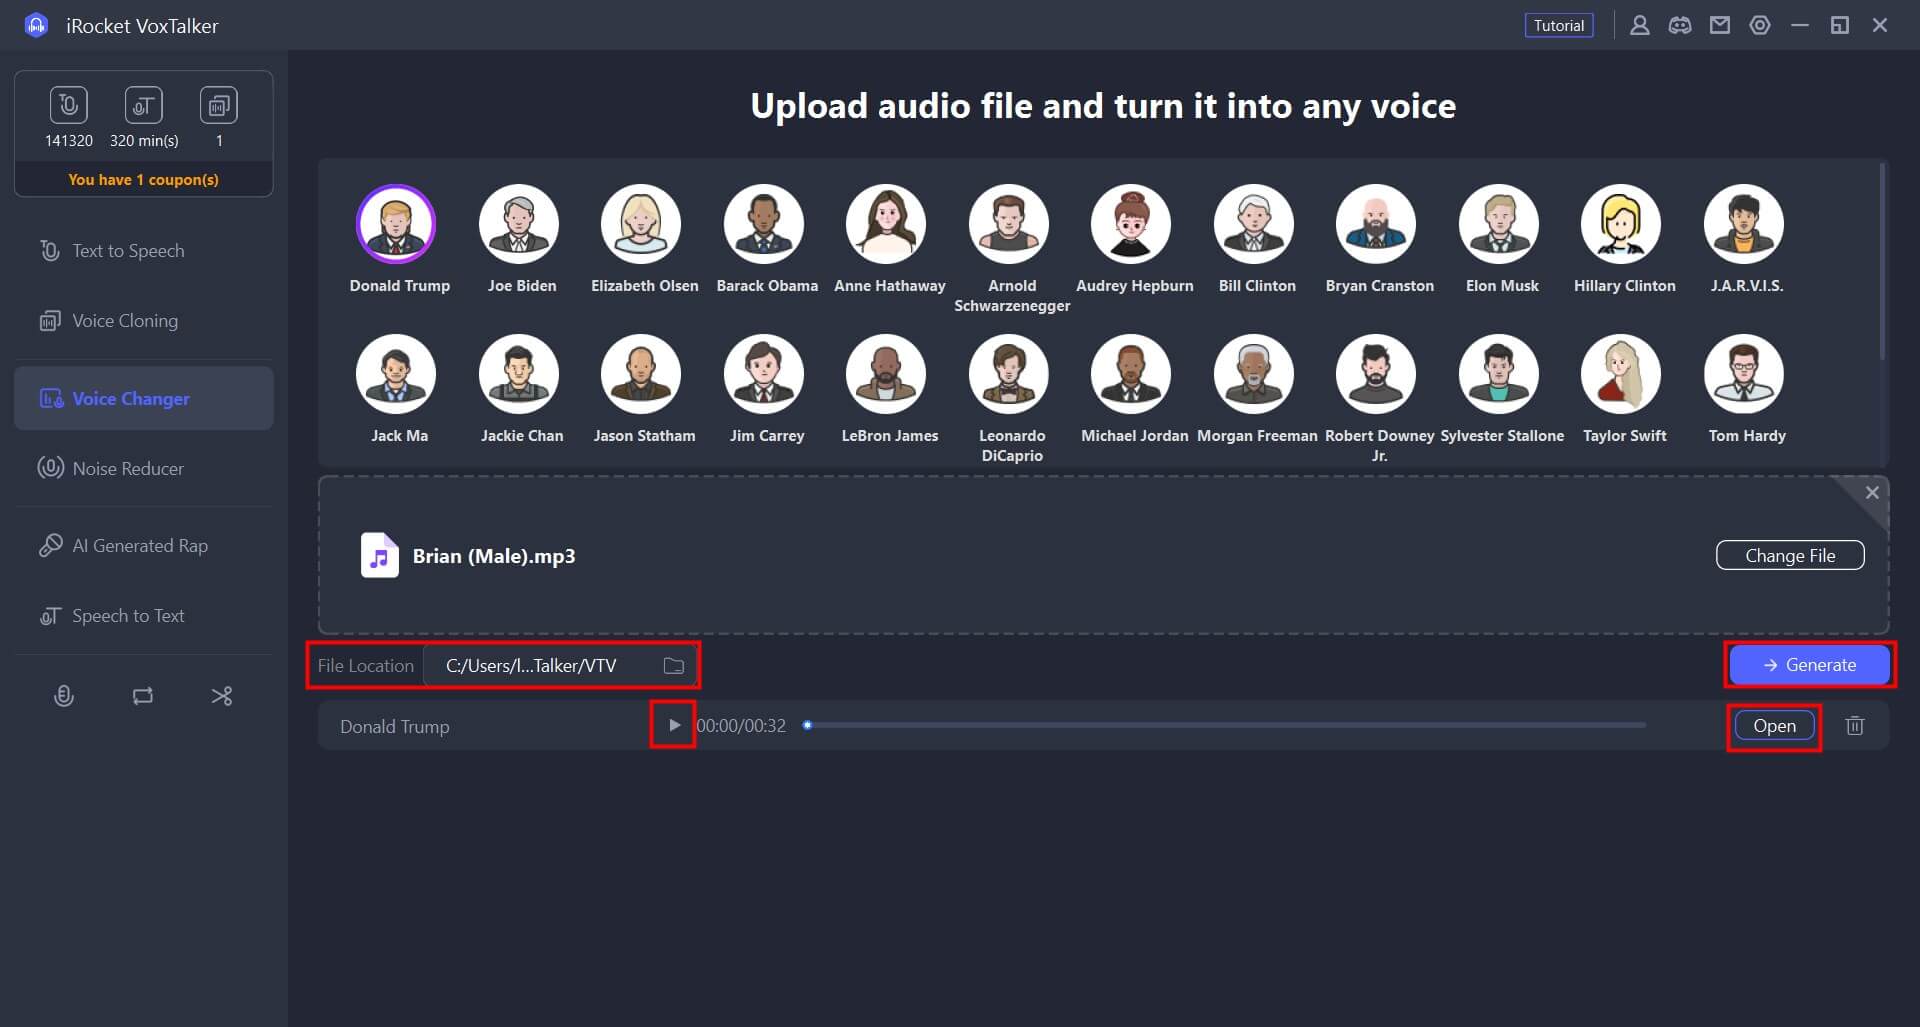
Click "Generate" and wait for a while. Once the conversion is complete, the file will be saved to the destination automatically. You can play or open the file location at the bottom.
AI-Generated Rap
VoxTalker also provides a service that can automatically generate rap and lyrics using AI. If you need audio production, please try it.
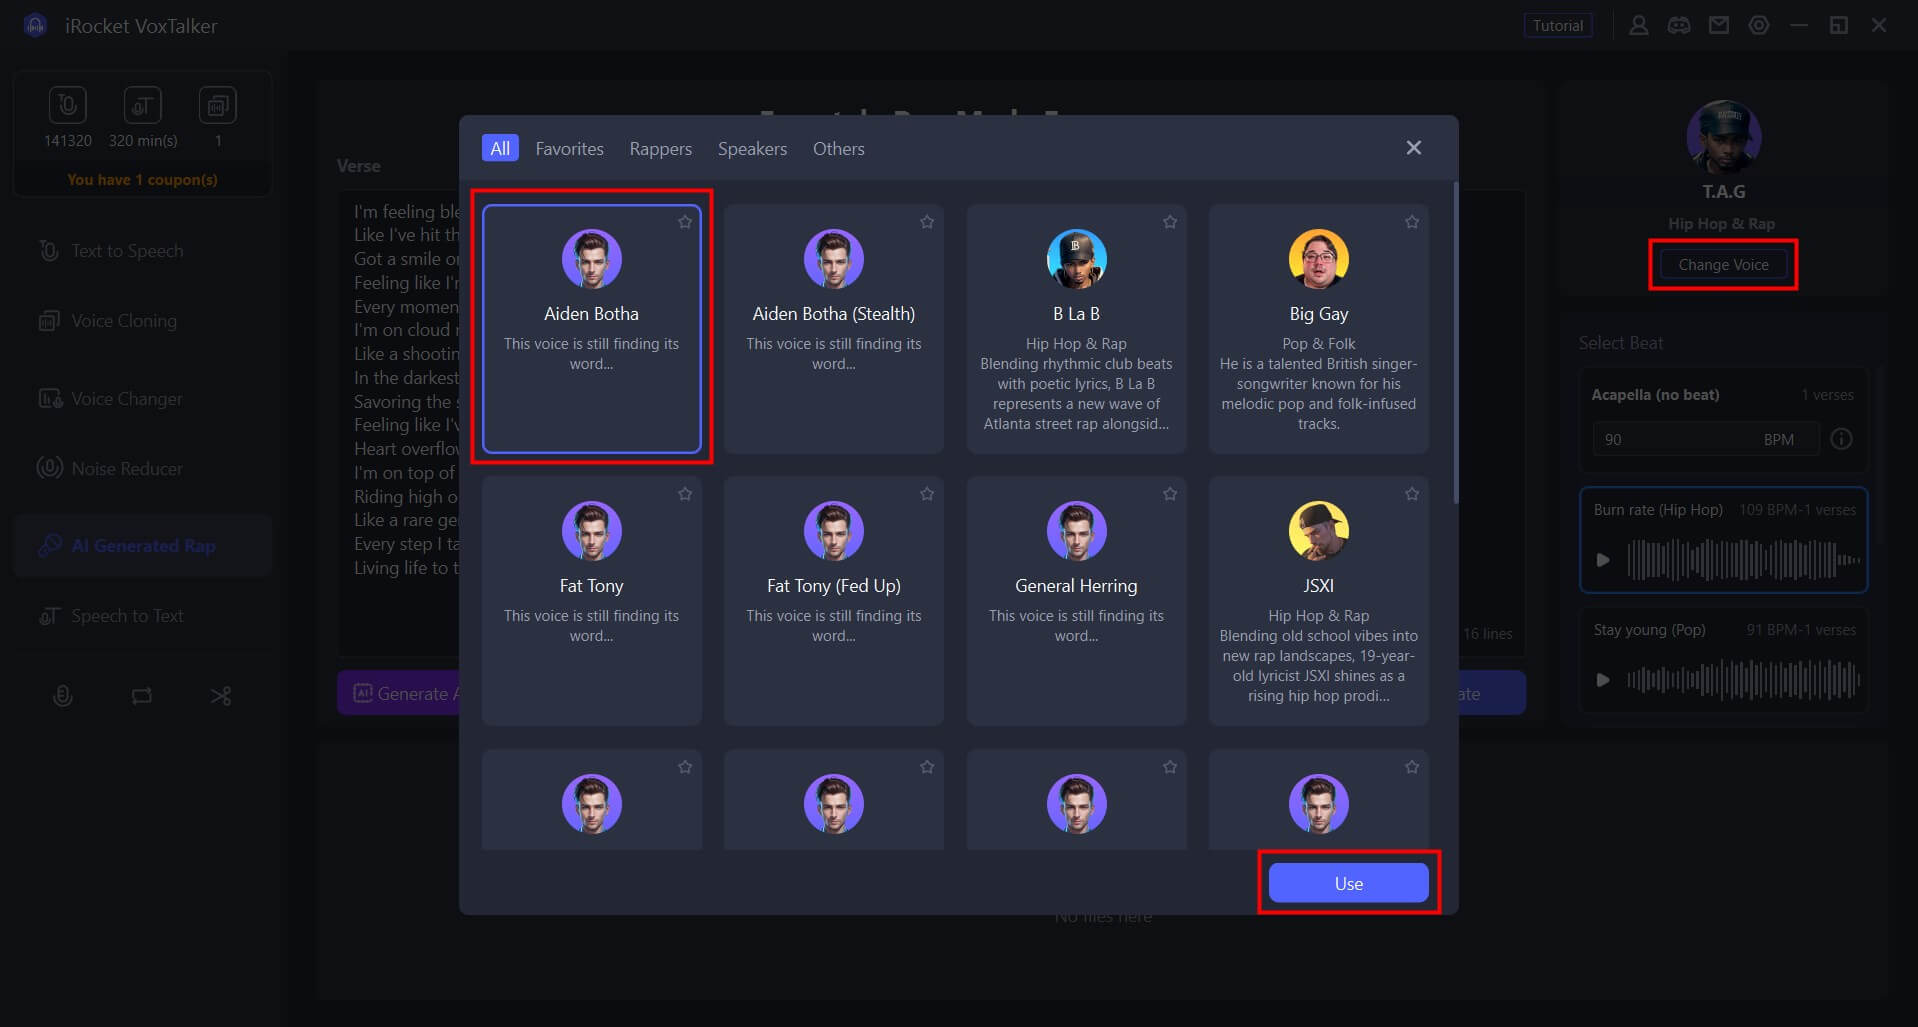
Step 1: Select rapper
Switch to the “AI-Generated Rap” tab and select the rapper by clicking on the doll icon on the right.
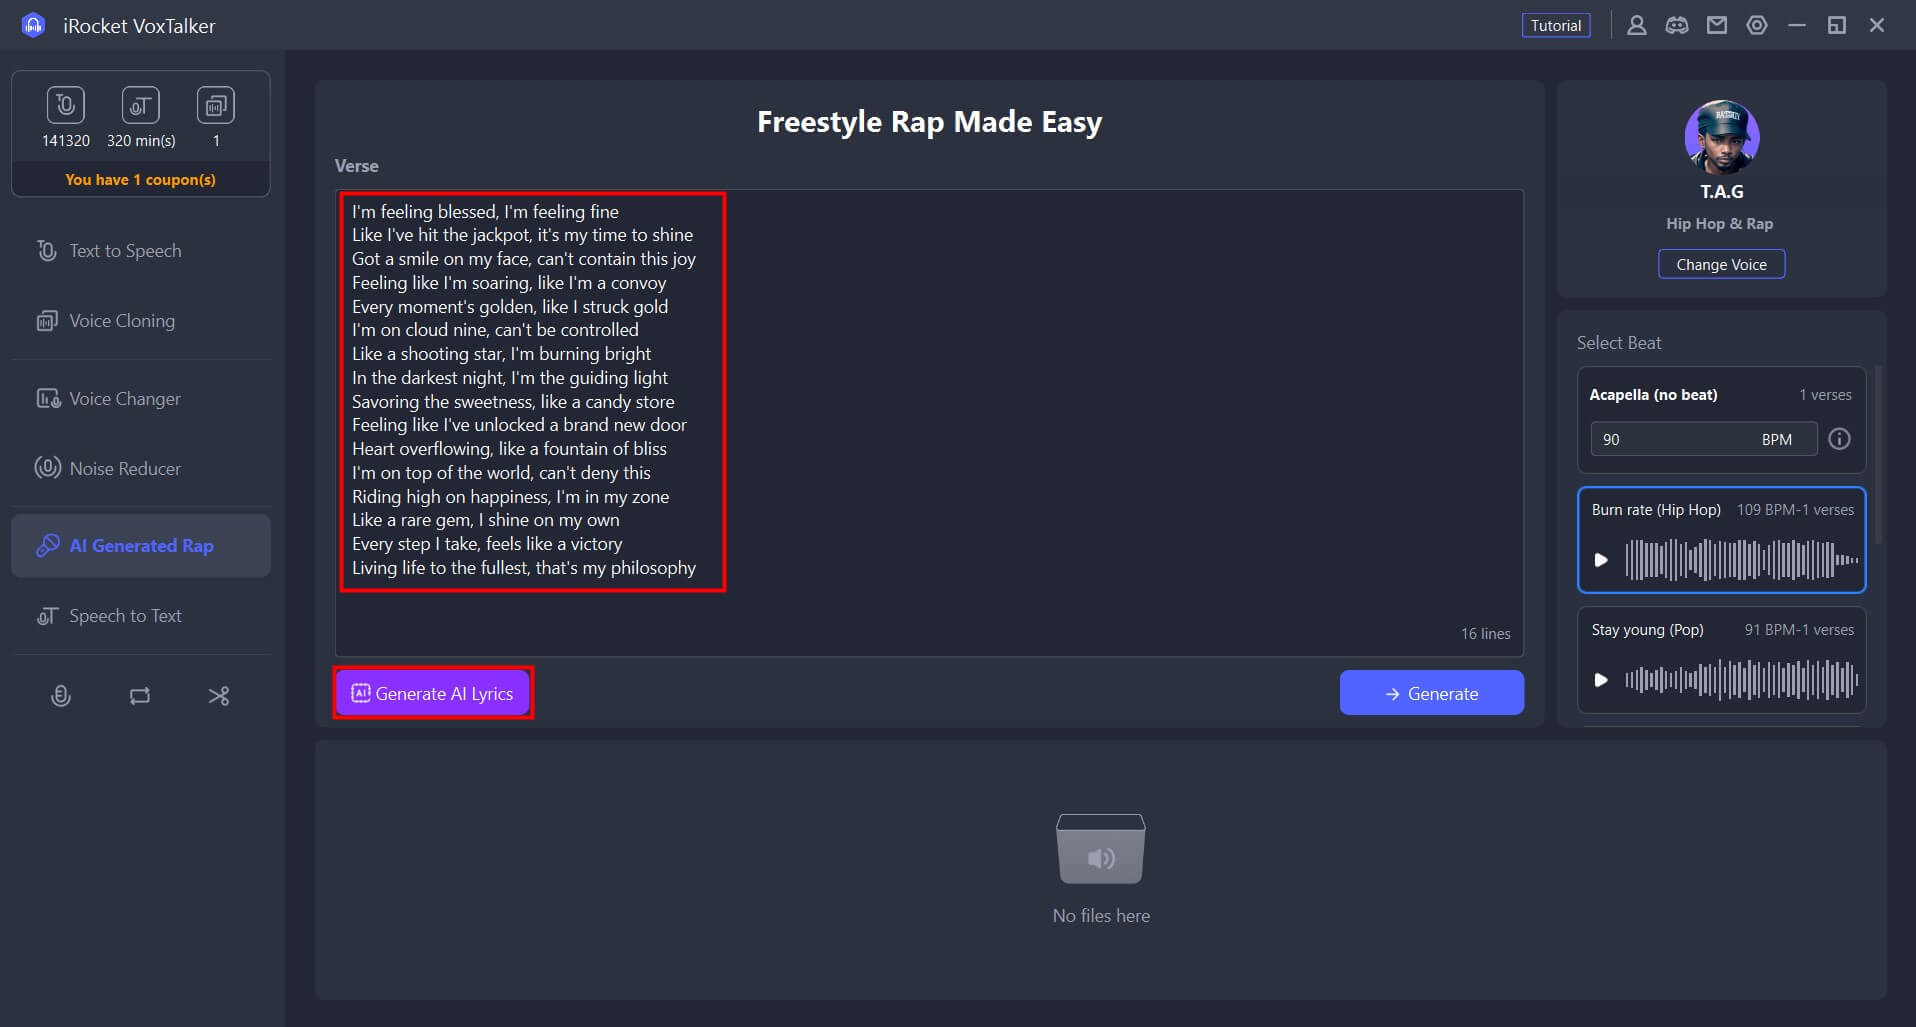
Step 2: Enter lyrics
Enter the lyrics in the text input window and add line breaks if necessary. Click "Generate AI Lyrics" and describe your theme to generate and copy the lyrics.
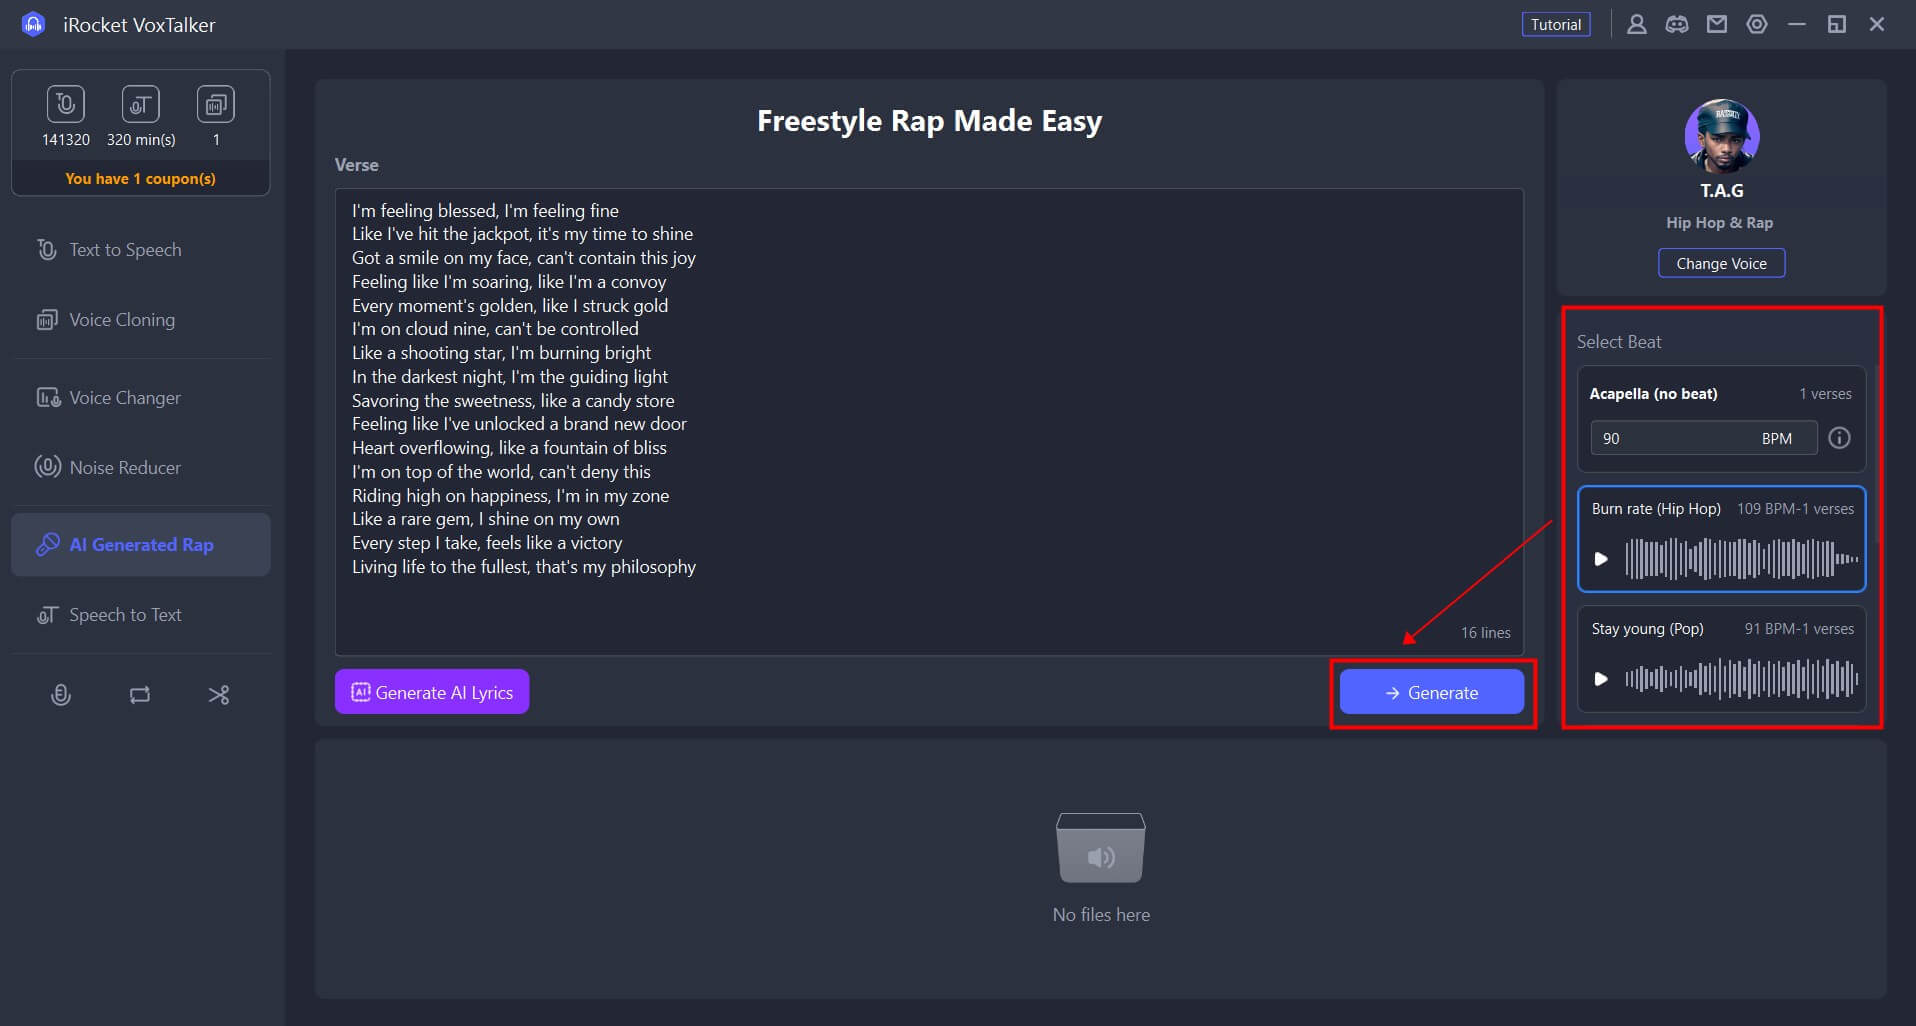
Step 3: Generation and storage
Listen to the beat on the right before making your selection. After that, click "Generate", wait for a while, and the generated rap will be displayed at the bottom. You can play it or output it.
Record
You can record in real-time with VoxTalker and output in MP3/AAc/WAV file format. This feature allows you to easily record and edit online meetings, personal notes, speeches, lectures, and songs.
Step 1: Set sound quality etc.
Go to the “Record” tab. Click the "Settings (gear)" icon in the upper right corner to select the audio quality and save location. Also, set the recording volume, device, and file format on the toolbar.
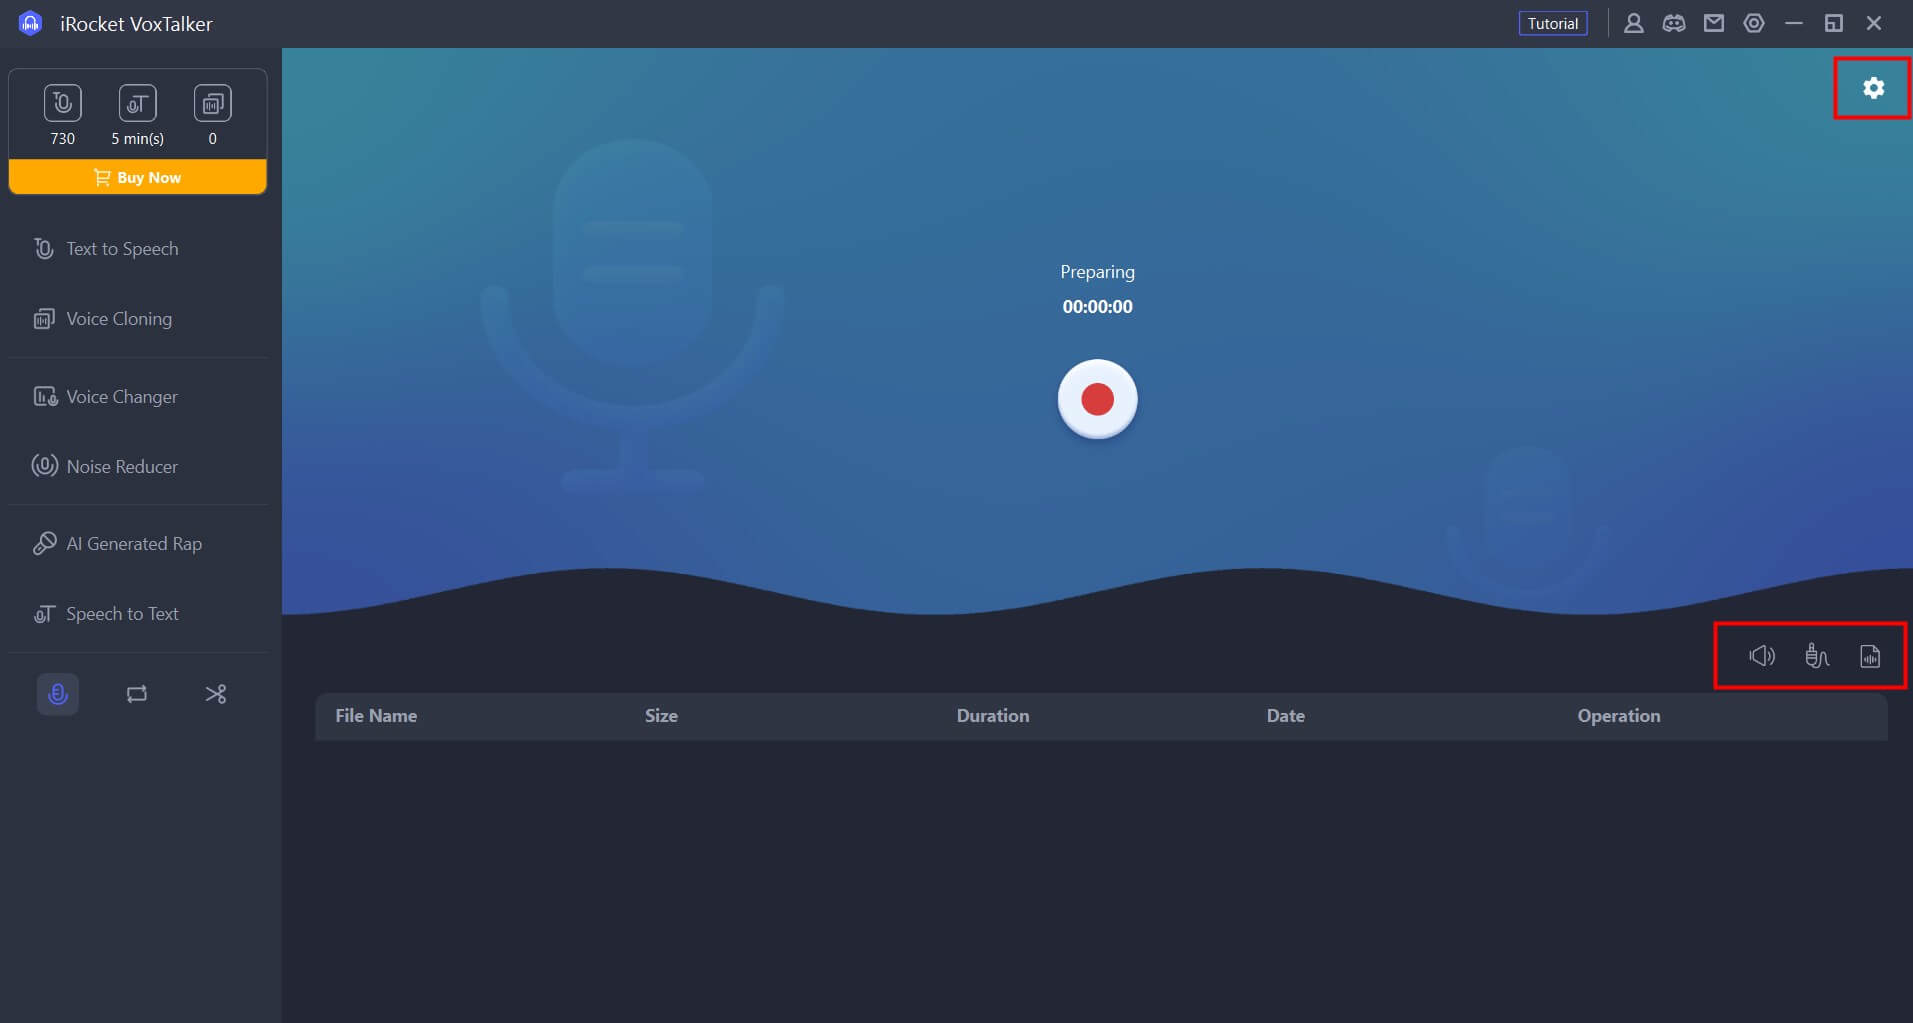
Step 2: Start recording
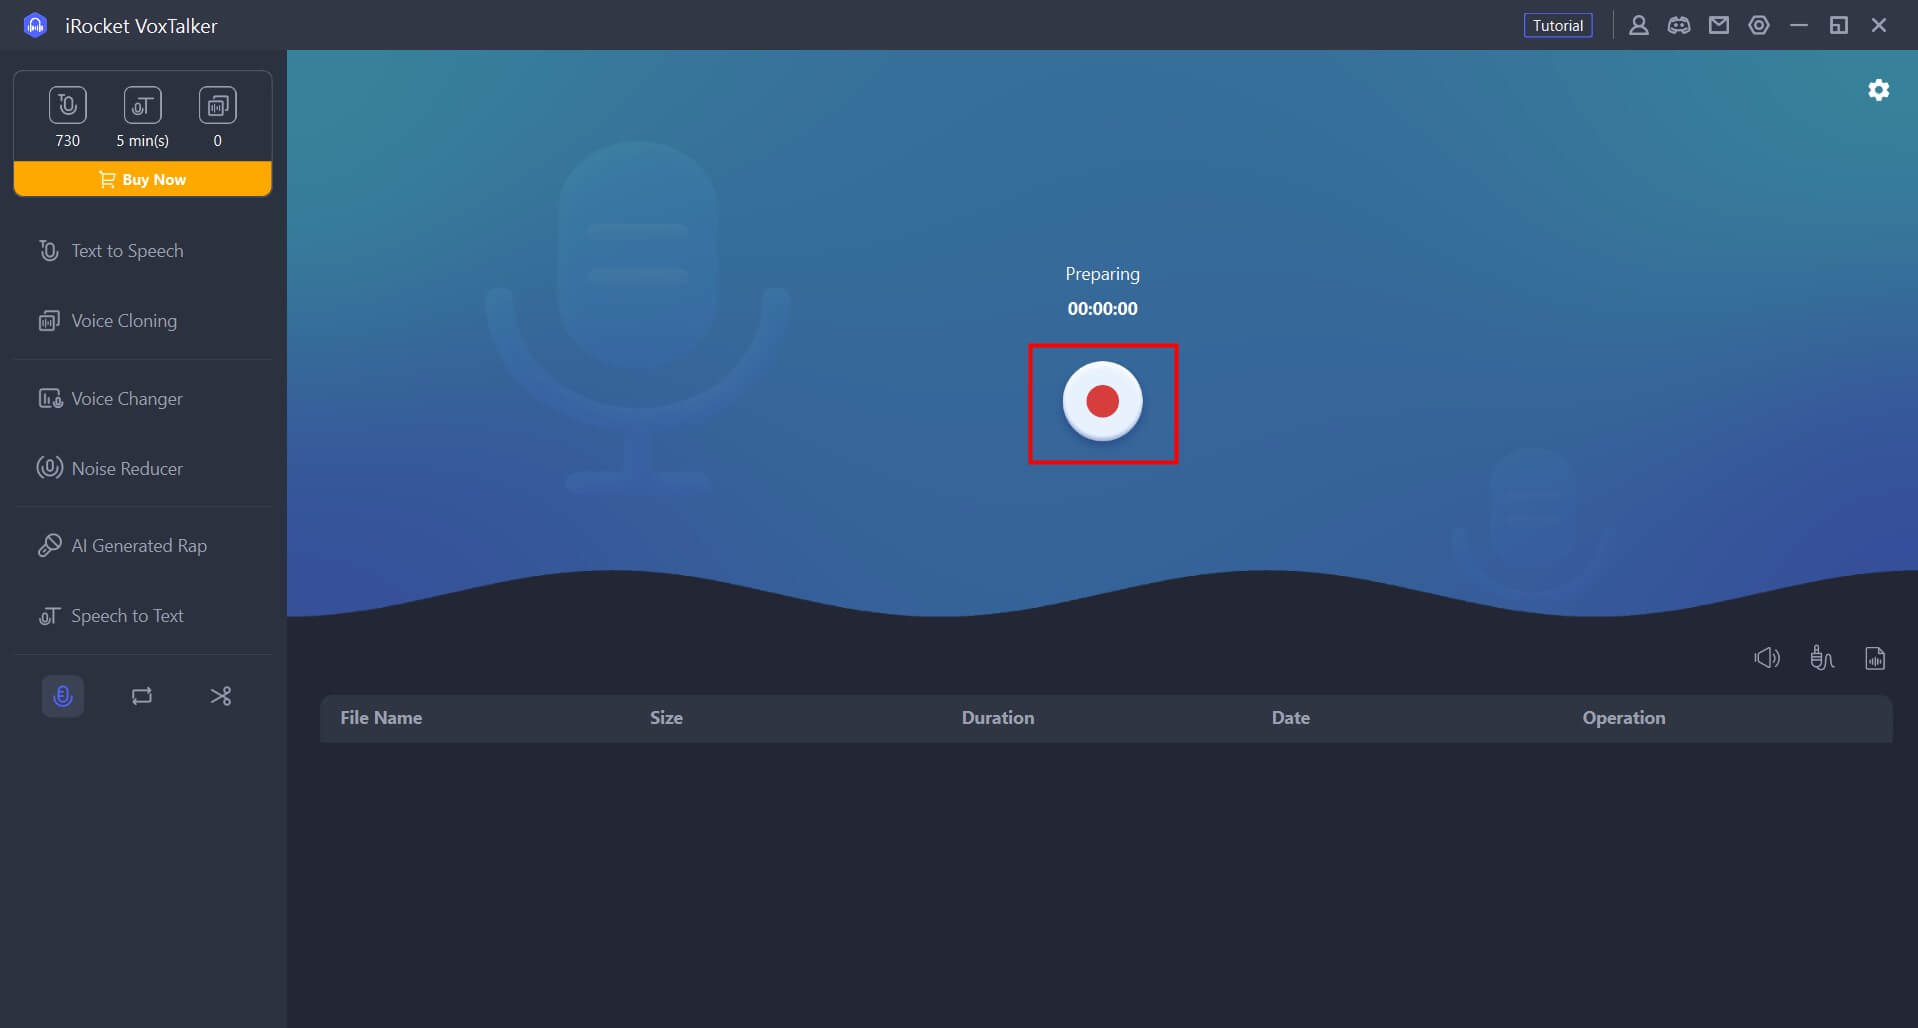
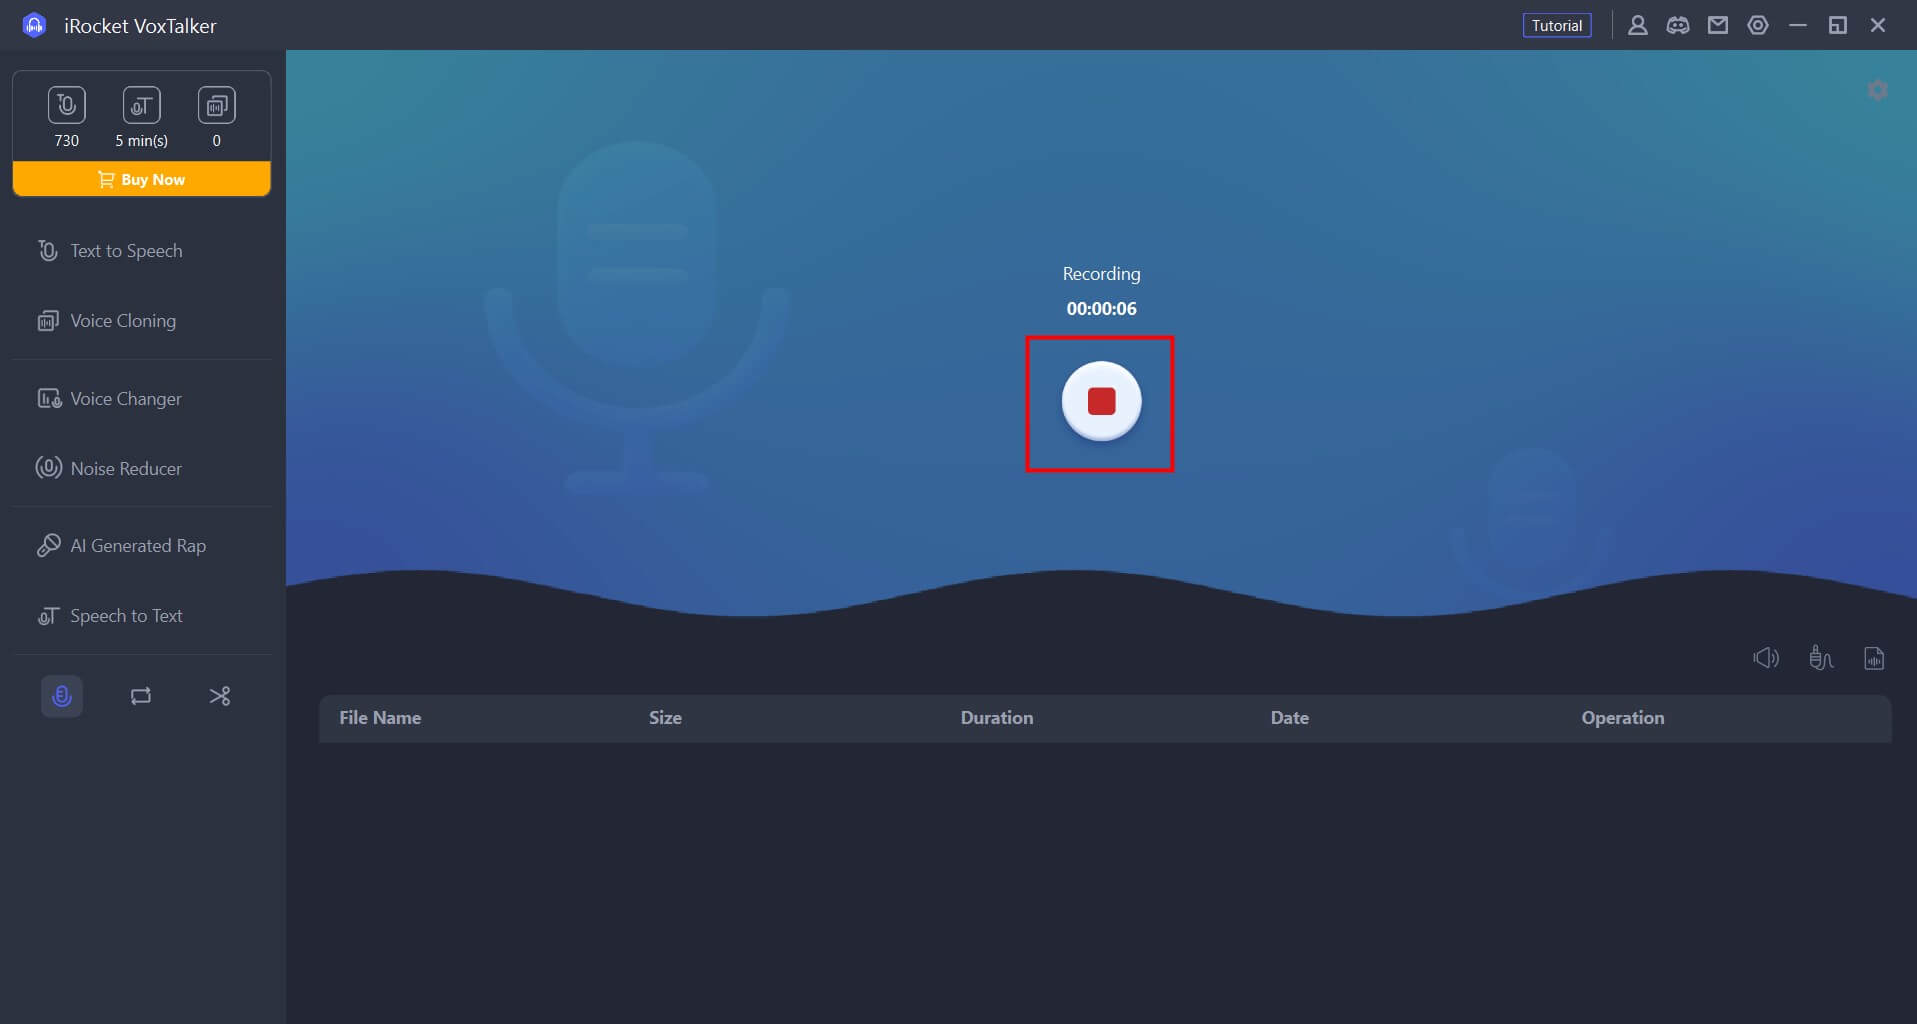
Click the red "●" button on the screen to start recording. Click again to end the recording.
Step 3: Check and output your recording
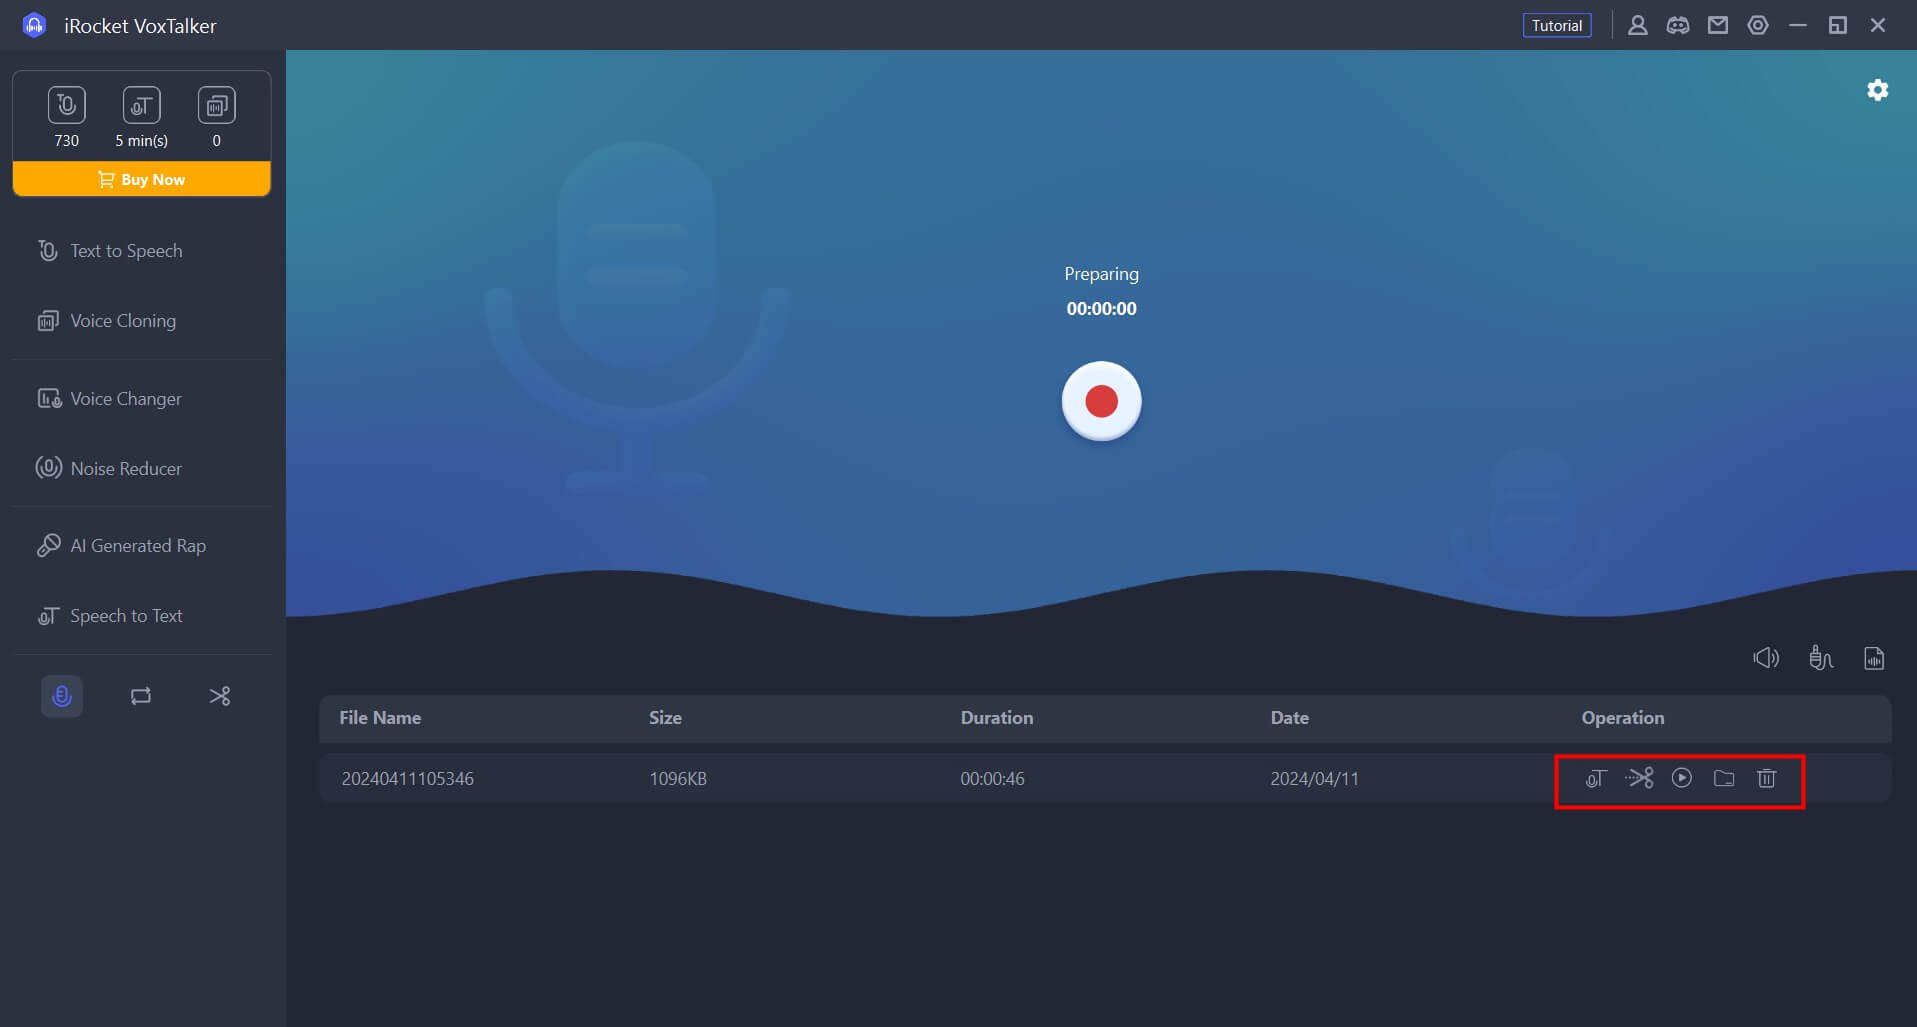
The new recording will be added to the list below, displaying the recording's file name, size, length, and creation date. On the right side, you can transcribe, edit, play/stop, open folders, delete, etc.
Audio Format Convert
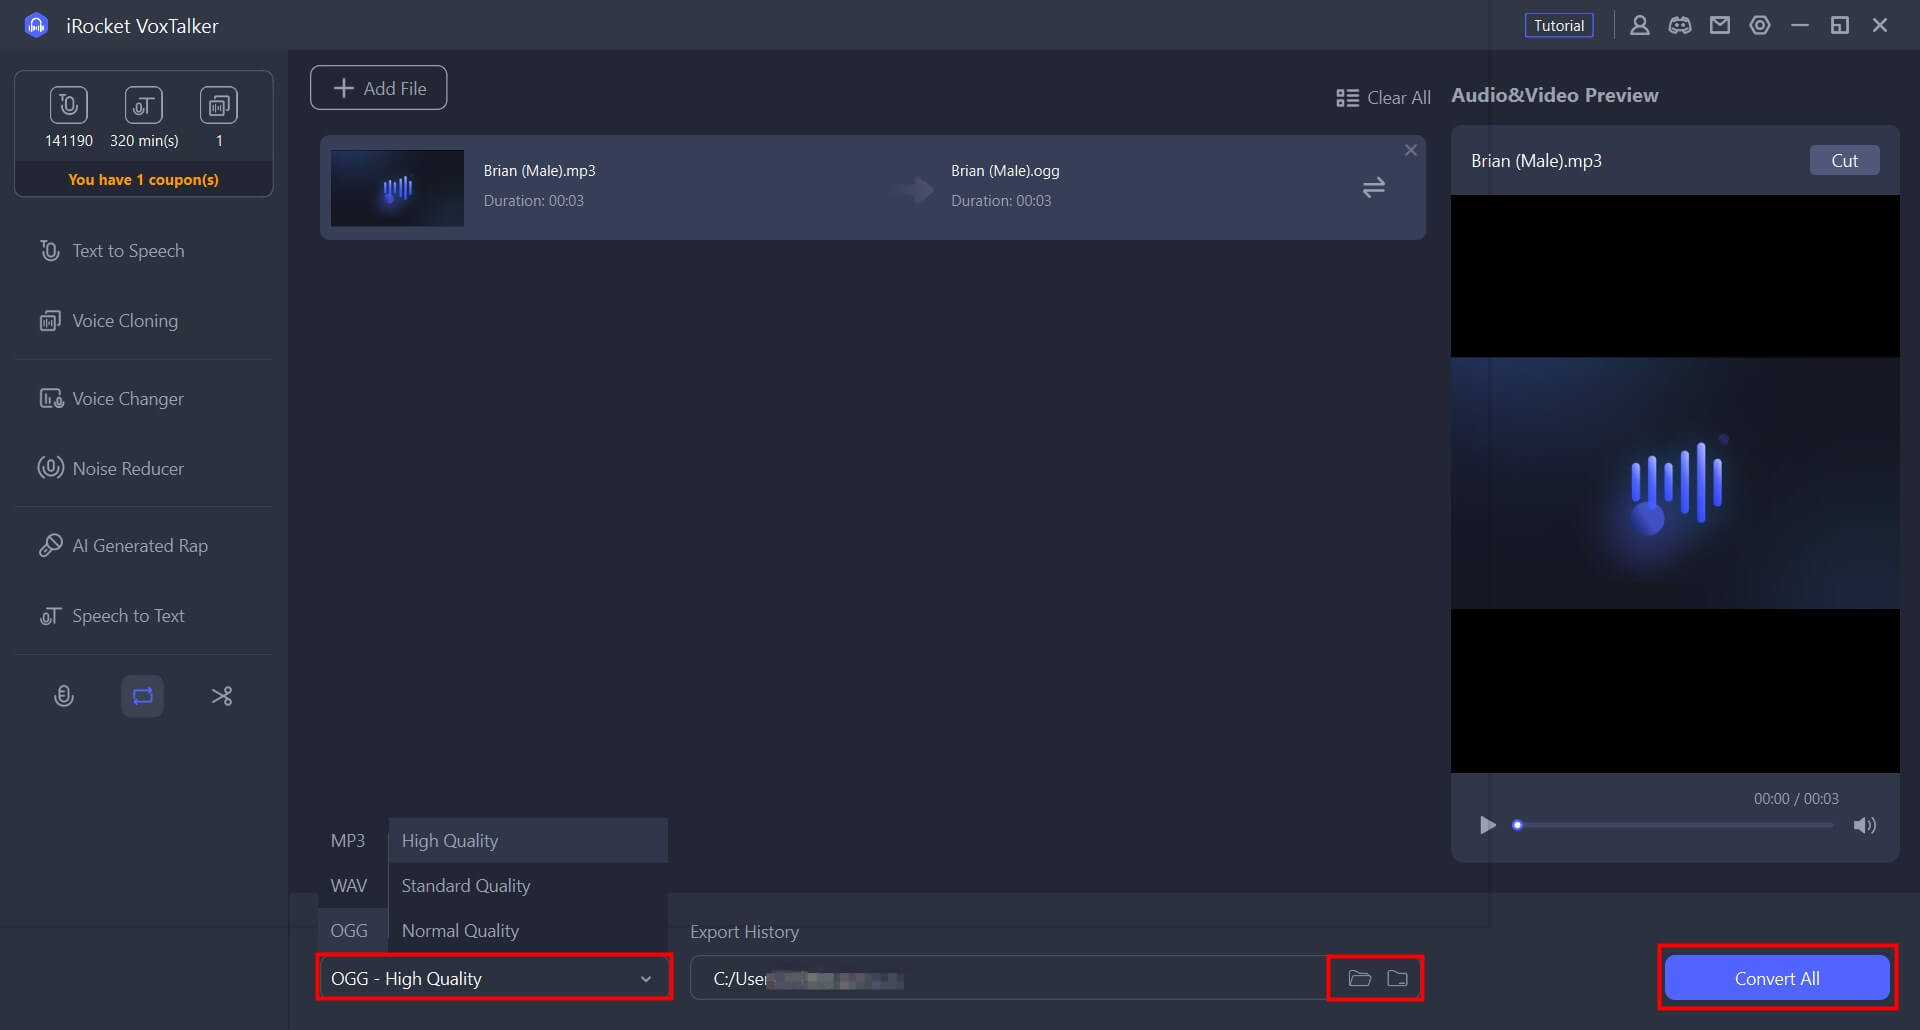
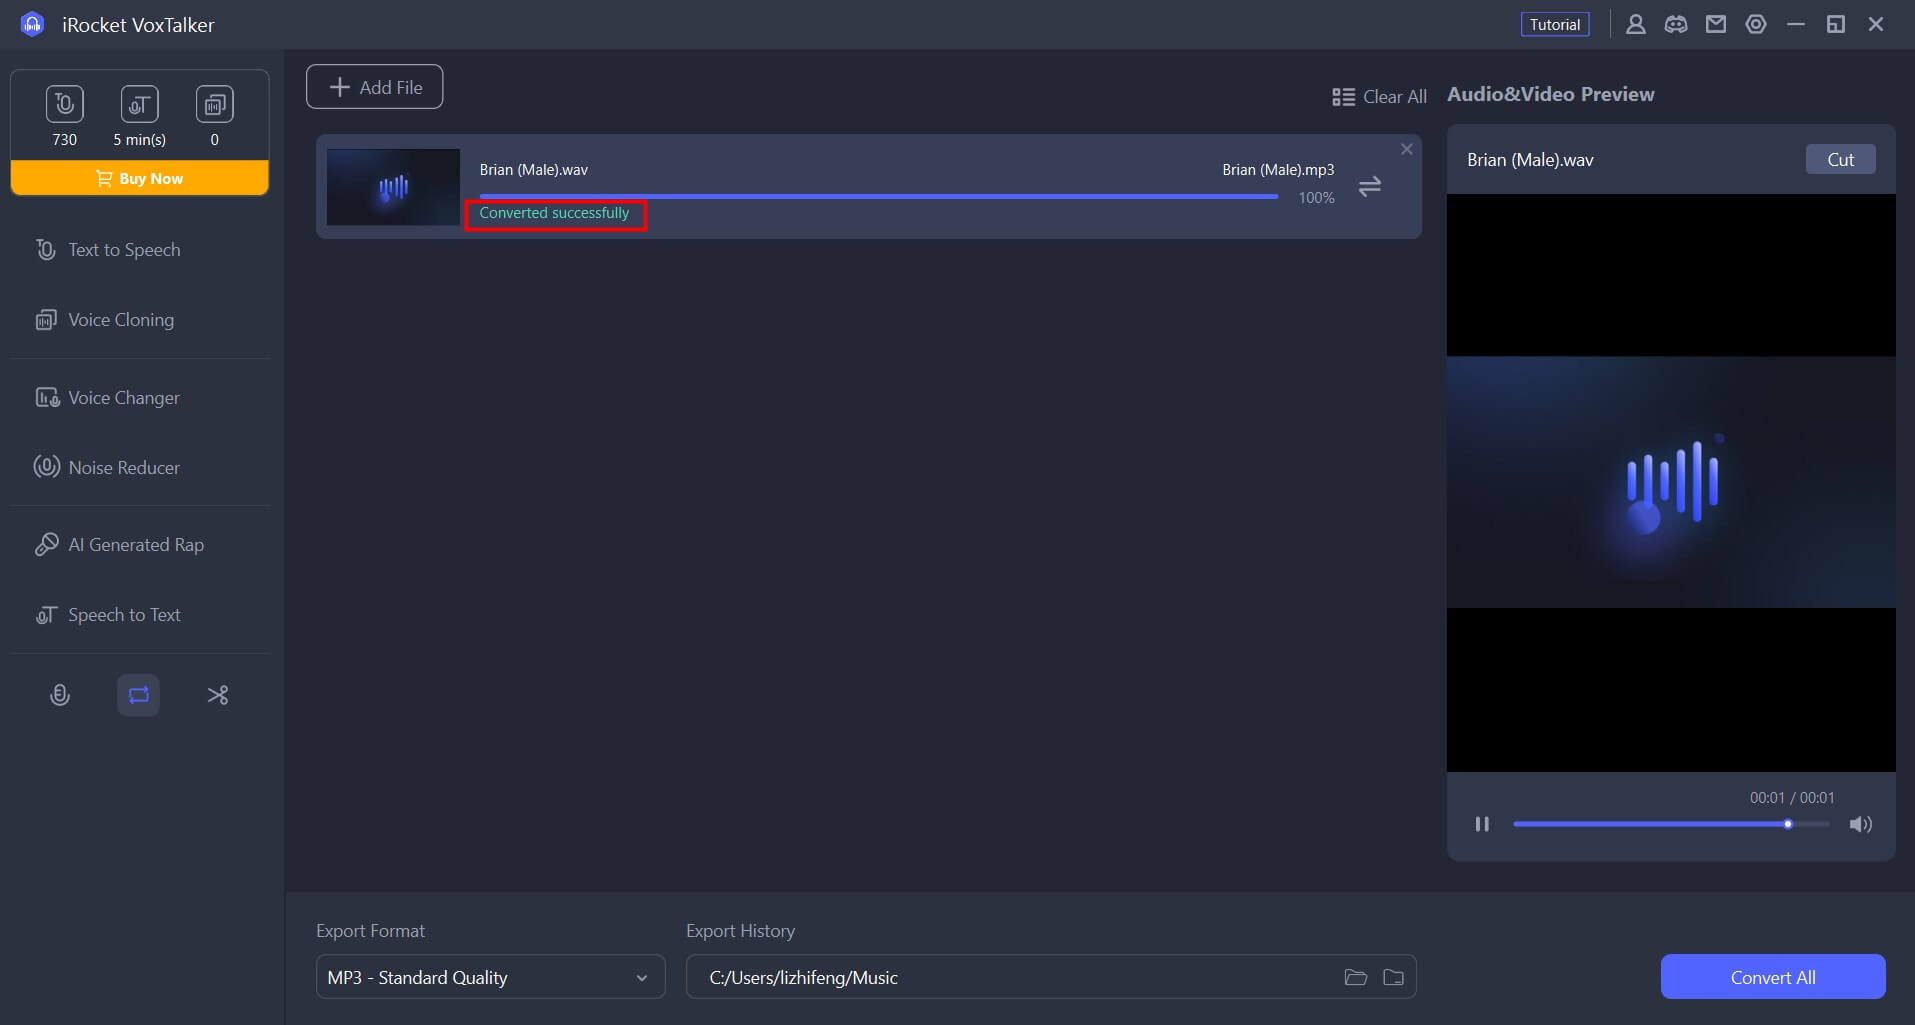
VoxTalker also has a format conversion function. Convert and save your video and audio files to MP3, WAV, and OGG.
Step 1: Import the file
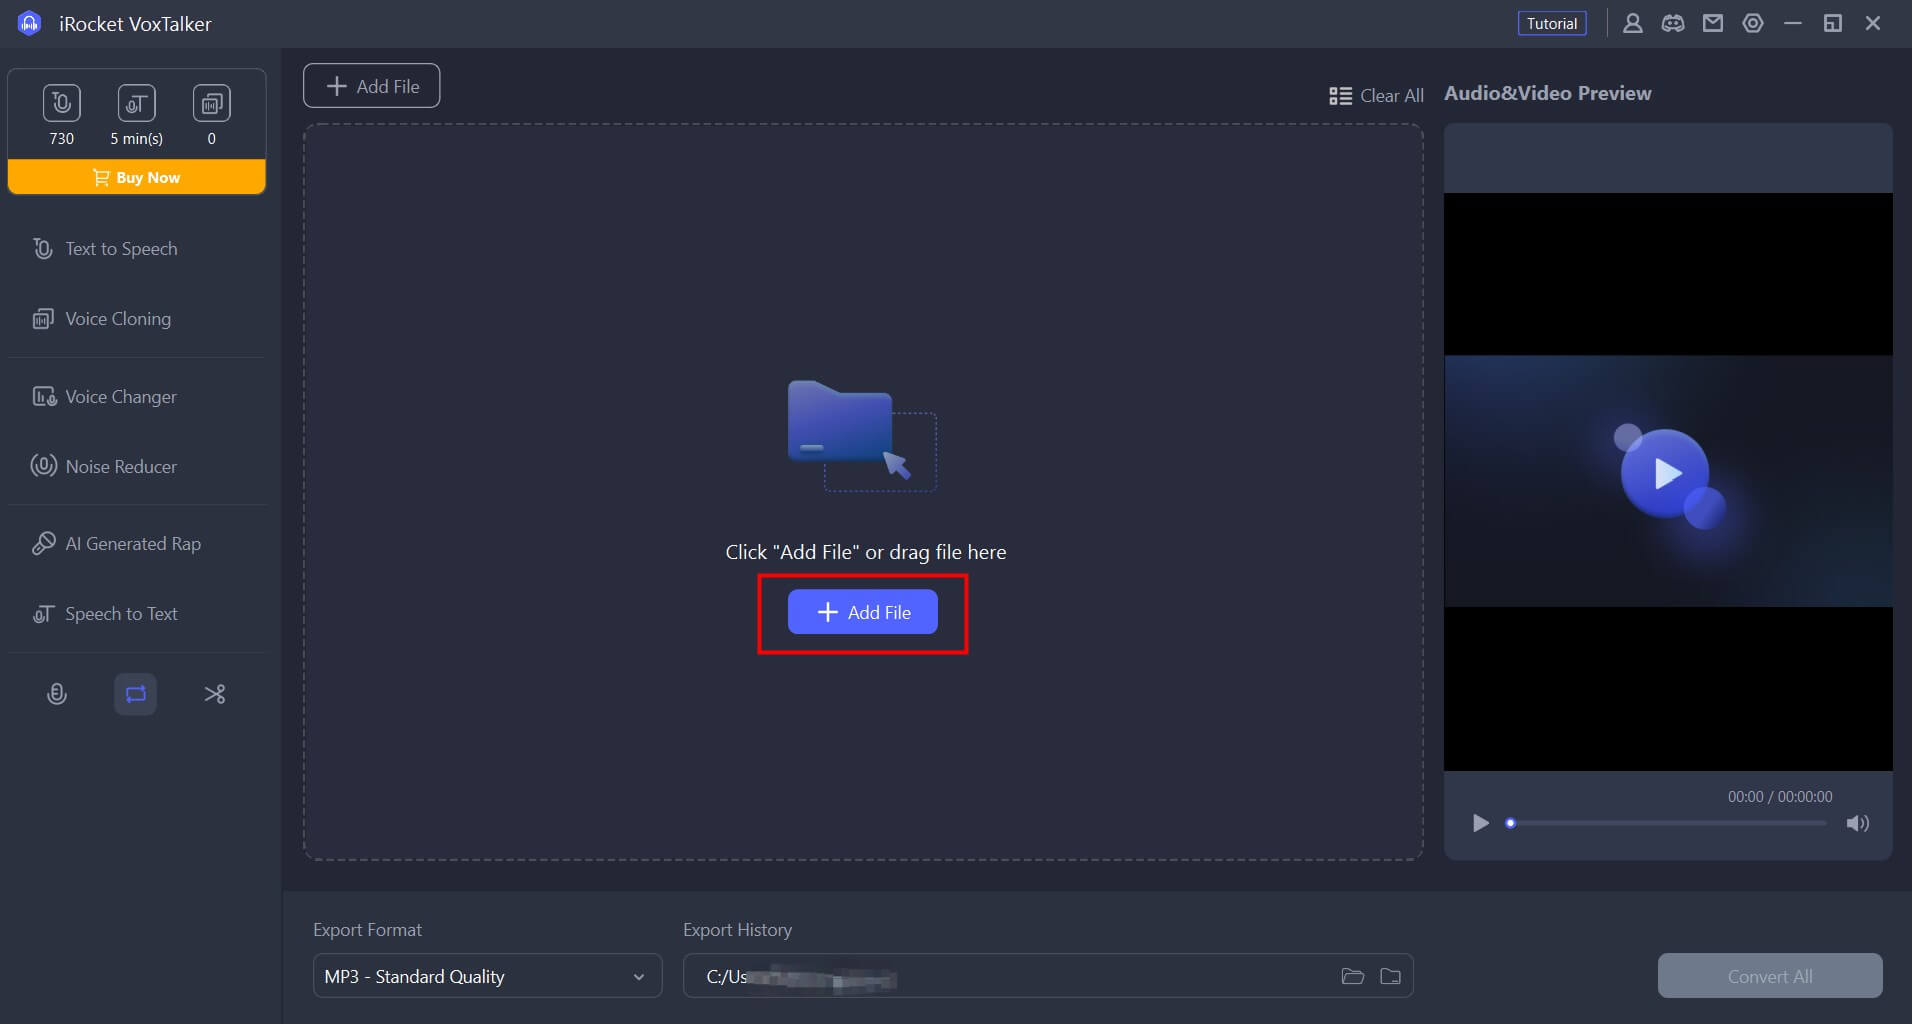
Go to the “Convert format” tab. Click "Add File" or drag to import the files you want to convert. You can also import multiple files and convert them at once.
Step 2: Convert and save
Select the output format save destination, and click "Convert All" to start the audio format conversion automatically. The converted file will be automatically saved in the location of your choice.
Audio Editing
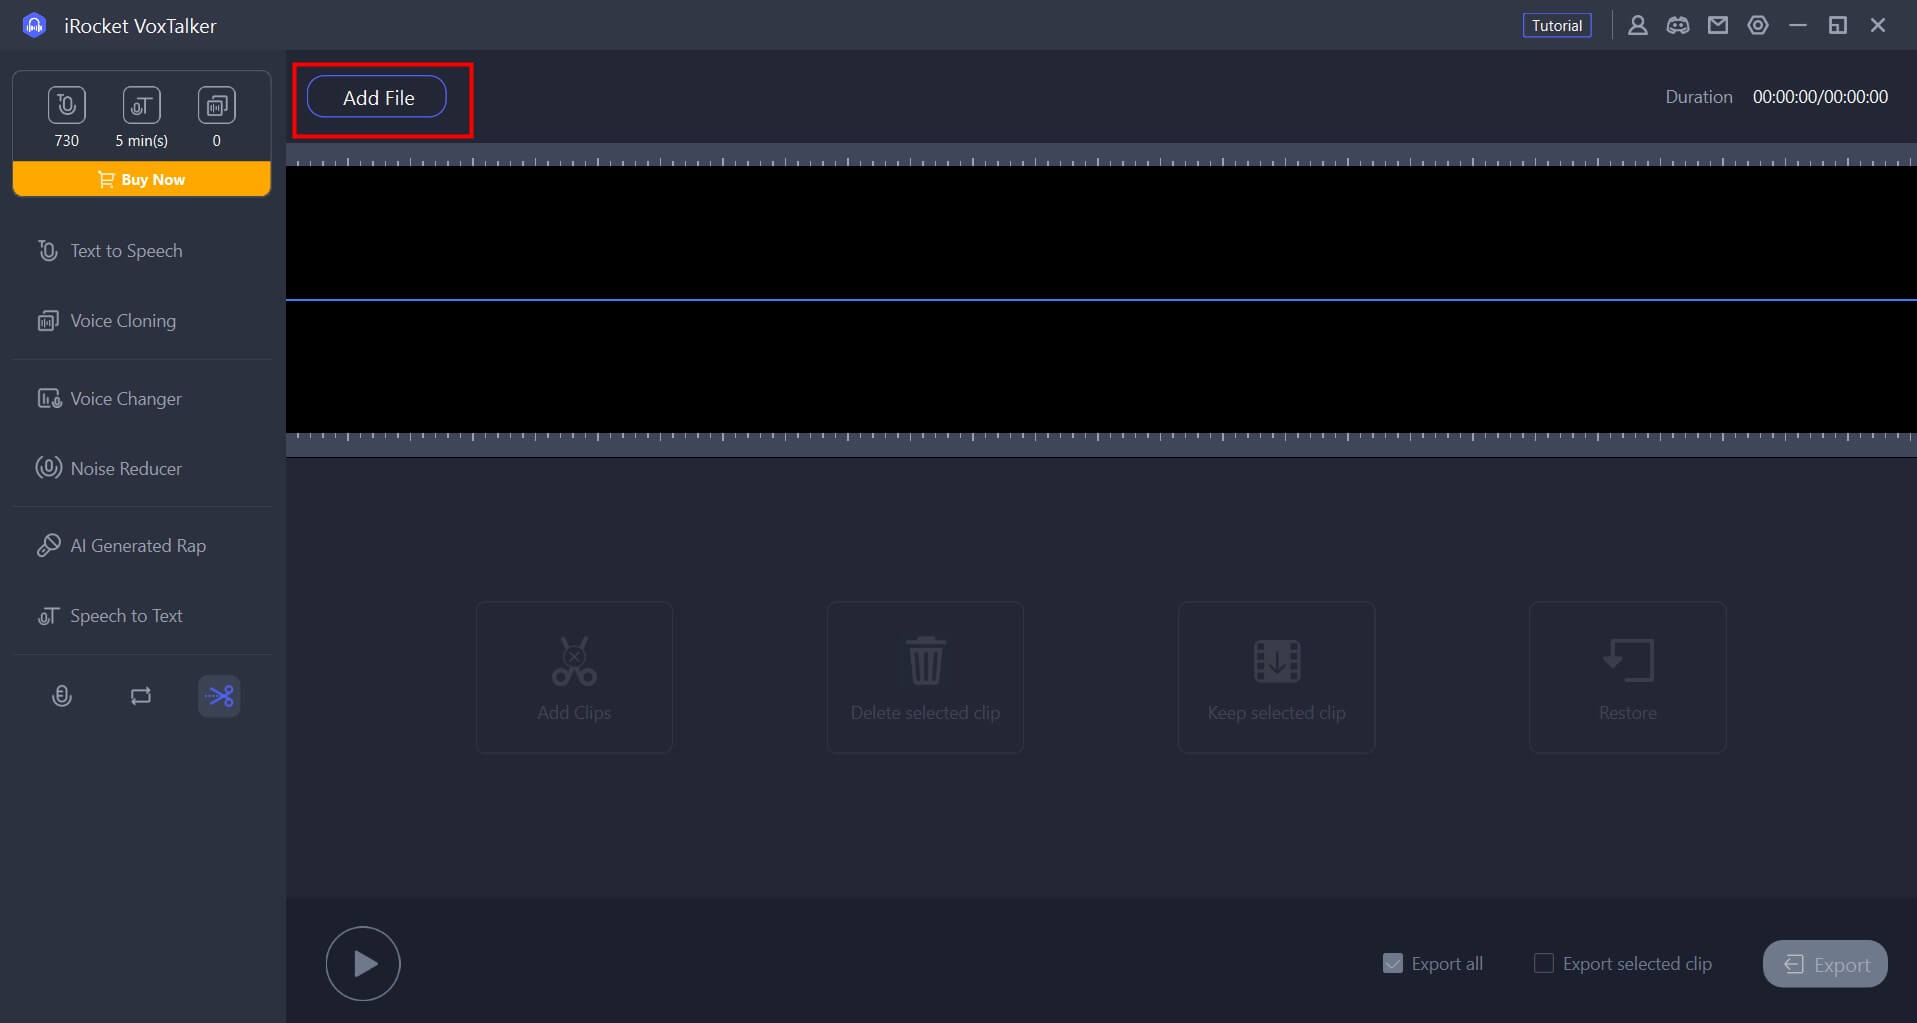
You can perform simple audio editing with VoxTalker.
Step 1: Import the file
Go to the Edit tab and click "Add File" to import the files you want to edit.
Step 2: Edit audio
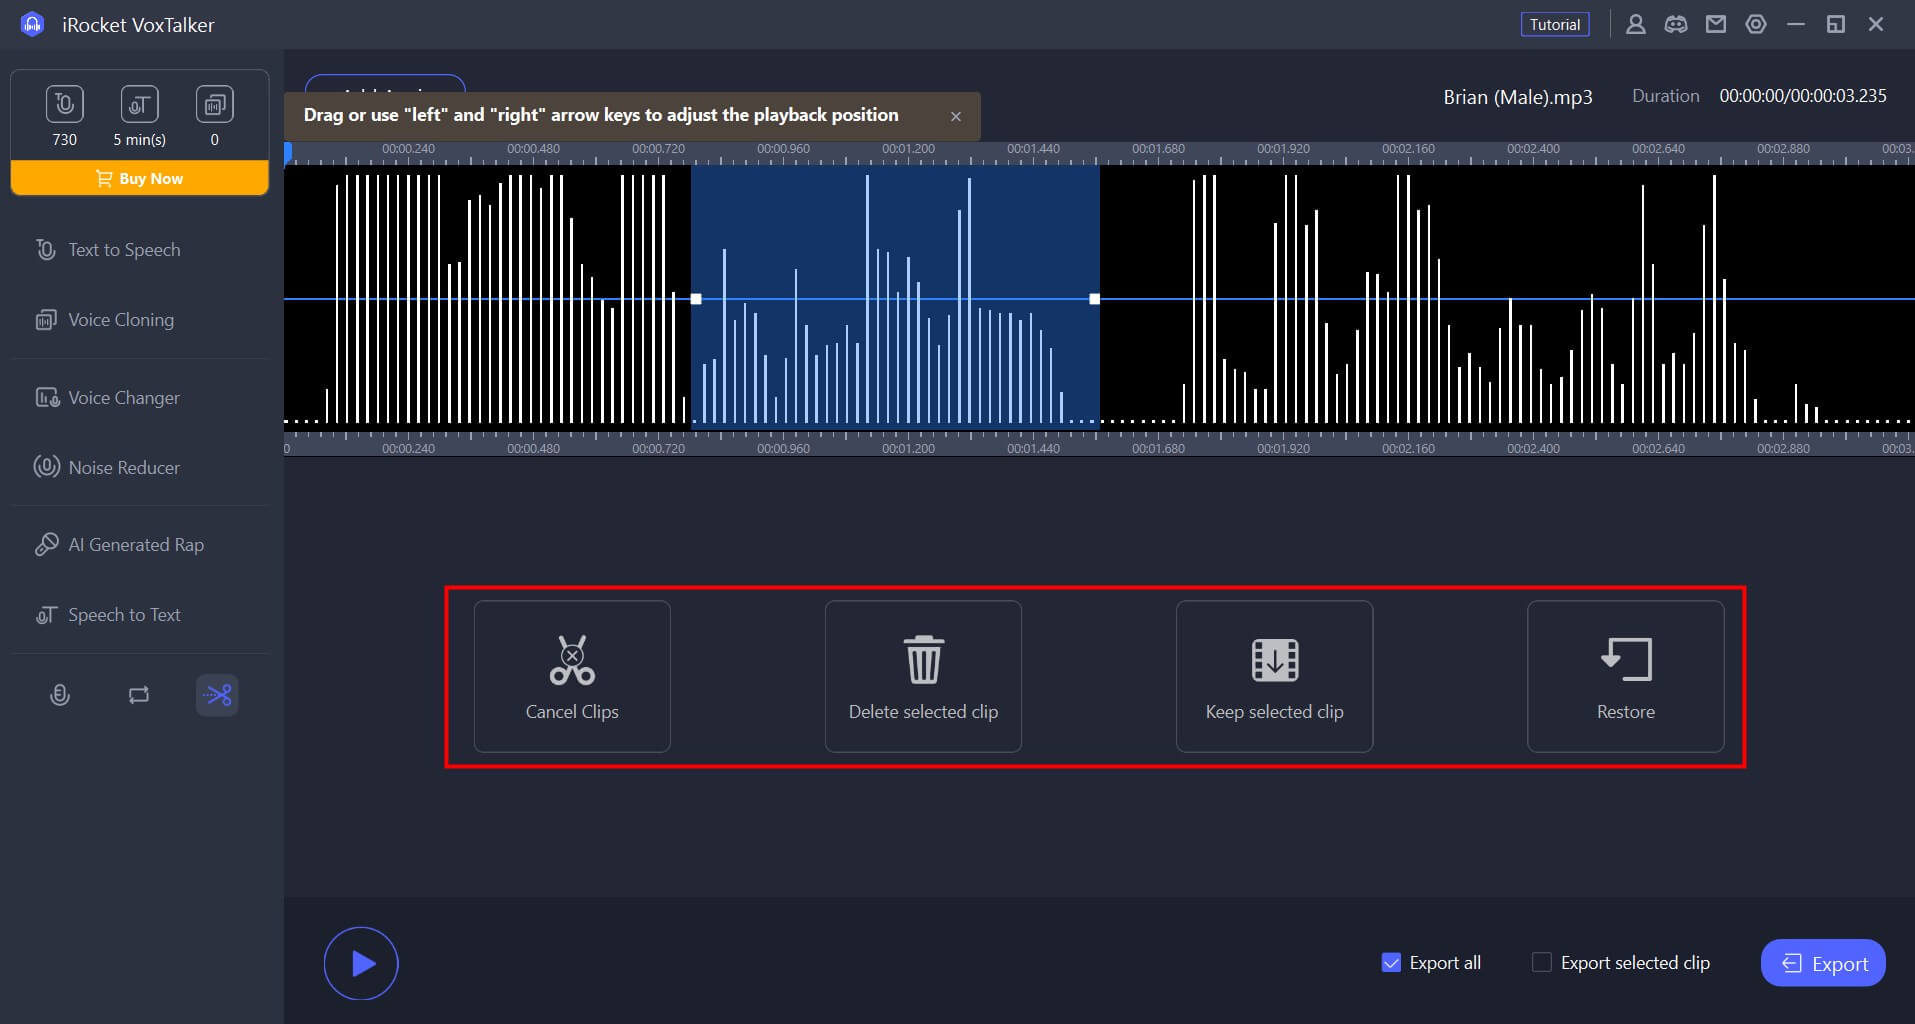
A selection box will appear; drag it to enclose the part you want to edit.
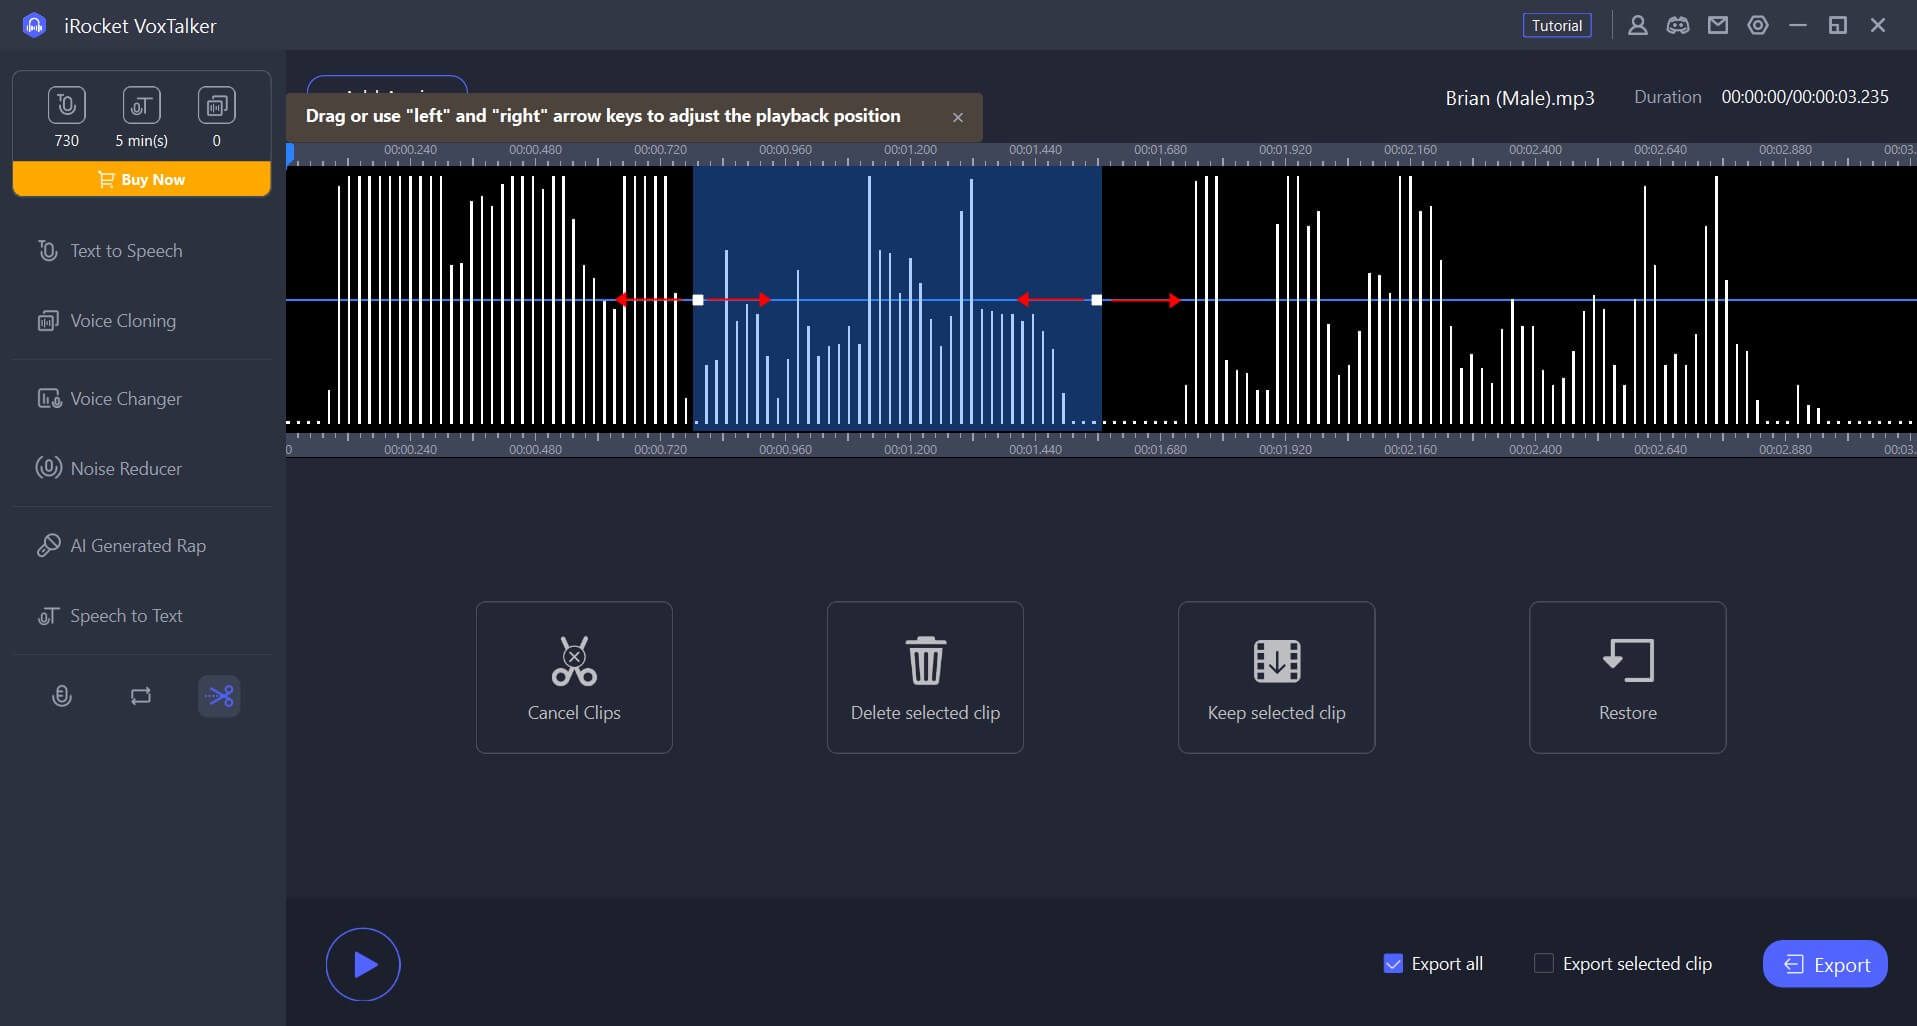
Select the required operation on the toolbar.
Step 3: Listen and output
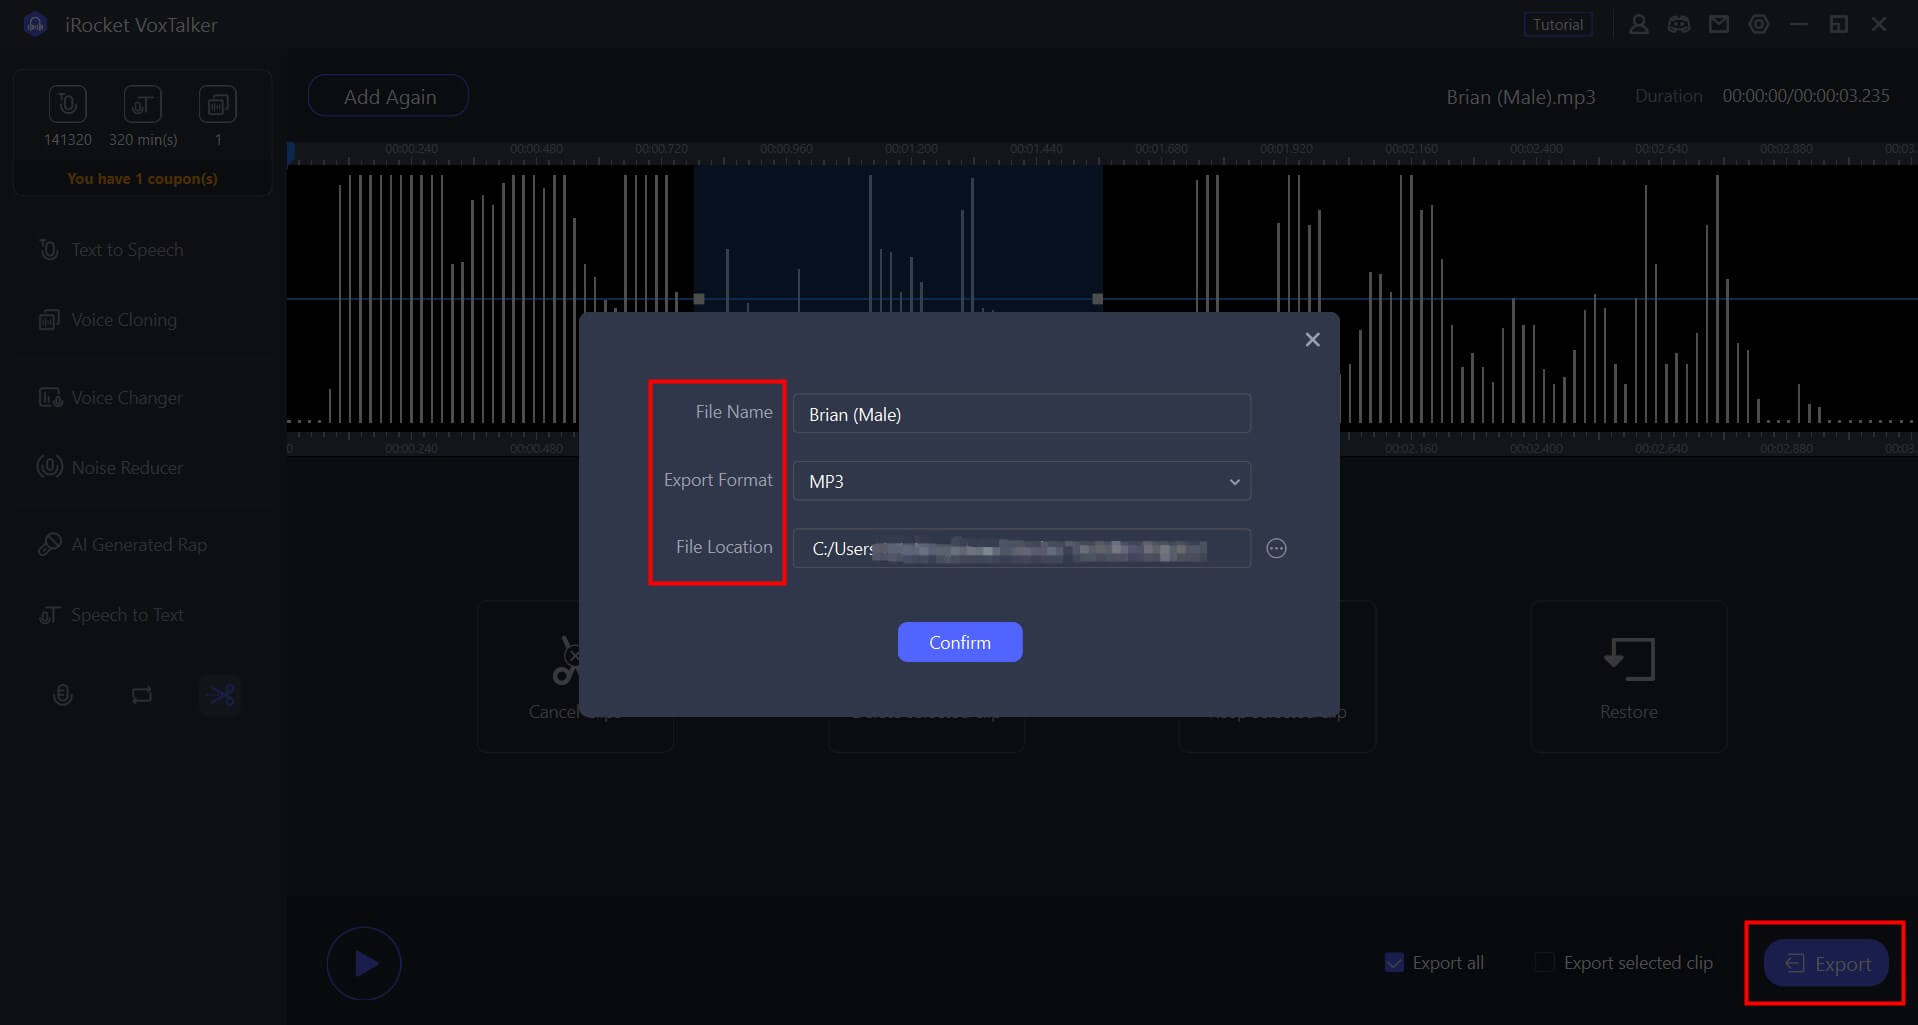
When you're done editing, play the audio at the bottom. Next, select whether to output all or selected clips.
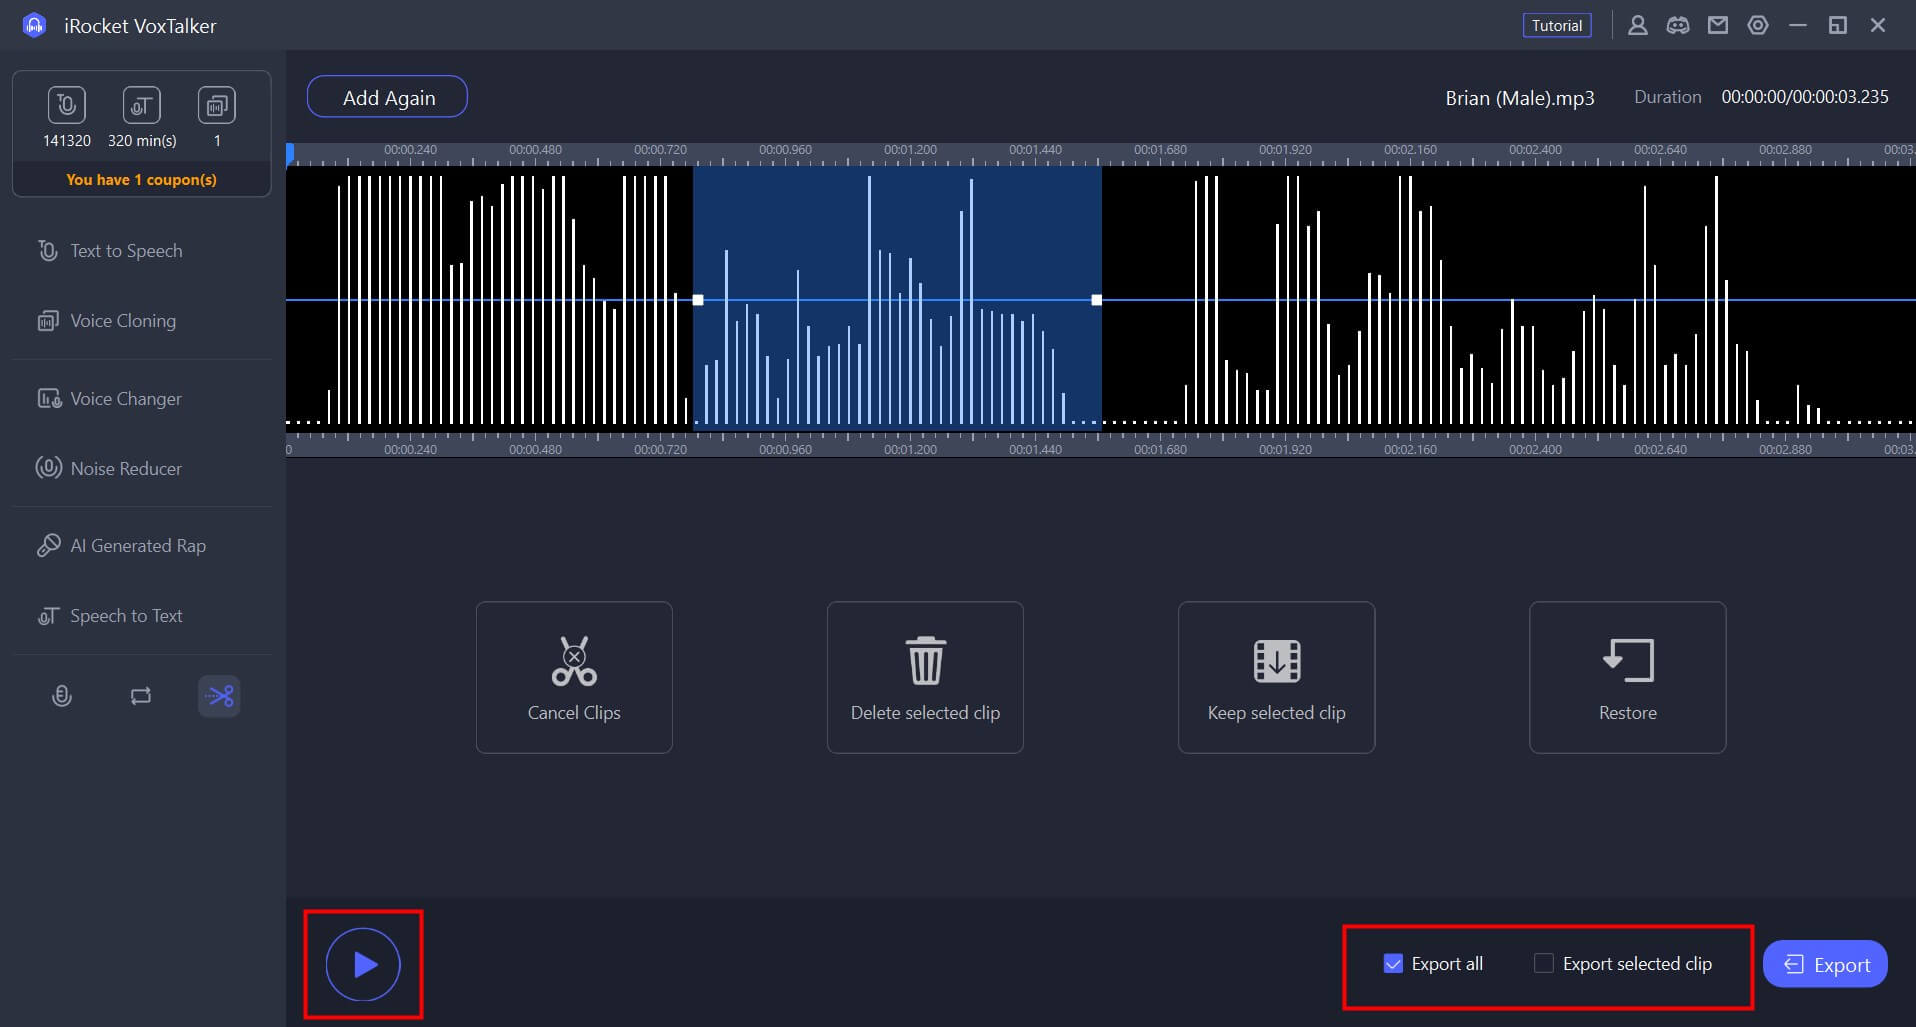
Click "Export" and select a file format and storage location to save the edited audio.
